- You can use the Magic Wand tool in Photoshop to automatically select a specific section of the image.
- The Magic Wand uses colors to decide what should be selected, and you can change its “Tolerance” level.
- Once you’ve made your Magic Wand selection, you can edit that selection in several ways.
- Visit Business Insider’s Tech Reference library for more stories.
The Magic Wand is one of Photoshop’s most powerful selection tools. Unlike other tools that make you manually select what you want, the Magic Wand tool does it automatically.
Photoshop’s Magic Wand is handy for selecting the background of a photo, or an object that’s entirely one color. This is because it decides what to select based on colors – once it hits a section that’s a different color from where it started, it’ll stop.
You can edit this with the Magic Wand’s “Tolerance” setting, which makes it more or less sensitive to changes in color.
Here’s how the Magic Wand tool works, and how to use it.
How to use the Magic Wand tool in Photoshop
Again, the Magic Wand tool works best with pictures that have contrasting colors. This way, the tool can be more accurate.
1. Open a photo in Photoshop.
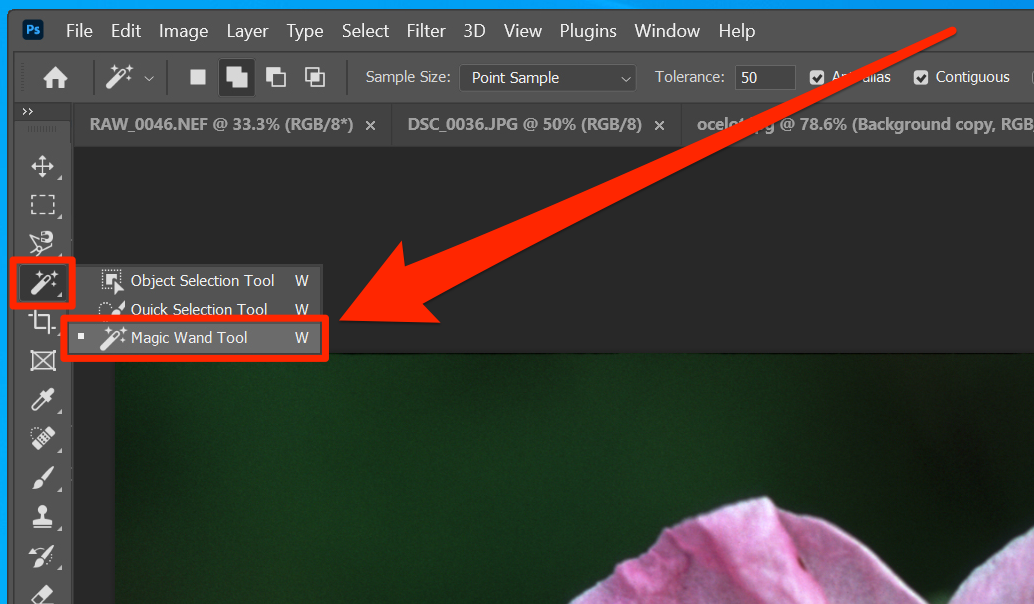
2. Click the Magic Wand icon in the toolbar on the left side of the screen. It's the fourth option from the top. If the icon instead looks like a brush painting a dotted line, right-click it and select "Magic Wand Tool."
Dave Johnson/Business Insider
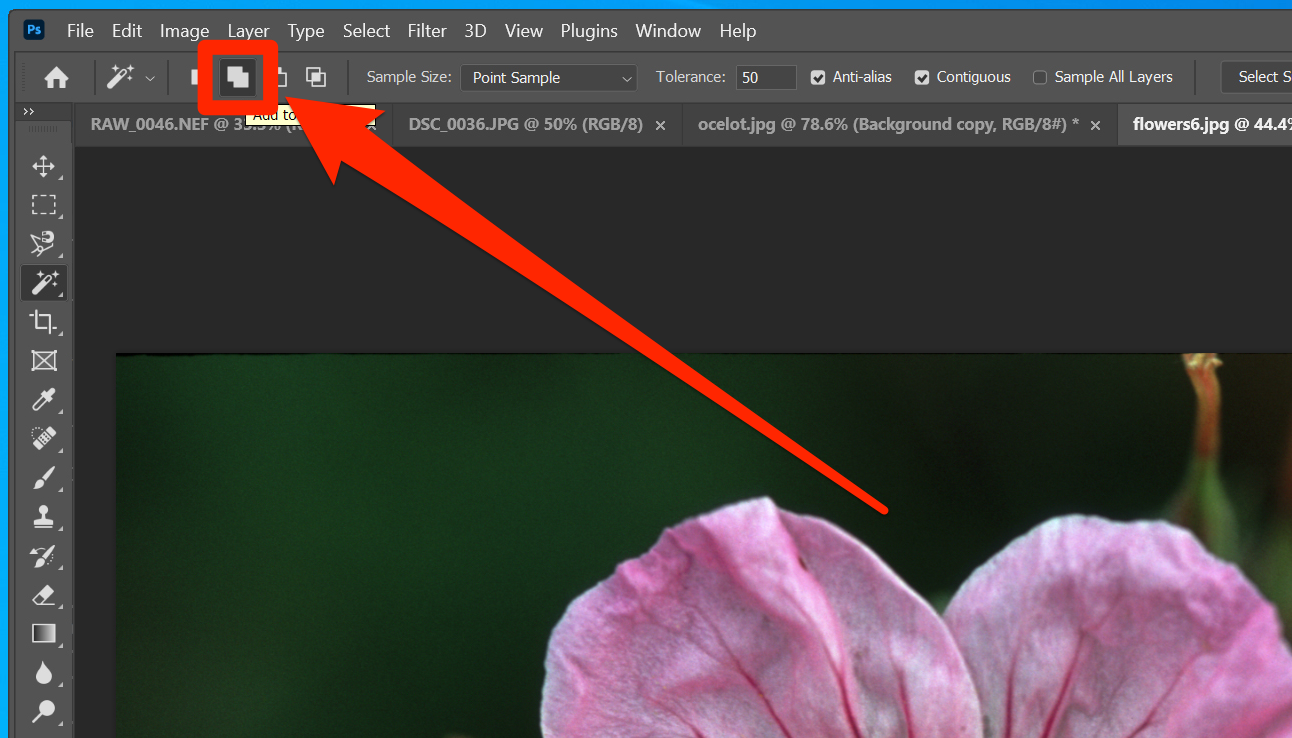
3. At the top of the screen, make sure that the "Add to selection" mode, which looks like two white boxes, is selected. This option means that every time you click the Magic Wand in the photo, you add to your selection instead of taking away.
Dave Johnson/Business Insider
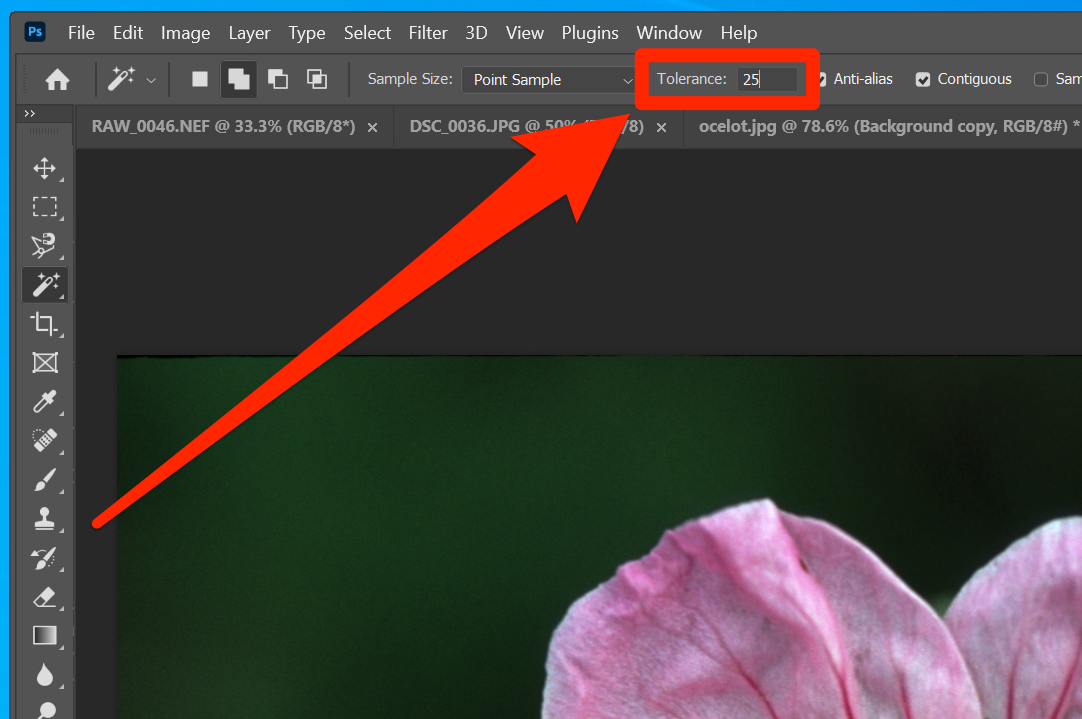
4. Also at the top of the screen, set the Tolerance to "25." This is a good starting point for most photos, but we'll adjust it if needed. The higher the Tolerance, the more you'll select per click.
Dave Johnson/Business Insider
5. Click the image, on a region you want to select.
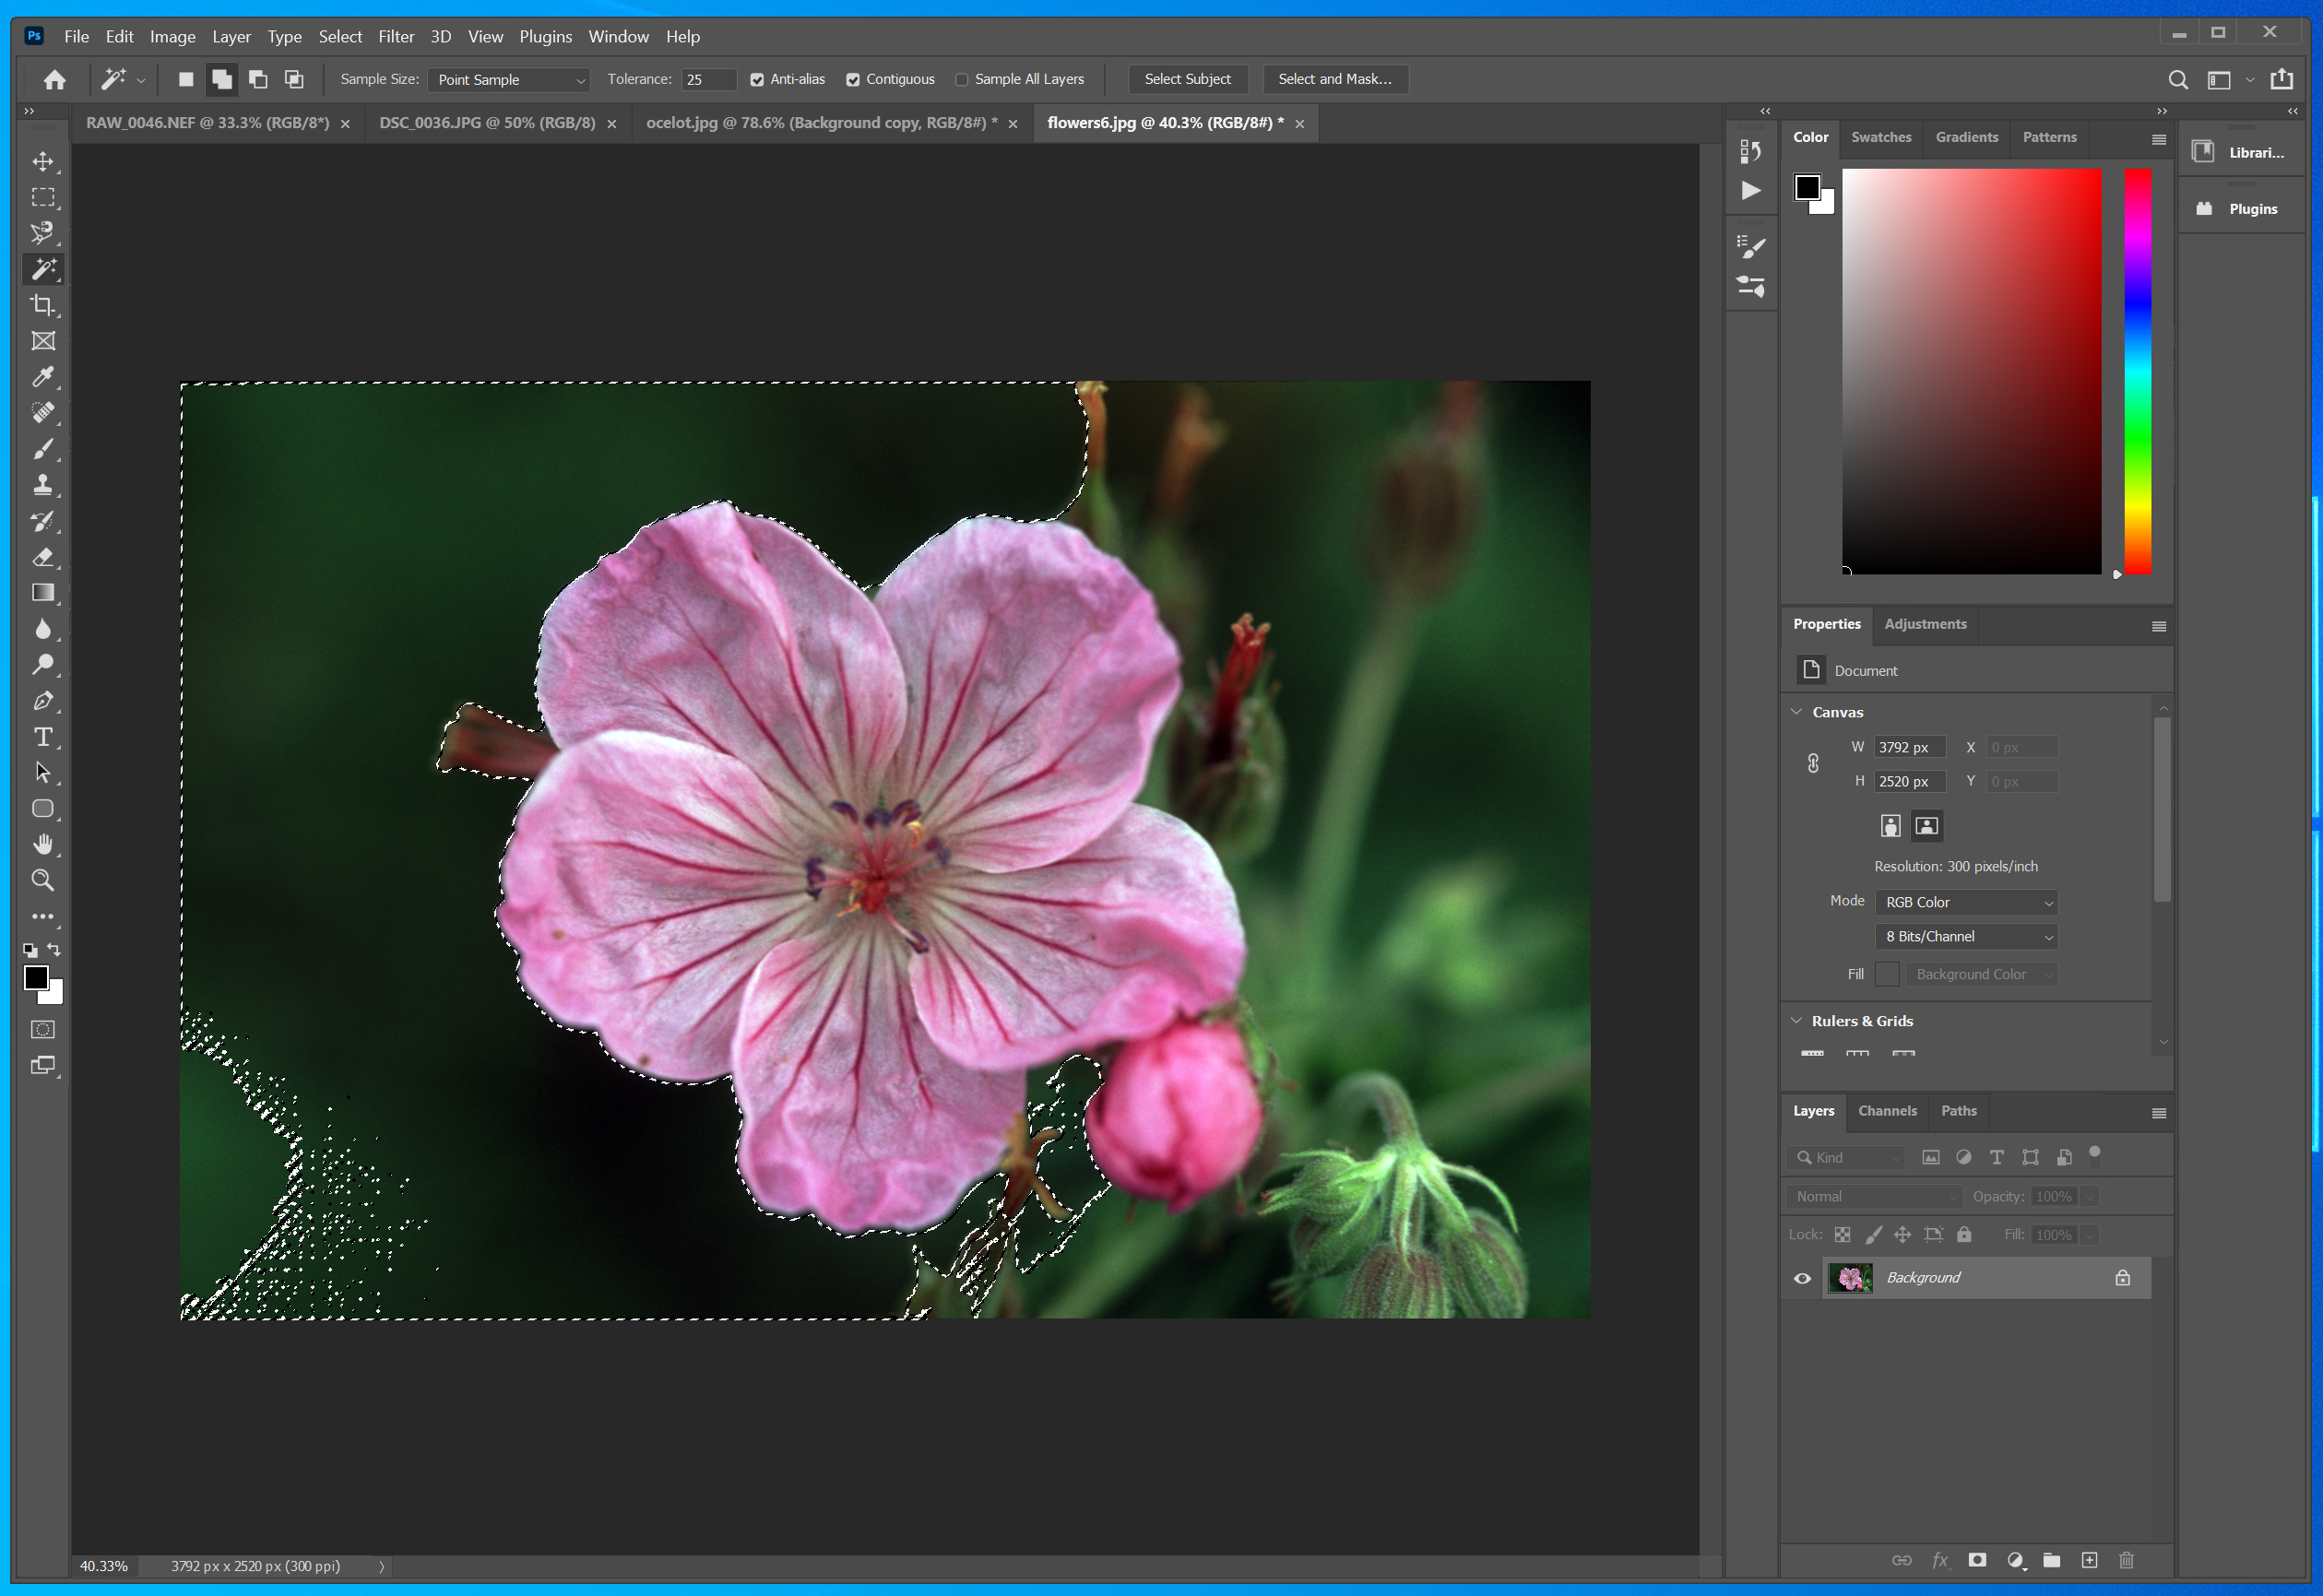
6. Take a look at what was selected. If the entire region wasn't selected, you have two options: One approach is to increase the tolerance and try again, continuing to "dial in" the best tolerance for the image.
Alternately, you can keep clicking the Magic Wand tool in the region you want to select; because you're using the "Add to selection" mode, every new use of the Magic Wand adds to your selection. Often, the best approach is to do a little of both.
Dave Johnson/Business Insider
7. If you selected too much and included parts of the photo you don't want in your selection, click the "New selection mode" button at the top of the screen (just one white square) and try again with a lower tolerance. You can choose "Add to selection" to build up your highlighted section until you're satisfied with the results.
8. Once you've selected everything you want, feel free to switch to another tool and edit the section however you like. You can also use the "Filters" menu at the top of the screen. As long as you keep the selection active, nothing you do inside of it will spill outside onto the rest of the picture.
9. Once you're done, enable the Magic Wand tool again and right-click inside of your selection. Click "Deselect" in the drop-down menu.
If you want more precise editing, you can also use the Quick Selection tool to add or subtract from your highlights.
How to use the Magic Wand tool with layers
Using layers is a great way to make sure that you don't accidentally edit part of the picture that you want to save. If you're going to make a big edit with the Magic Wand tool, you should duplicate your layers beforehand.
This preserves an unedited version of the image, and lets you blend the two versions of the image if you want. To do this:
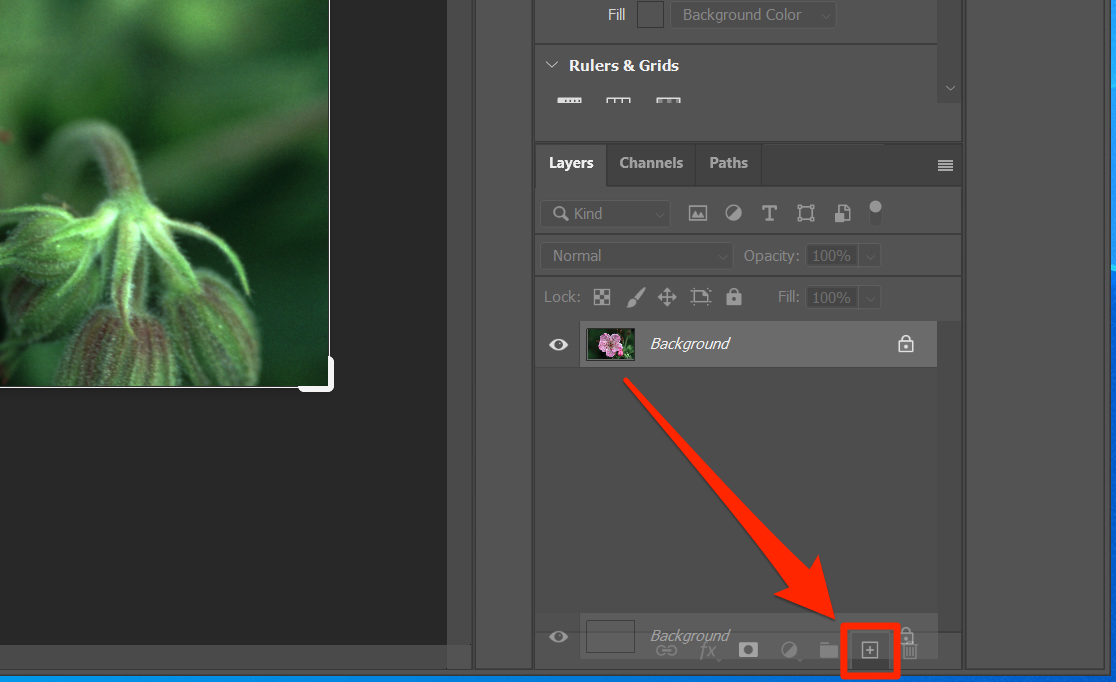
1. Go to the Layers palette on the right side of the screen and drag the current layer(s) to the "Create a New Layer" button (shaped like a plus sign or sticky note) at the bottom of the screen.
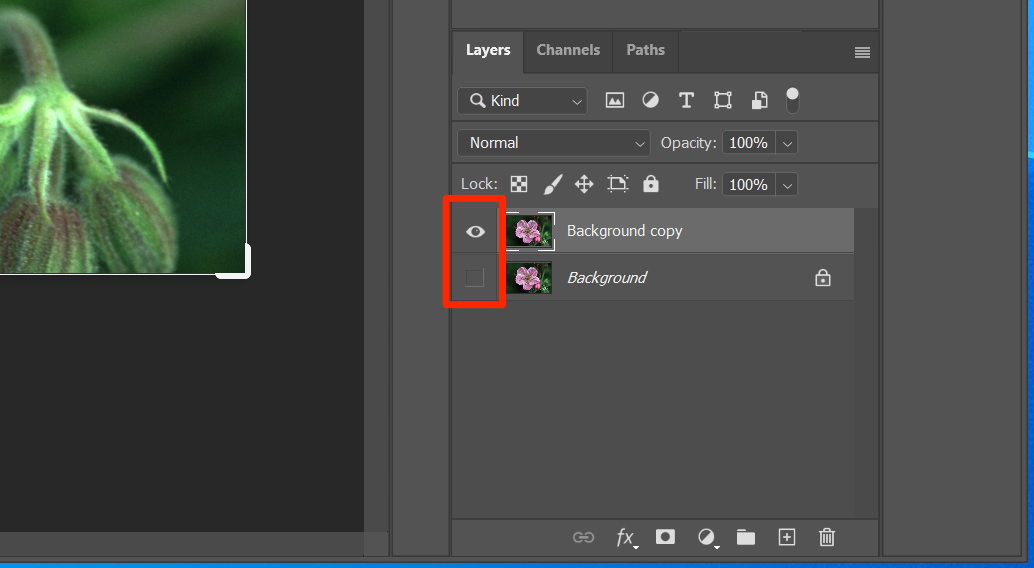
2. Hide your original layers by clicking the eye icon next to them.
Dave Johnson/Business Insider
3. Click the new layers on top to select them and proceed with selecting and editing.
Dave Johnson/Business Insider
You can use the eye icons to hide and unhide the layers however you like, which is great if you want to use the originals for reference.
Related coverage from Tech Reference:
-
How to make a background transparent in Photoshop in 2 ways
-
How to change the background color of your photos in Photoshop to make your images more striking
-
How to invert the colors of any image in Photoshop in 3 simple steps
-
How to outline text in Photoshop to make your text stand out on a custom image
-
How to flip an image in Photoshop to get the mirror image of any photo
