- You can set a default printer for your Windows 10 computer so that it’s easier and quicker to print documents.
- While you can still change printers for an individual job, changing the default printer on your preferred Windows computer can save you from having to set it every time.
- Visit Business Insider’s homepage for more stories.
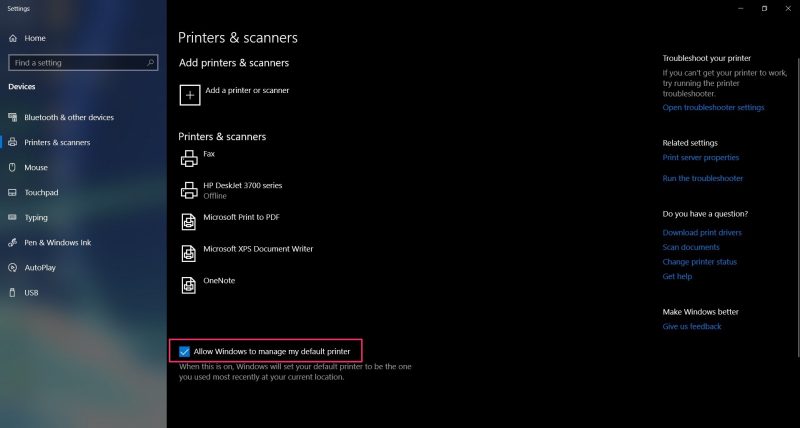
Windows will automatically set your printer to be the last one you used at your current location. However, you can turn this function off to manually set your printer to a preferred one, so it doesn’t change every time you move.
You can also re-enable that default setting later, if that’s your preference.
Check out the products mentioned in this article:
Windows 10 (From $139.99 at Best Buy)
How to set a default printer in Windows 10
1. Press the Windows key on your keyboard or click the Windows icon at the bottom left of your screen, and search for “Printers.”
2. Select “Printers and Scanners” from your search results.
3. Uncheck "Allow Windows to manage my default printer" at the bottom of the screen by clicking the check box.

4. Select the device you want to make your default from the list of printers and scanners. Click on it, then click "Manage."

5. On the new screen, select "Set as default." This should now be your default printer.

6. To re-enable the default printer settings, recheck the "Allow Windows to manage my default printer" button.
This can be really helpful if you have a laptop that switches printers a lot. Changing the default printer manually like this still allows you to change your printer on a case-by-case basis if you choose to, whenever you print from an application.
Related coverage from How To Do Everything: Tech:
-
How to change the font size on a Windows 10 computer, to make it easier to read text displayed on your screen
-
How to change your account username on a Windows 10 computer without getting lost in menus
-
How to turn off the password feature on Windows 10 for quicker access to your computer
-
How to log off a Windows 10 computer in 4 different ways
