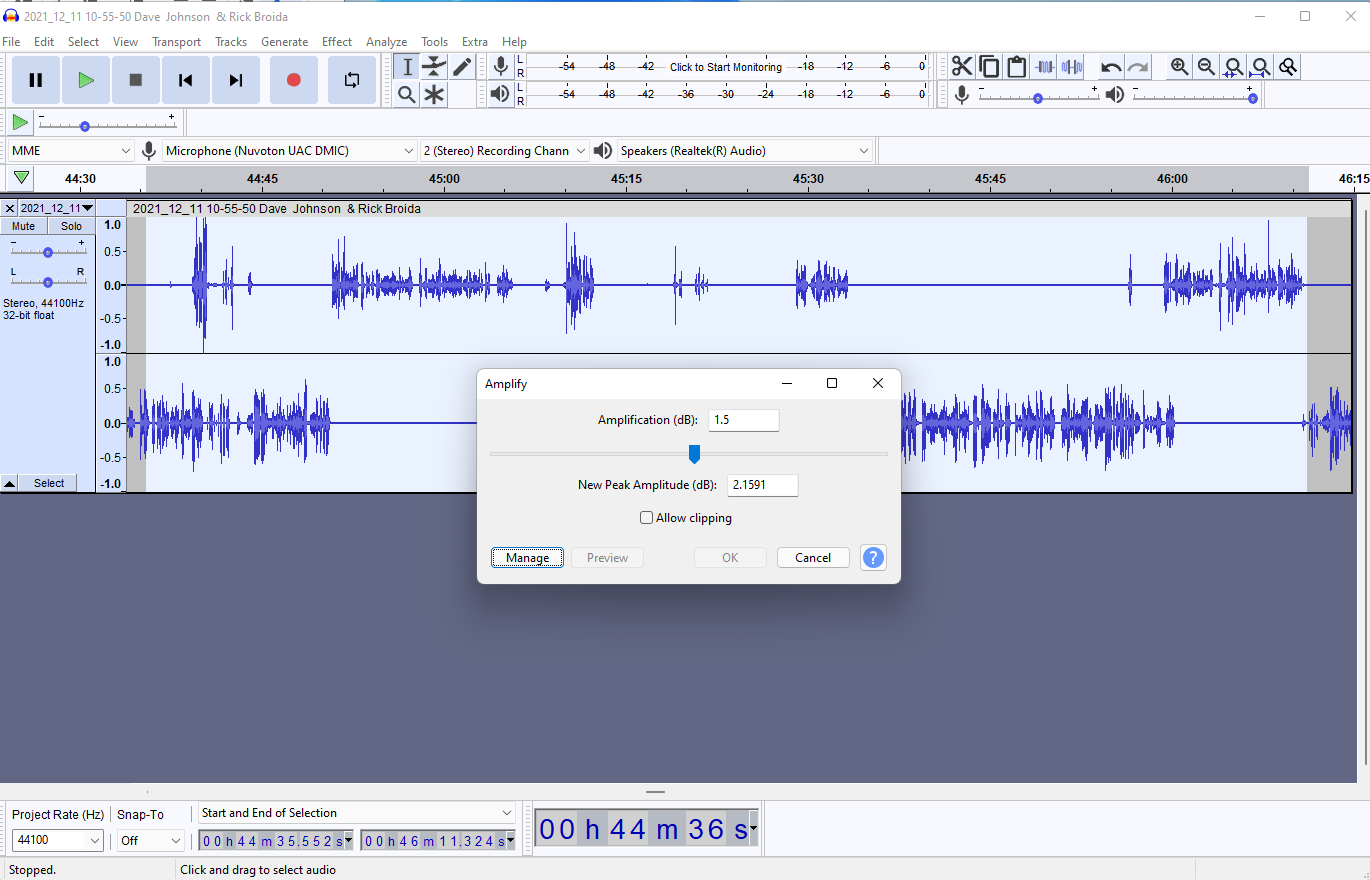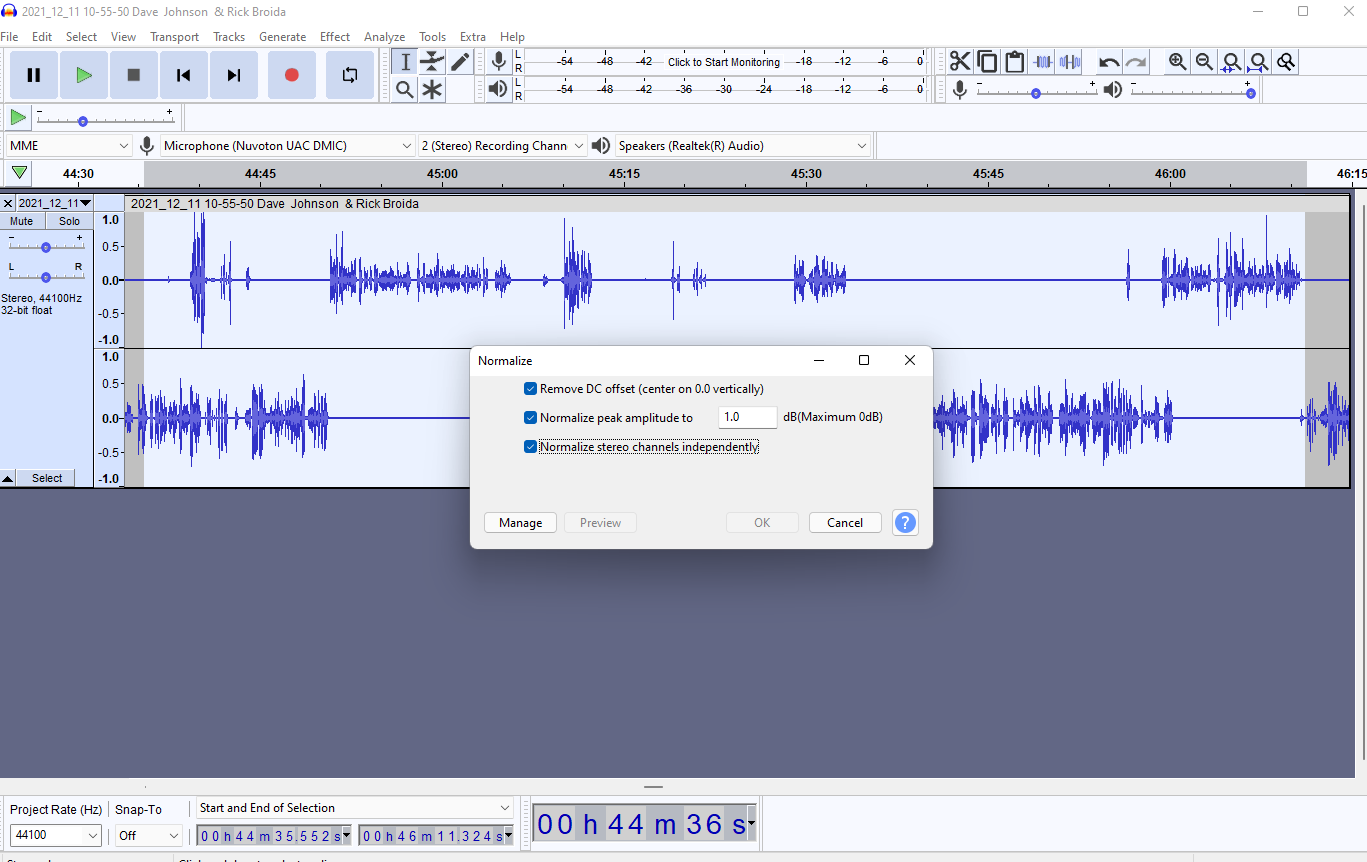
- You can make your audio louder in Audacity by utilizing the Amplify and Normalize effects.
- Amplify increases the audio's level by a certain amount, and preserves the relative difference in level between tracks.
- Normalize increases audio to a specified peak decibel, and can make all the selected tracks be roughly the same volume.
- Visit Insider's Tech Reference library for more stories.
It's not unusual to import audio into Audacity only to discover one or more tracks are too quiet. If you've recorded an interview, for example, one half of the conversation might be louder than the other — or you need to adjust the level of different elements such as a voiceover, background music, and your effects bed. Audacity gives you two tools to do this: the Normalize and Amplify effects.
Normalize and Amplify change the level of the selected audio, though they behave differently. Normalize is used to adjust audio to a target decibel (dB) level, while Amplify adjusts audio by a certain dB amount.
How to make audio louder in Audacity
1. Open the audio file you want to adjust in Audacity.
2. Select the part of the audio you want to adjust. To apply the effect to the entire file, click the track headers on the left or press Ctrl+A on your keyboard.
3. In the Effect menu, choose Amplify or Normalize.
- Amplify: If you want to amplify the track, click Effect and then choose Amplify. Set the amount you want to amplify the audio by. Choosing 0dB doesn't change the audio at all, for example, while 1dB increases the level by a decibel. The level will only be amplified to the point that the peak amplitude will start to clip, or distort; if you want to override this, click the checkbox for Allow clipping. Click OK.

- Normalize: If you want to normalize the track, click Effect and then choose Normalize. Make sure Normalize peak amplitude to is checked, and set the peak amplitude if you don't want the default value of -1 dB. If you have multiple tracks that were recorded at different volume levels and want to make sure they have the same peak amplitude, also check Normalize stereo channels independently. Click OK.

The differences between Normalize and Amplify effects
While Normalize and Amplify can both make your audio louder, there are times when you want to use one or the other. First and foremost, the Normalize dialog box has a feature you won't find in Amplify: Remove DC offset. This is a useful feature if you import audio that is not centered on the horizontal zero line, which can happen if there is an electrical fault in your recording equipment. If you have audio like this, apply the Normalize effect with Remove DC offset selected.
In addition, you need to decide whether you want to increase the dynamic range of all the audio equally.
If you apply the Normalize effect to two audio tracks with different volume levels, it will bring both the loud and quiet tracks up to the specified dB level, normalizing the two tracks and making them both roughly equal in volume.
Apply the Amplify effect to that same set of tracks, though, and it will increase the level of both tracks by the specified number of dB, keeping the original relative difference in loudness between them. This is handy if one track is a quiet musical bed and you don't want to make it as loud as the primary voice track, but simply make them somewhat louder.
Dit artikel is oorspronkelijk verschenen op z24.nl

