

Reuters
- To make a custom thumbnail for YouTube, you can use editing tools that are likely already available on your PC or Mac computer.
- You can’t create a custom thumbnail on the YouTube website itself, but you can select from three pre-made options once your video has been processed.
- Visit Insider’s Tech Reference library for more stories.
Your YouTube video’s thumbnail is like the cover of a book – while you shouldn’t judge the contents by it, people do anyway. That’s why the thumbnail should represent the video and look as good as possible.
When you upload a video to YouTube, you can choose from among several pre-selected thumbnails, or make your own.
How to make a thumbnail for your YouTube videos
Select an auto-generated thumbnail
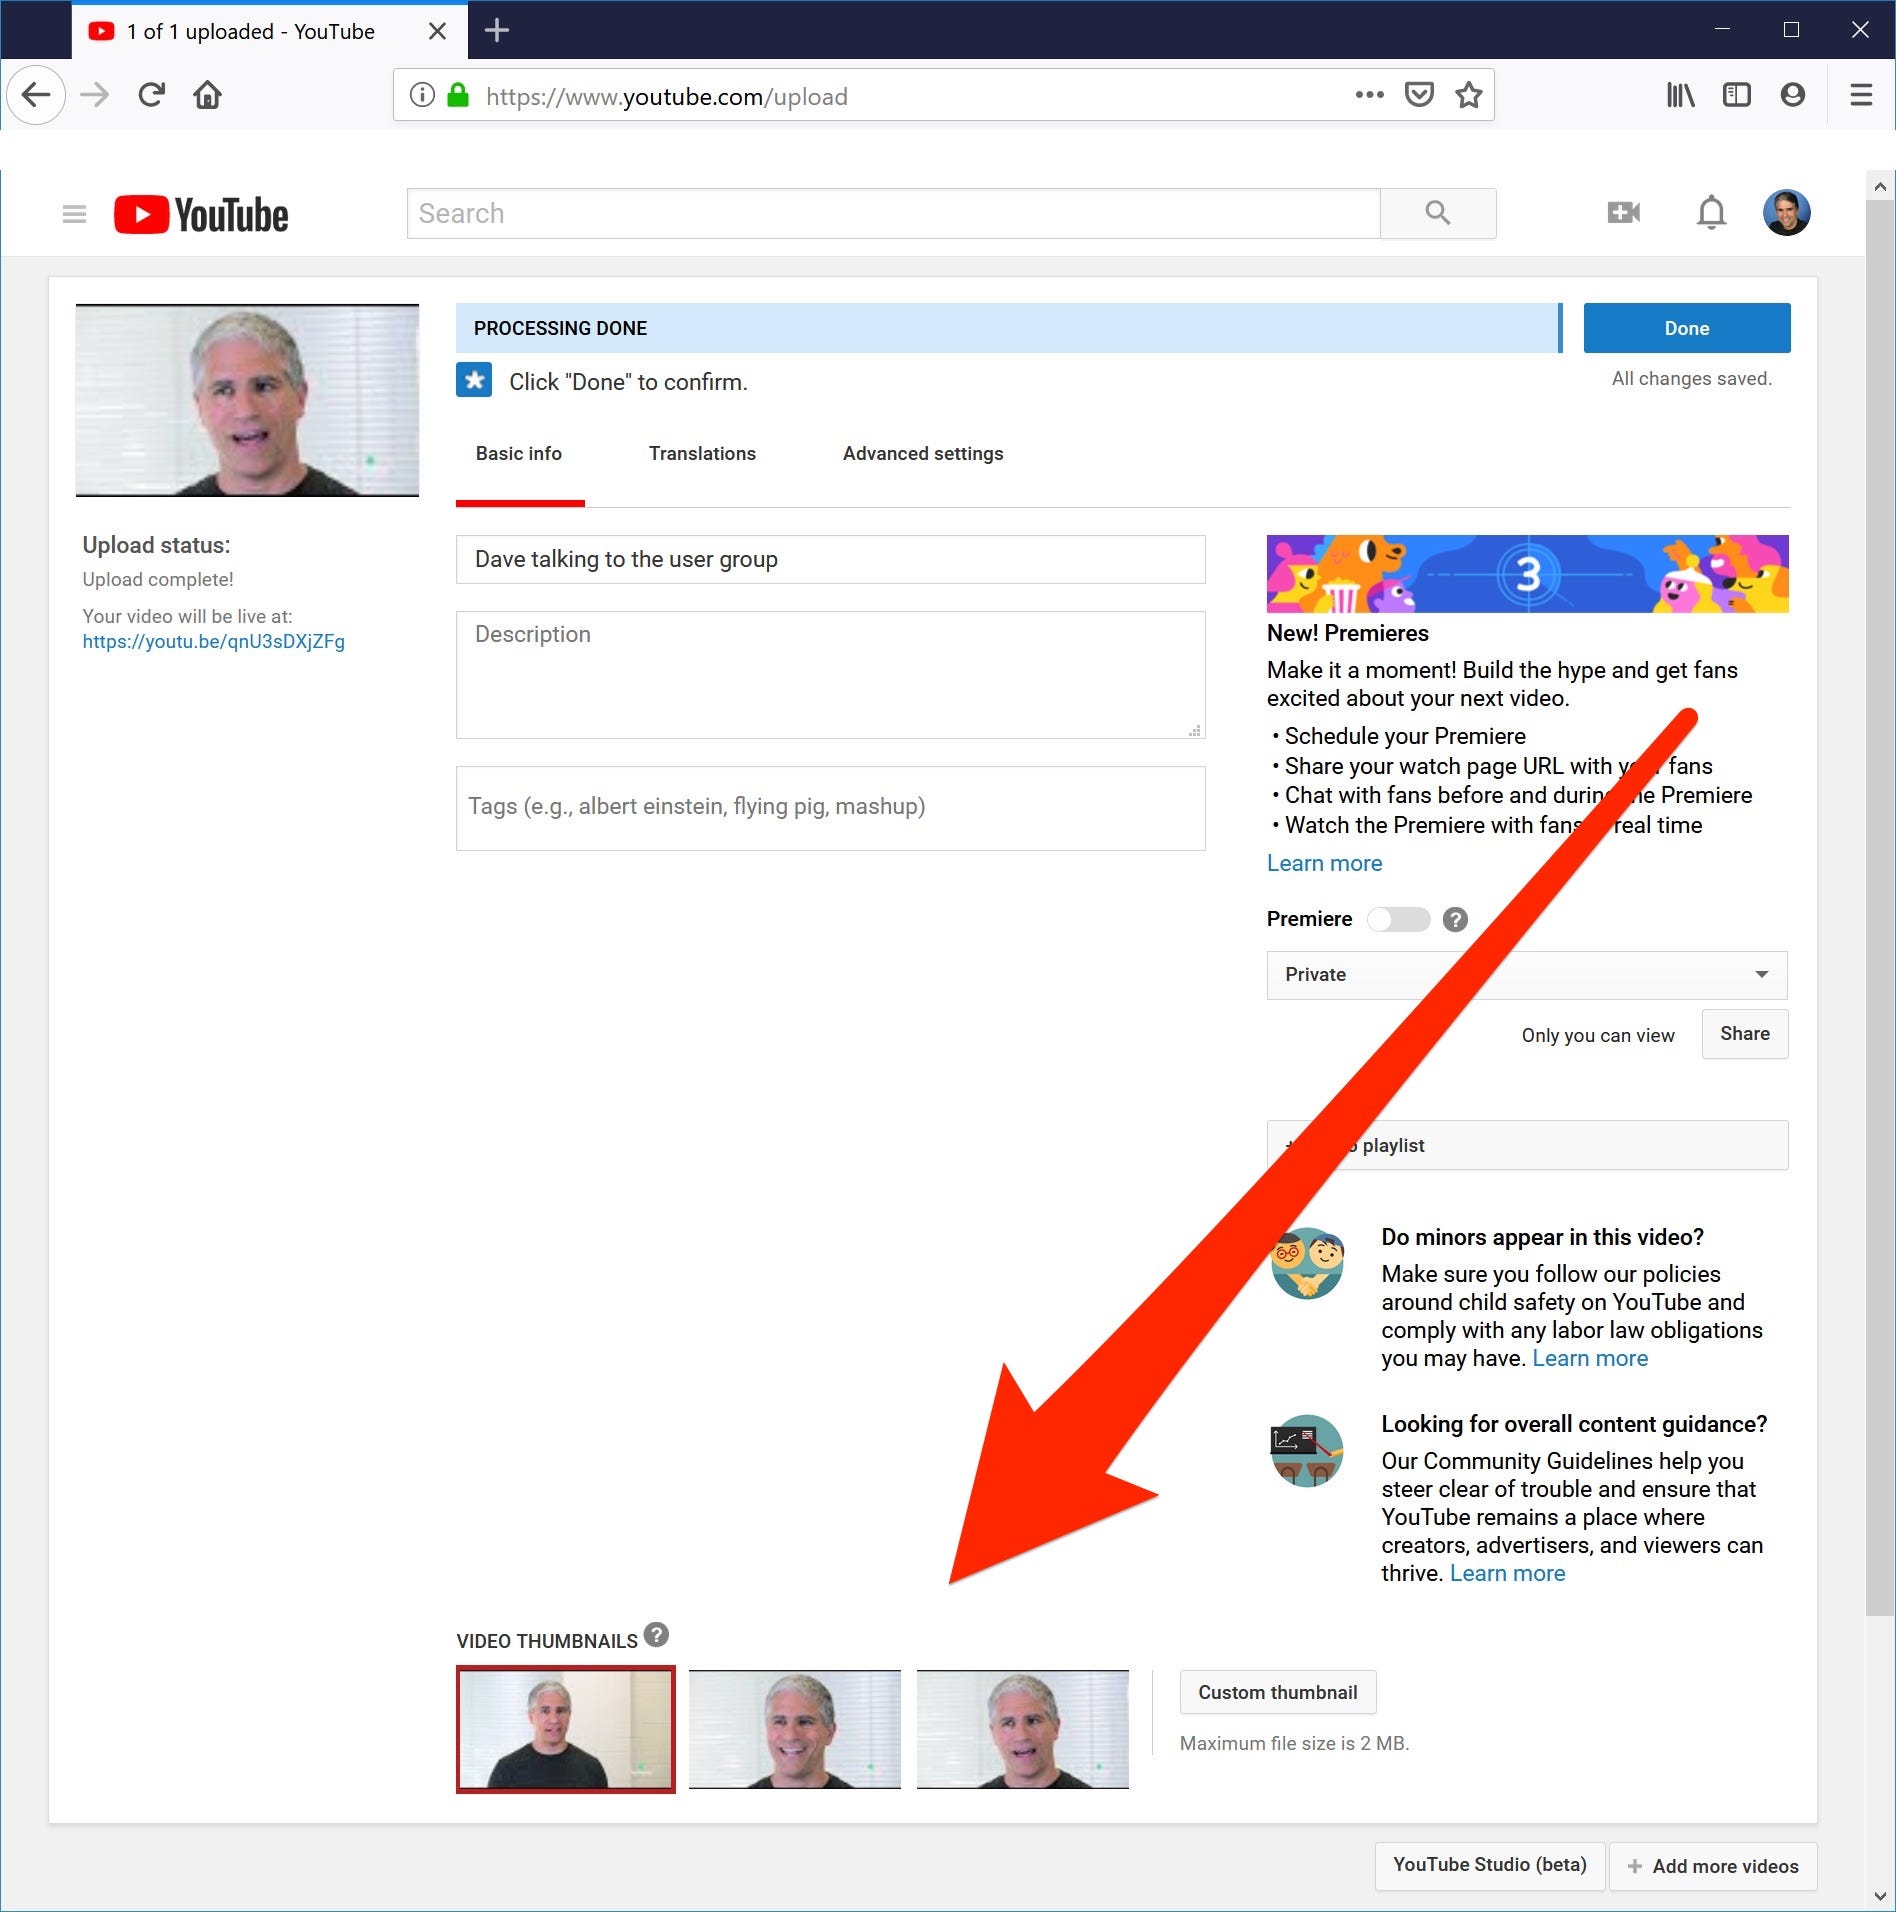
You can choose a video thumbnail when you initially upload the video, or later, when the video has been processed. You can even change it after it’s published.
If you are uploading the video, you should see three thumbnail options appear at the bottom of the upload screen while the video is uploading and processing. To choose one, simply click it.
If you want to create your own thumbnail, see the section “Make a custom thumbnail and upload it” below.
Dave Johnson/Business Insider
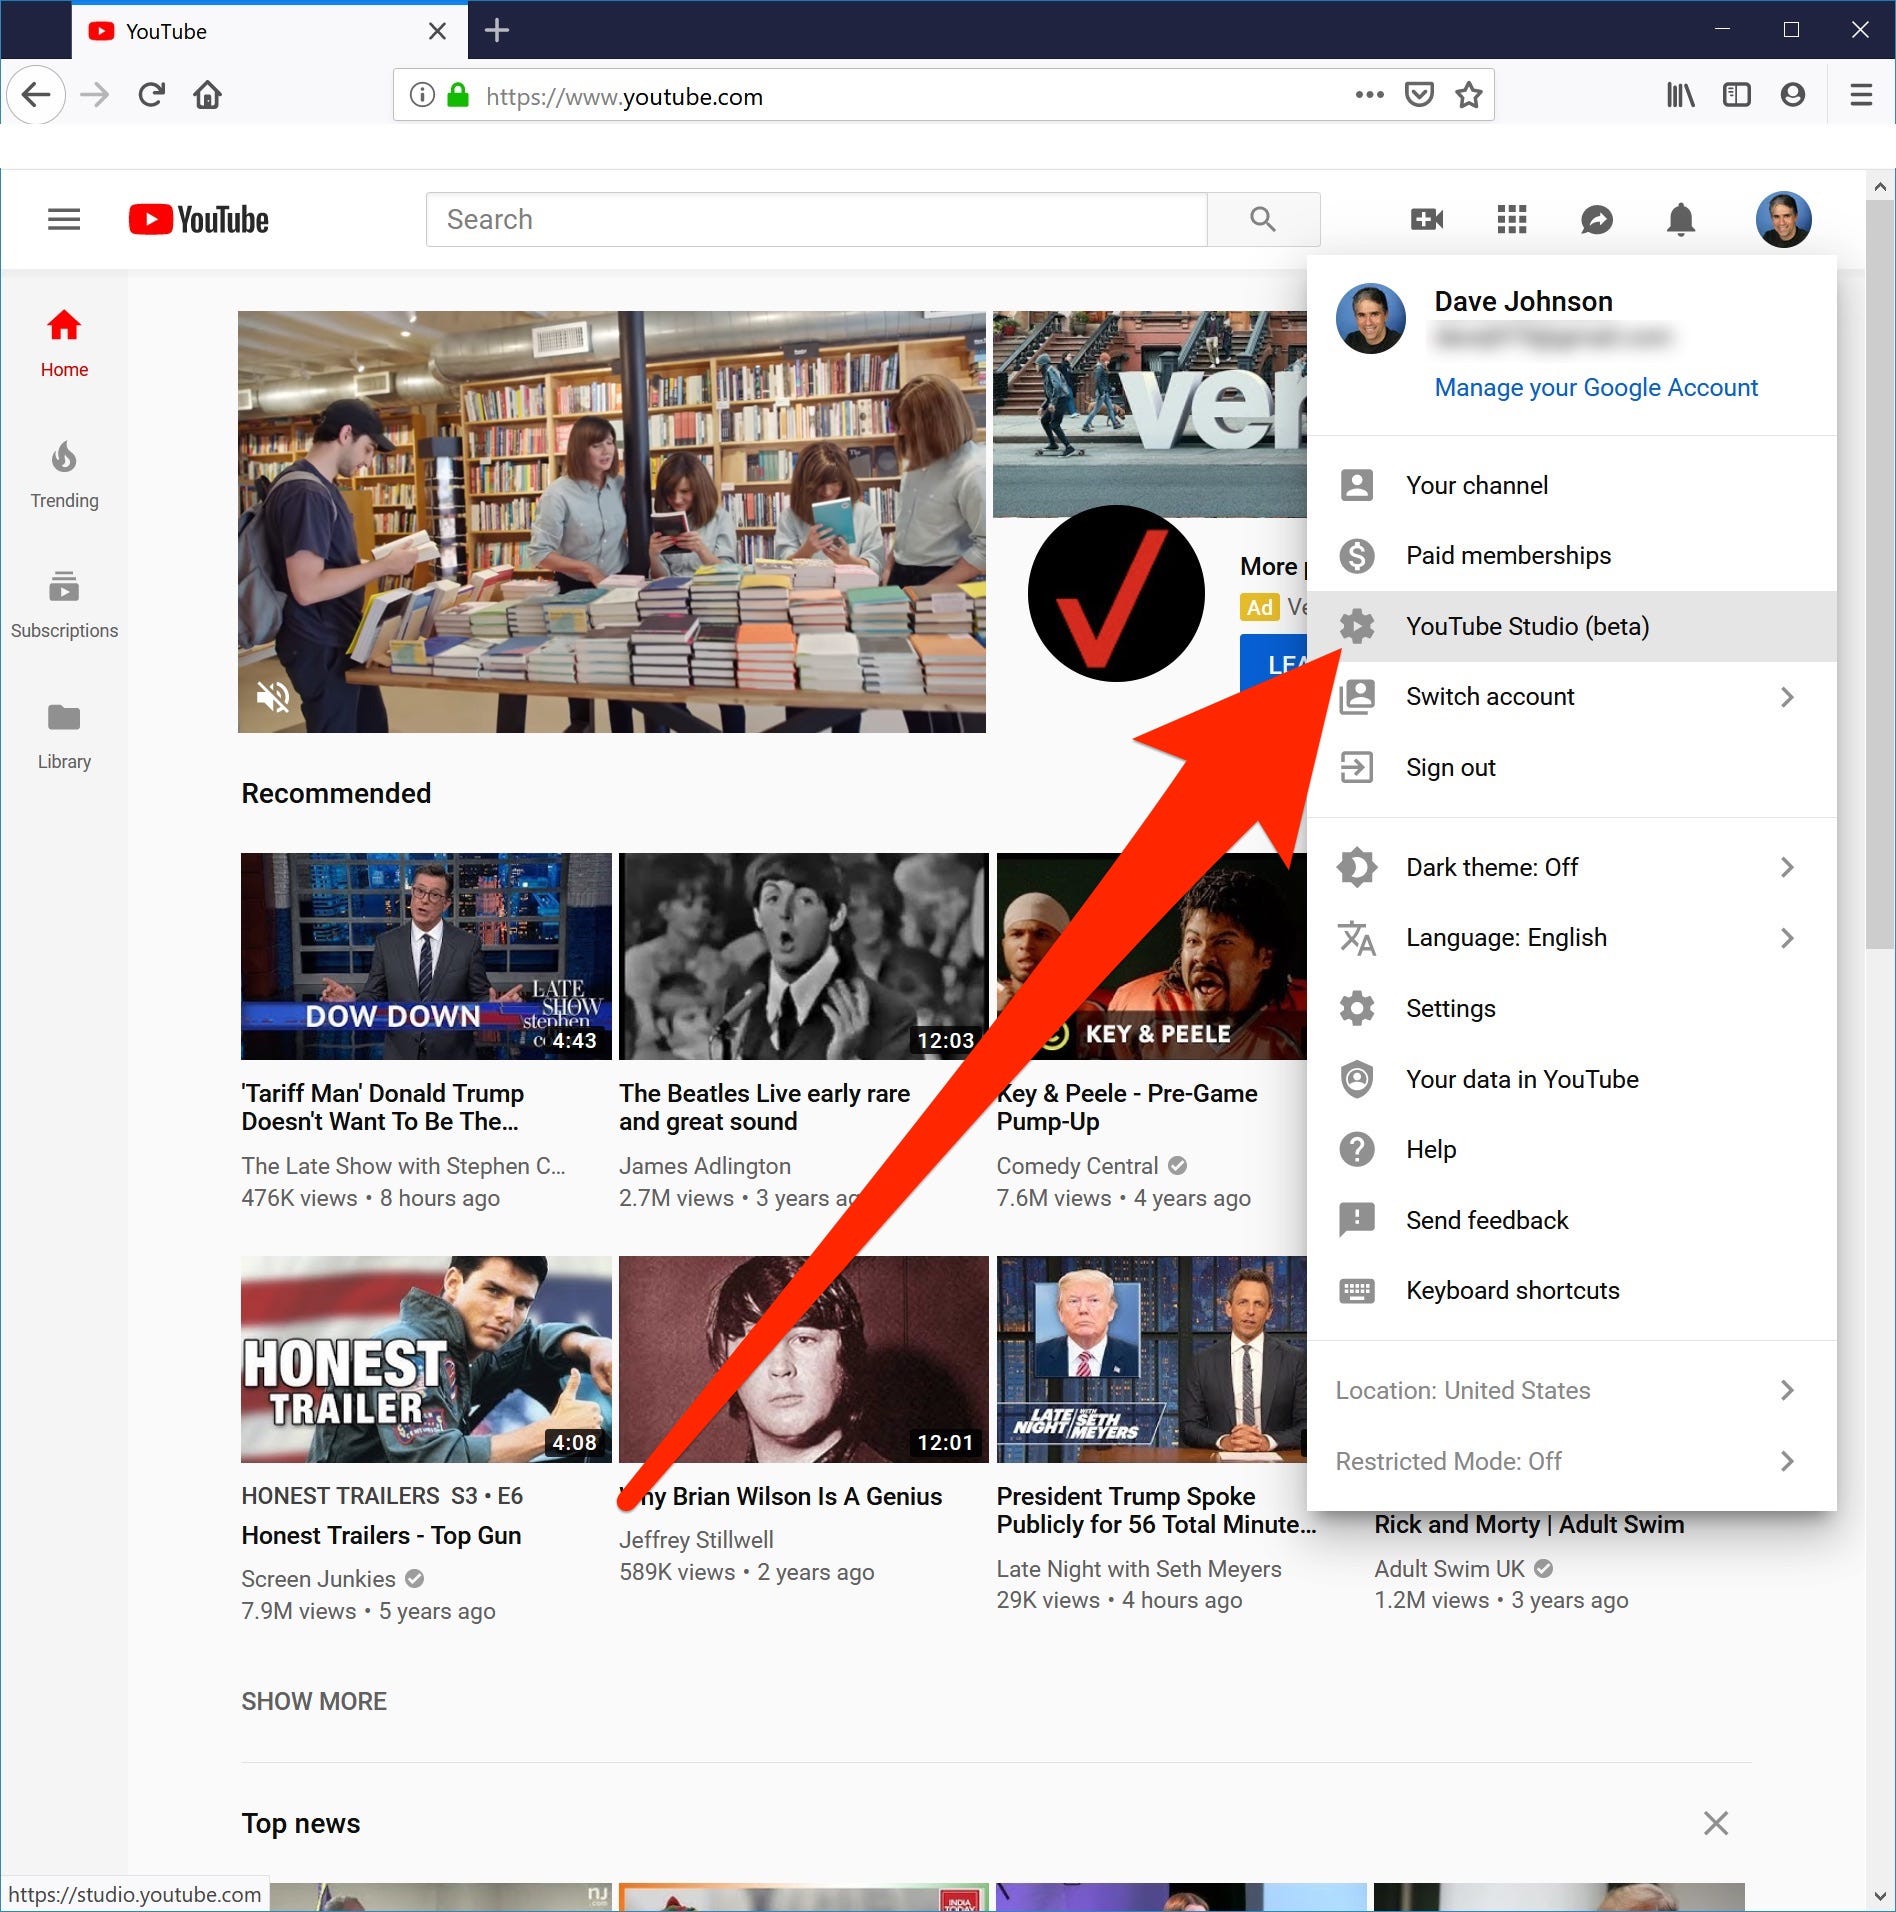
If the video has already processed or been published, you can set or change the thumbnail from YouTube Studio.
1. From the YouTube homepage, click your avatar at the top right of the screen and choose "YouTube Studio."
Dave Johnson/Business Insider
2. In the pane on the left, click "Videos."
3. Hover your mouse over the video you want to edit and click the pen icon that appears.
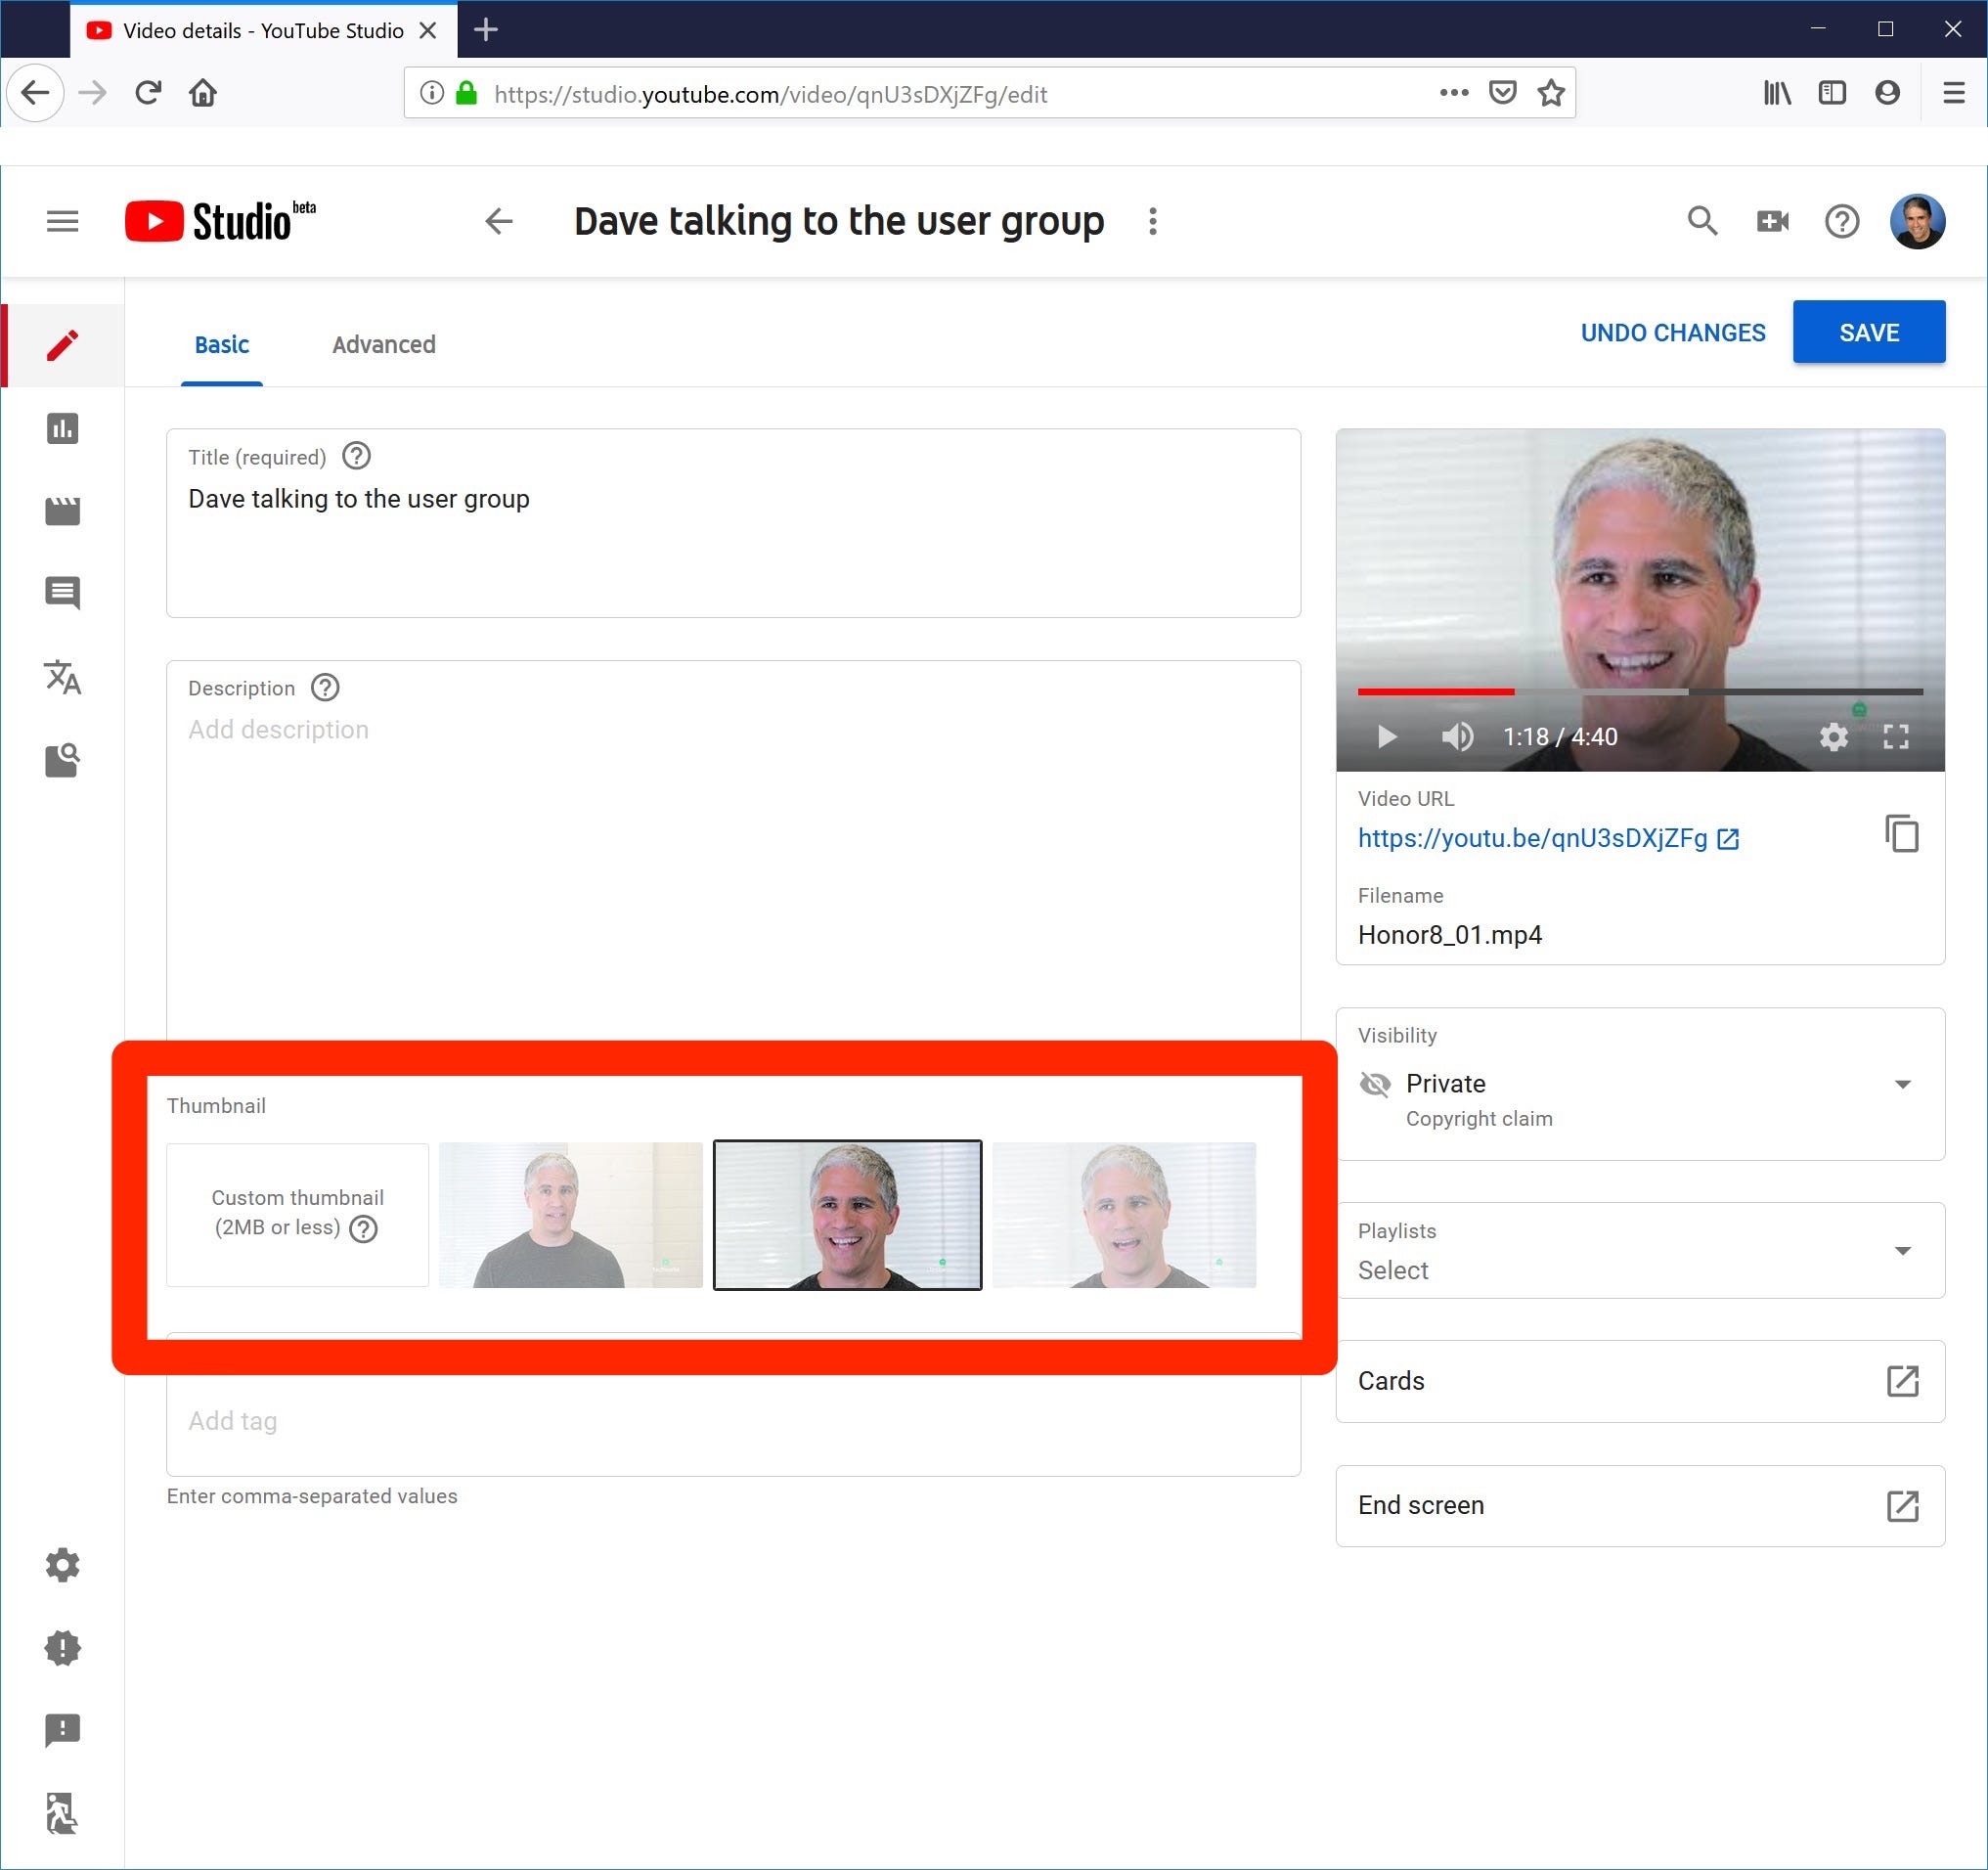
4. On the Basic Details page, you should see three auto-generated thumbnails. Choose the one you want to use and then click "Save" in the top-right.
Dave Johnson/Business Insider
Make a custom thumbnail and upload it
If none of the auto-generated thumbnails suit you, you can create your own, but YouTube doesn't have any tool for doing this. The easiest way to create a thumbnail is to use a screenshot utility like Snipping Tool on a Windows computer, or any of the various screenshot methods on a Mac computer.
Here's how you can do it on a PC or a Mac.
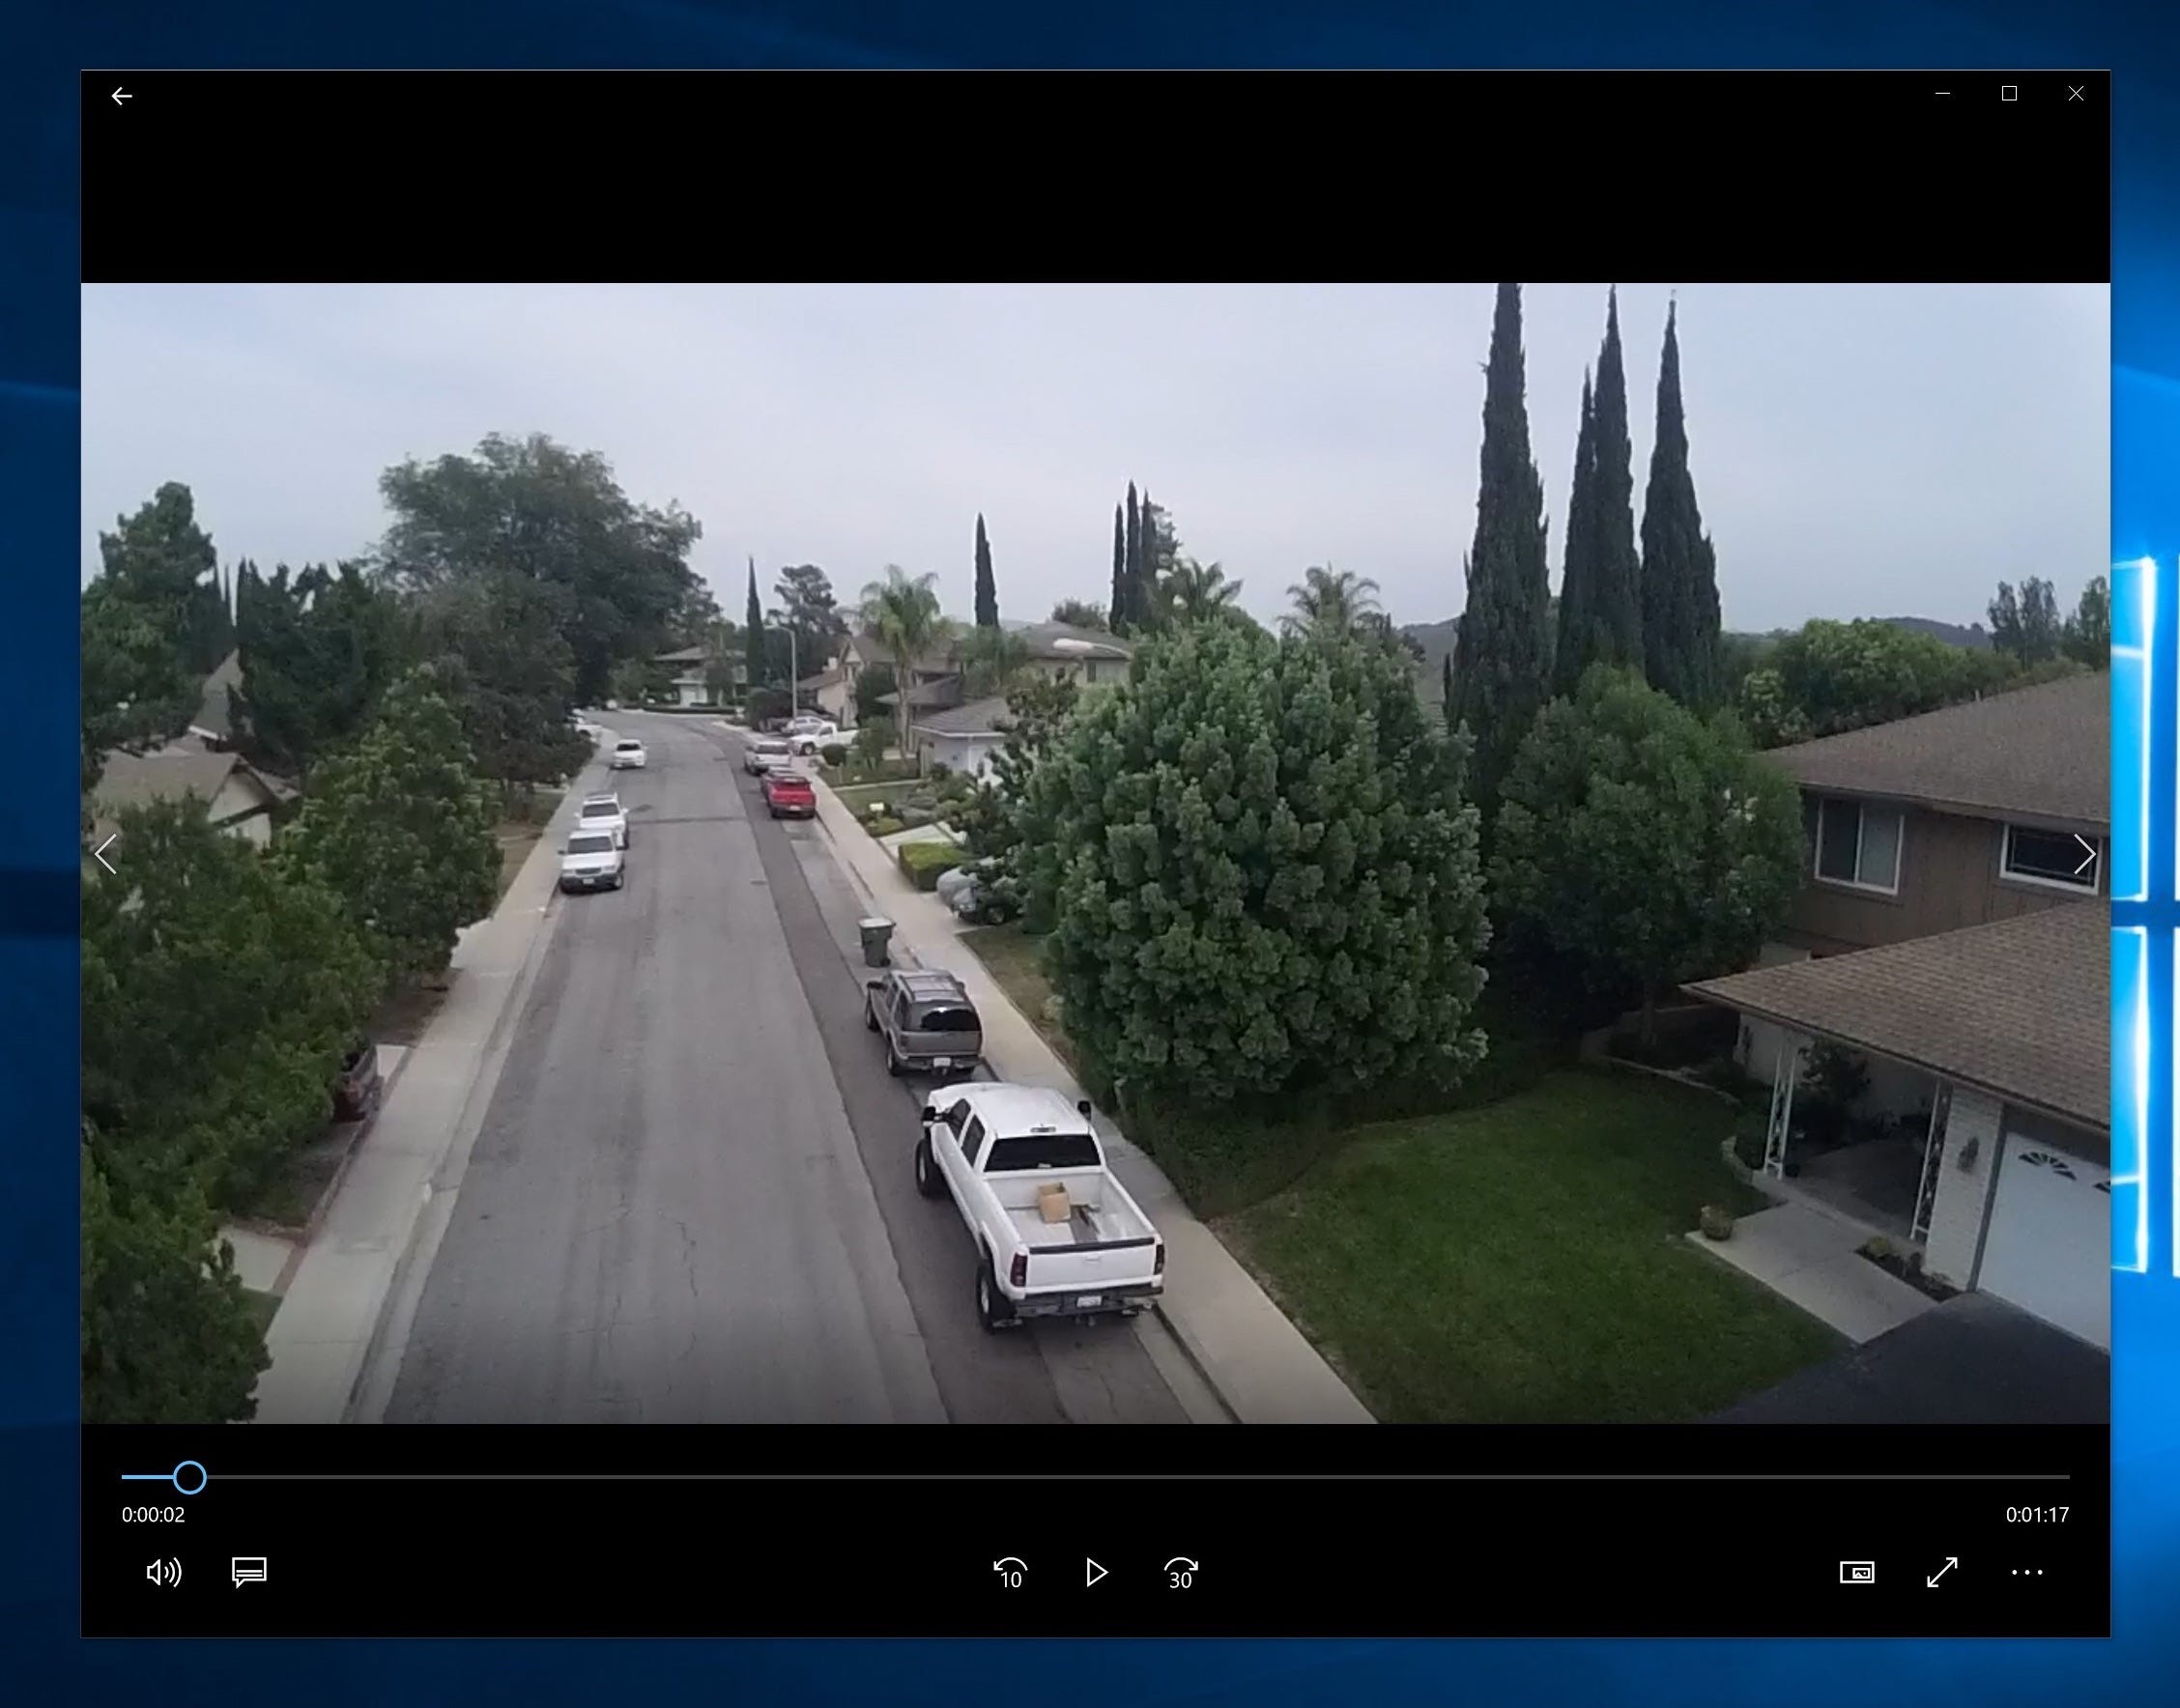
1. Open the video on your computer in any media player.
2. Pause the video at the point that you want to create the thumbnail.
Dave Johnson/Business Insider
3. Start the Snipping Tool from the Start menu on Windows, or press Command + Shift + 4 on a Mac to enter screenshot mode. If using Snipping Tool, click "Mode" and choose "Rectangular Snip."
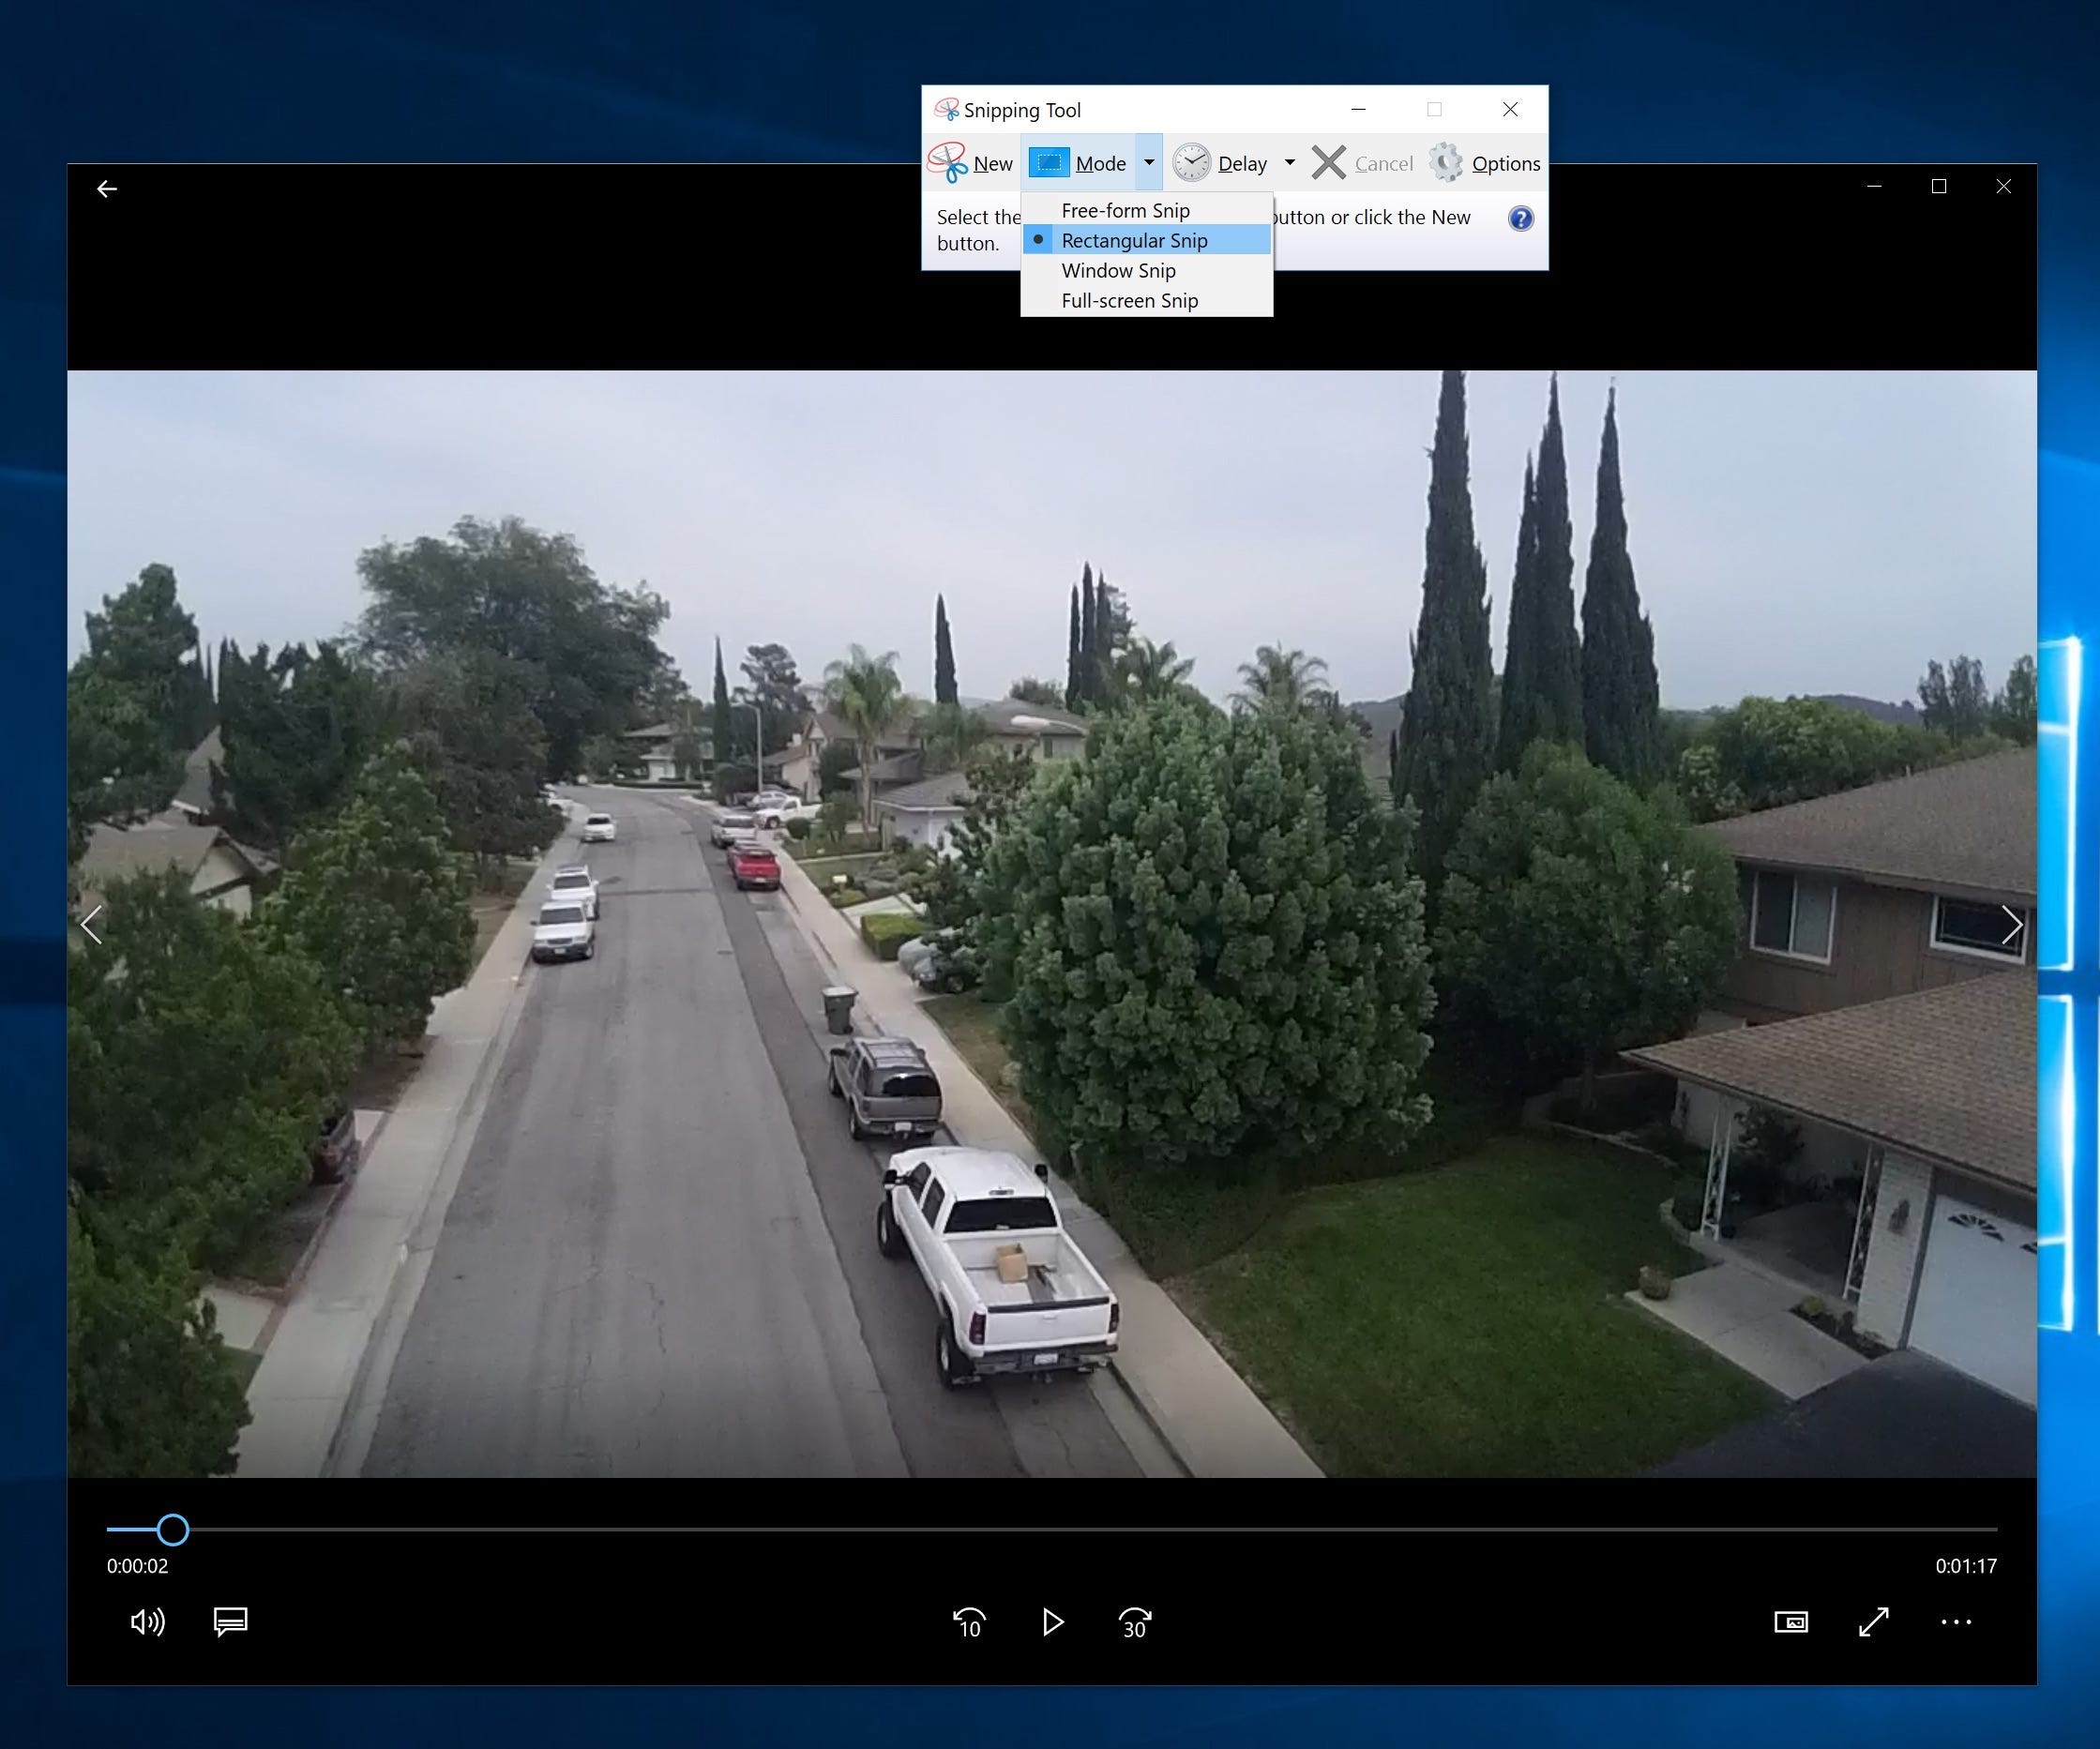
Dave Johnson/Business Insider
4. Click in the upper left corner of the video and drag the rectangle to the lower right corner. Be careful to capture as close to exactly the video window as possible.
5. The screenshot will appear in the Snapping Tool. Click "File" and then click "Save As." Name the thumbnail image and save it. If using a Mac, the photo will appear in the bottom-right corner of the screen, and will disappear in a few seconds. Once it disappears, it has been saved.
6. Return to the video in YouTube and, beside the auto-generated thumbnails, click "Custom thumbnail."
7. Choose the file you just saved.
Many creators also use programs like Adobe Photoshop to design their custom thumbnails. If you want a thumbnail that's not just a frame from your video, consider designing your own.
Related coverage from Tech Reference:
-
How to edit a Zoom video recording for free using Youtube
-
How to 'tag' someone on YouTube by replying to a comment on desktop or mobile
-
How to upload an iMovie video to YouTube on your Mac, without leaving the iMovie app
-
How to turn on Dark Mode on YouTube, to reduce eye strain and make videos stand out on your screen
-
How to merge multiple YouTube accounts by re-uploading your videos
Dit artikel is oorspronkelijk verschenen op z24.nl