PeopleImages/Getty Images
- You can make a hanging indent in Google Docs using the ruler tool, which lets you change the margin size.
- Hanging indents are great for works cited pages, block quotes, lists, and more.
- You'll need to be using a computer to get hanging indents in Google Docs – it's not available in the mobile app.
- Visit Insider's Tech Reference library for more stories.
Hanging indents are rare, but useful. Unlike an ordinary indent – where only the first line of a paragraph is pushed a bit to the right – a hanging indent leaves the first line all the way to the left, and instead pushes all the lines under it to the right.
You usually find them in bibliographies and MLA format "works cited" pages, and sometimes for creating lists within documents.
It's easy to do hanging indents in Google Docs. Here's how.
How to make a hanging indent in Google Docs
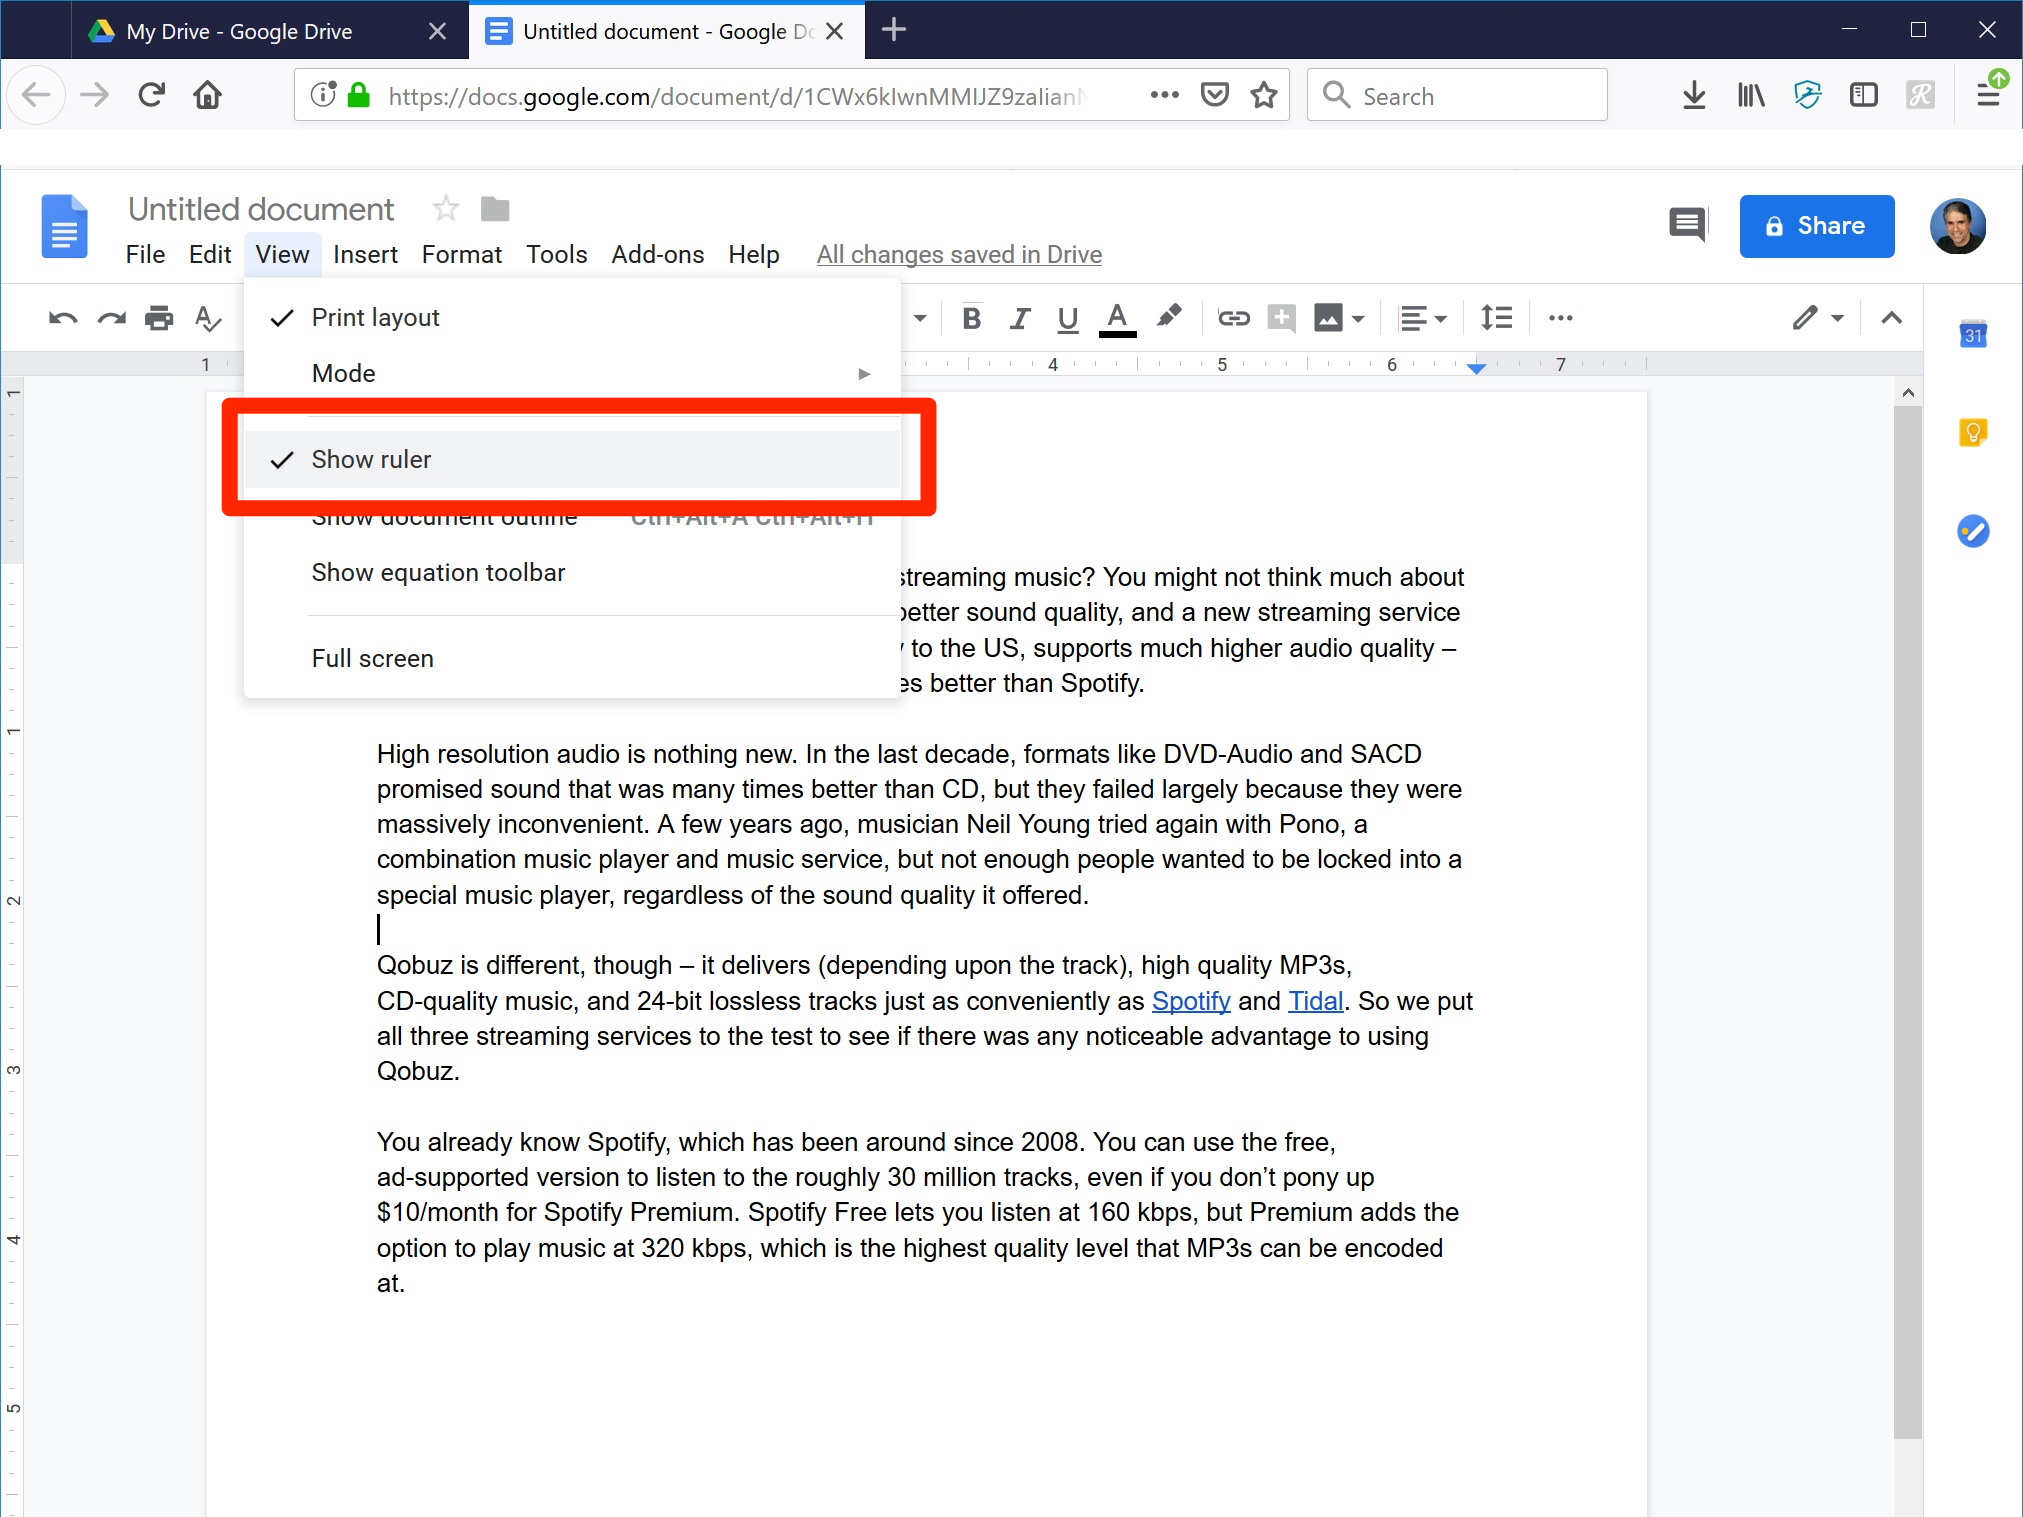
1. If it's not already visible at the top of your Google Docs document, turn on the ruler by clicking "View" and then clicking "Show ruler."

Dave Johnson/Insider
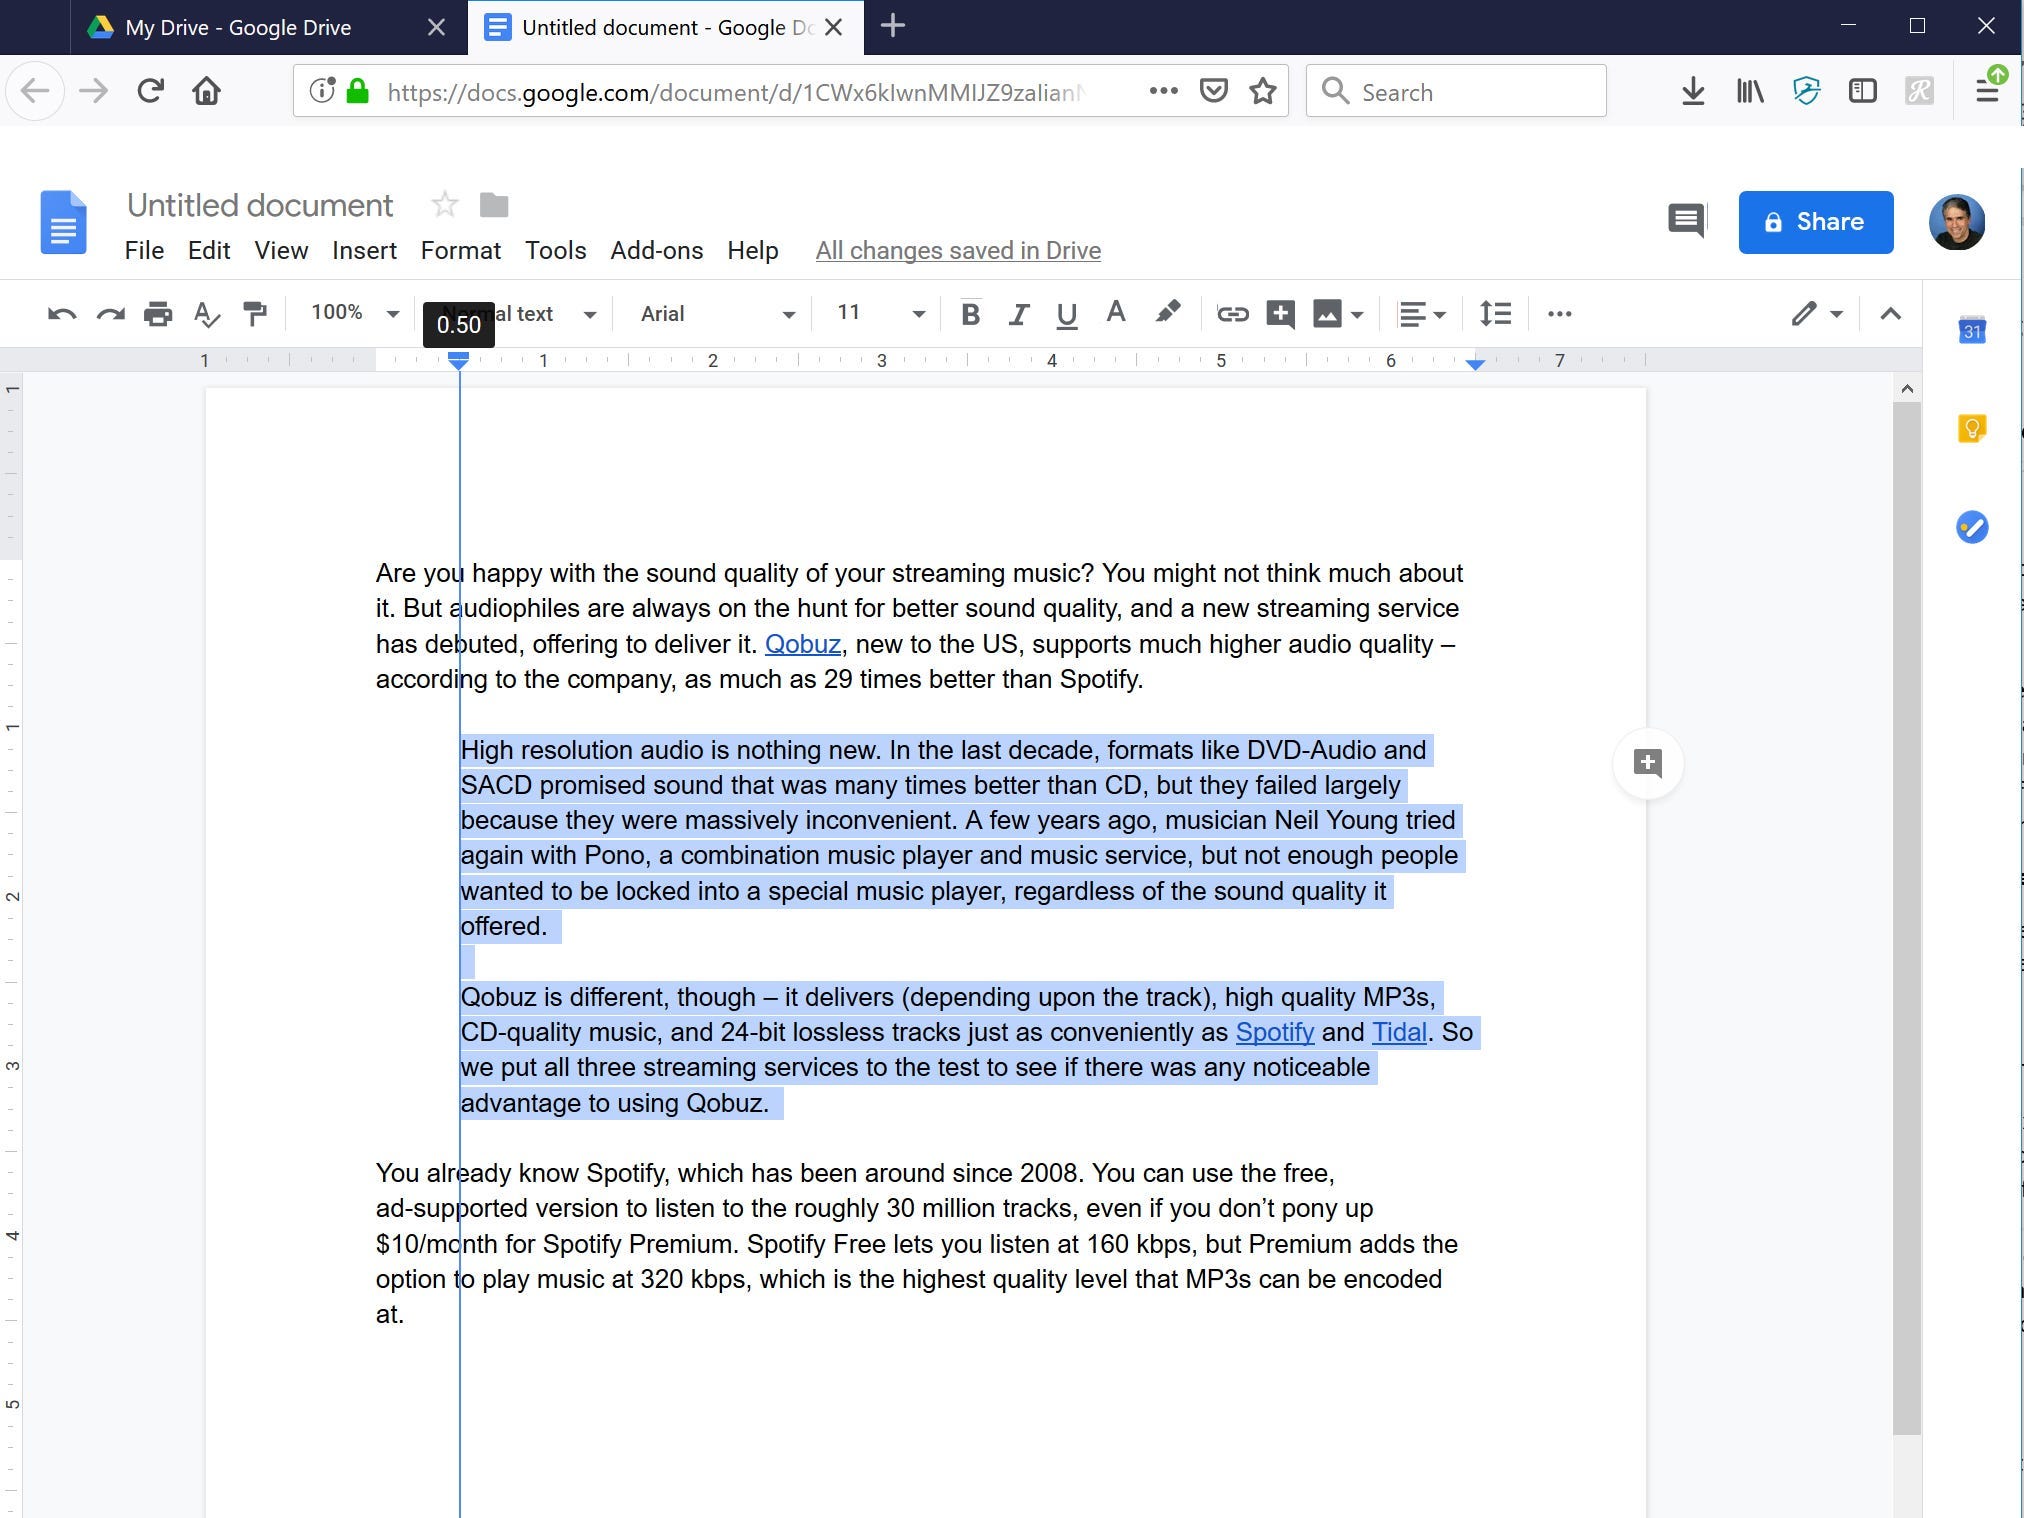
2. Highlight the text that you want to indent. This can be a single paragraph, multiple paragraphs, or the entire document.
3. On the ruler, find the left indent control (which looks like a blue triangle pointed down) and the left margin control (which is a small blue rectangle). They're usually stacked together above the left margin.
4. Click and drag the left indent (the triangle) to the right, as far as you want the text to be indented. A common indent is about a half-inch. Notice that when you do this, the margin control will go with it, and all the text will be indented.

Dave Johnson/Insider
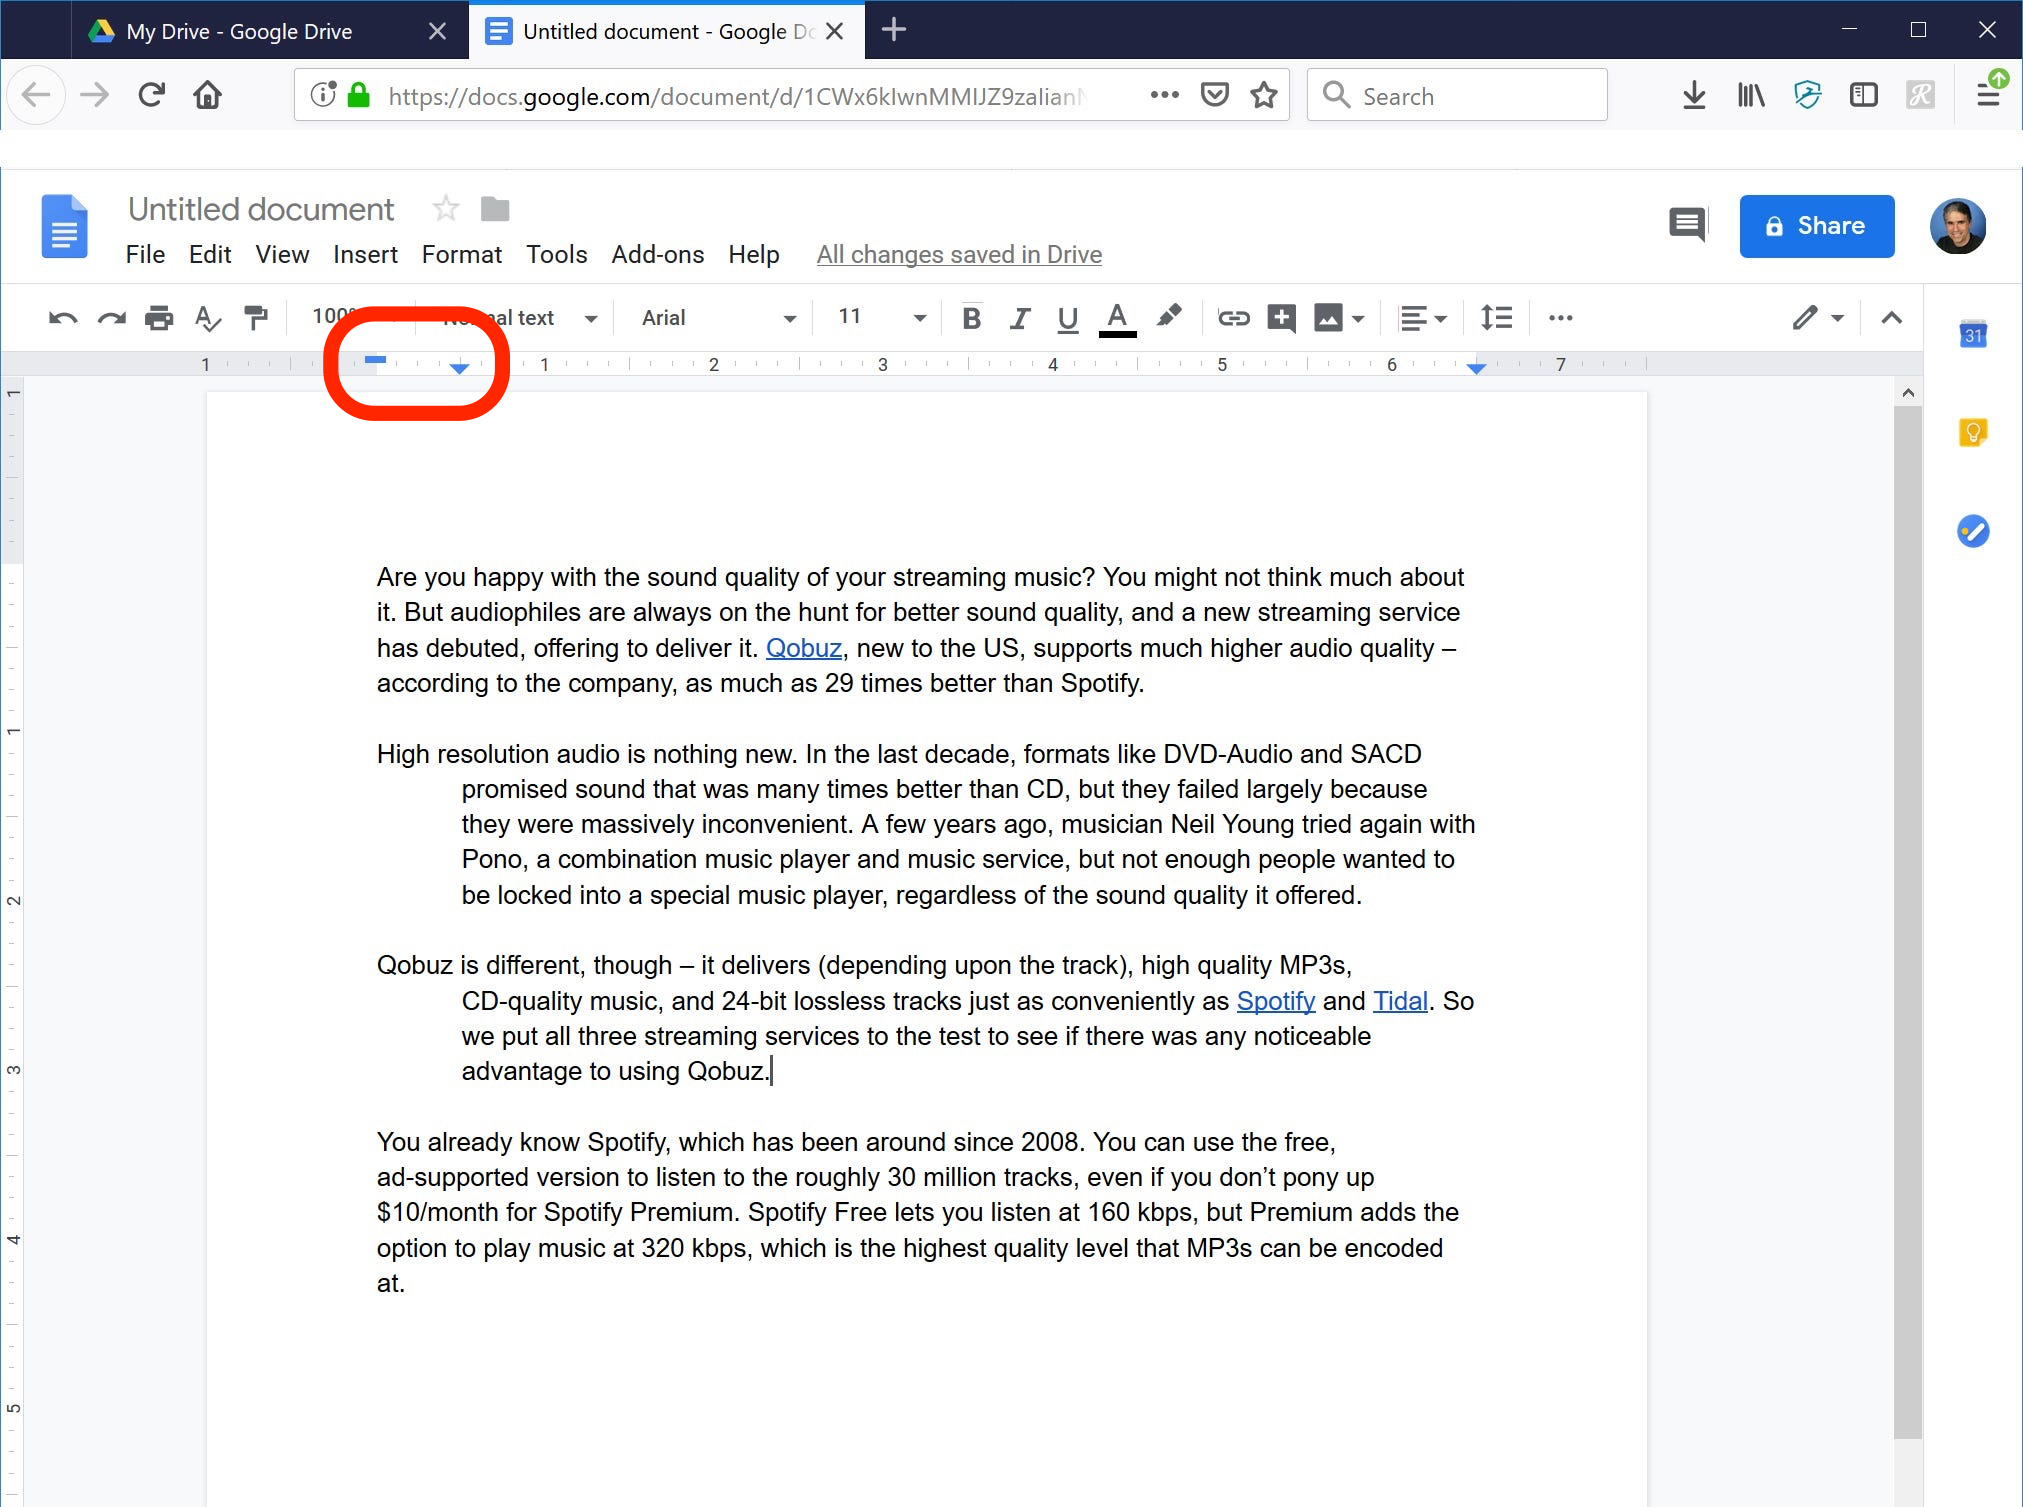
5. Click and drag the left margin control (the rectangle) back to the margin where it started.

Dave Johnson/Insider
You've now made a hanging indent.
Dit artikel is oorspronkelijk verschenen op z24.nl
