Stanislav Kogiku/SOPA Images/LightRocket via Getty Images
- To make a GIF on your iPhone, you can convert a Live Photo in the Photos app or use apps like GIPHY.
- Converting Live Photos lets you make quick pseudo-GIFs with photos you've taken yourself.
- GIPHY gives you more features to make and customize GIFs on your iPhone.
- Visit Insider's Tech Reference library for more stories.
If you've ever taken a Live Photo on your iPhone, you've probably realized that it's a bit like recording a quick GIF with your camera.
However, Live Photos are a bit different – they aren't meant to repeat automatically, for example, and only work on Apple devices.
But if you do want to make a GIF on your iPhone, and make these Live Photos repeat, you're in luck. You can use the native iPhone Photos app to make your Live Photos repeat, and the GIPHY app to create a GIF that can be shared anywhere.
Here's how.
How to make a GIF on an iPhone with the Photos app
First, it should be noted that turning a Live Photo into a GIF through the Photos app won't create a real GIF – it'll just create another Live Photo that looks like a GIF when played on an iPhone or iPad.
This means that if you export this Live Photo to a non-Apple device, it still won't move. You'll have to use GIPHY to create a real GIF.
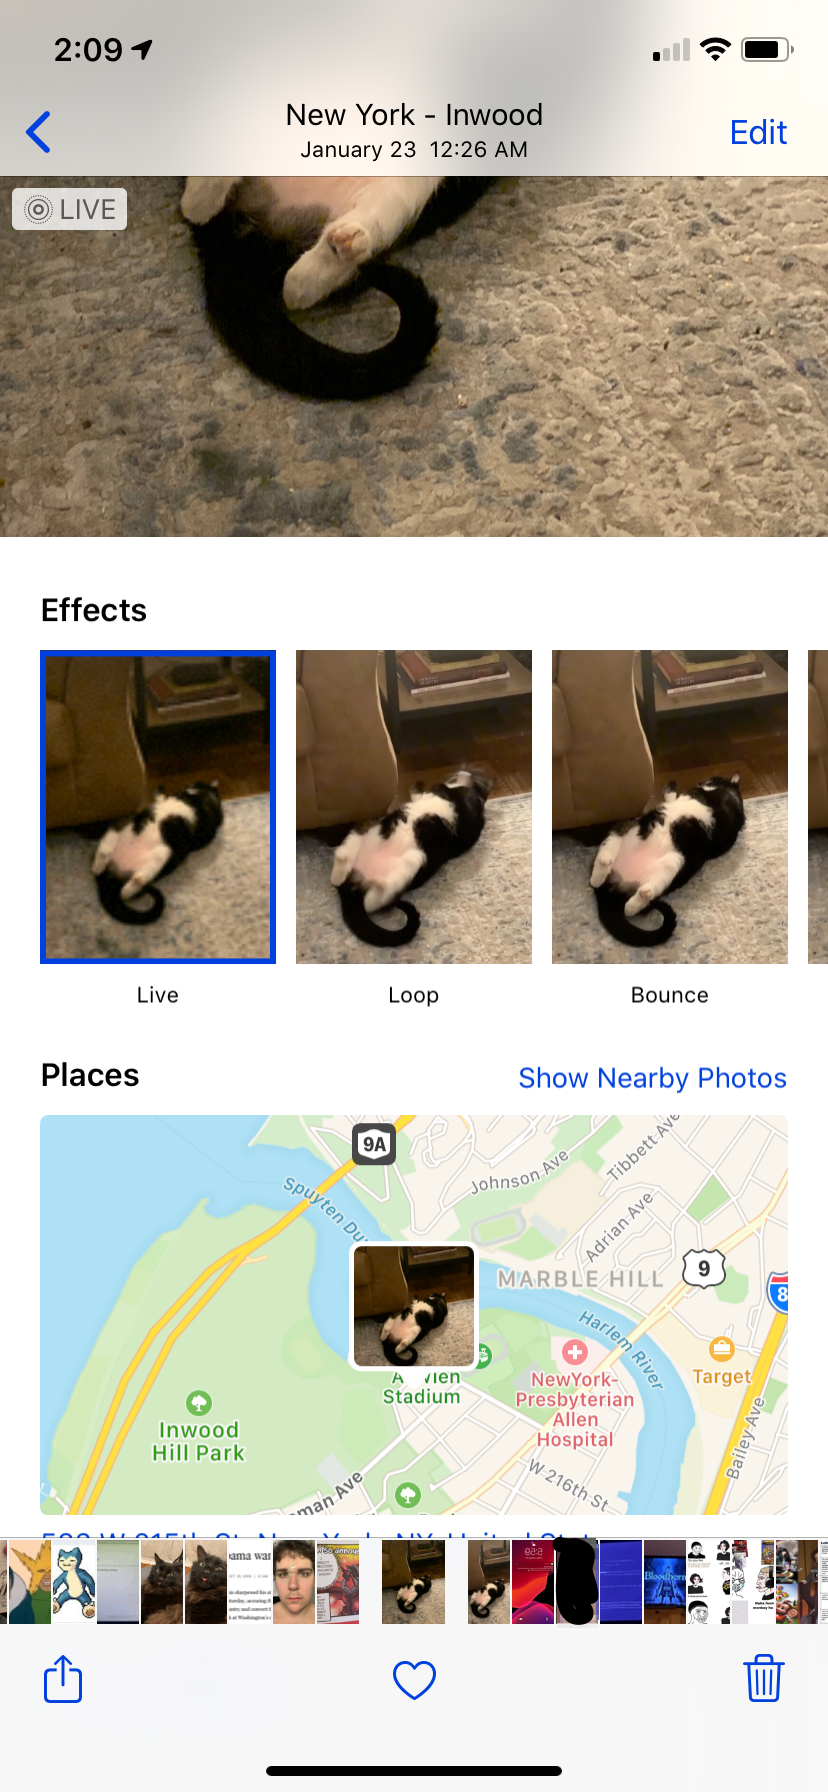
1. Open the Photos app on your iPhone and tap on the Live Photo you want to turn into a GIF.
2. Swipe up on the photo to bring up the moving picture menu (Live, Loop, Bounce, Long Exposure).
William Antonelli/Insider
3. Tap on "Loop" to turn the picture into a repeating GIF. Note, however, that it won't be a "clean" GIF - instead of simply jumping back to the end of the GIF when it's finished, the image will fade out, like so:

William Antonelli/Insider
You can also tap on "Bounce" so that the frames of the picture will go forward and in reverse instead of starting back at the beginning.
How to make a GIF on an iPhone using GIPHY
GIPHY gives many more options for getting creative with your GIFs, allows you to share your new creations with the world, and allows you to download GIFs created by other members of the community.
1. Open the GIPHY app.
2. Tap on the "Create" icon in the top-right.

William Antonelli/Insider
3. Here you have two options for making your GIF:
- Film a new GIF by tapping on the camera icon, bottom-center.
- Make a GIF from your photos by tapping on the photos icon in the bottom-right, then tapping on the photo you want to use.
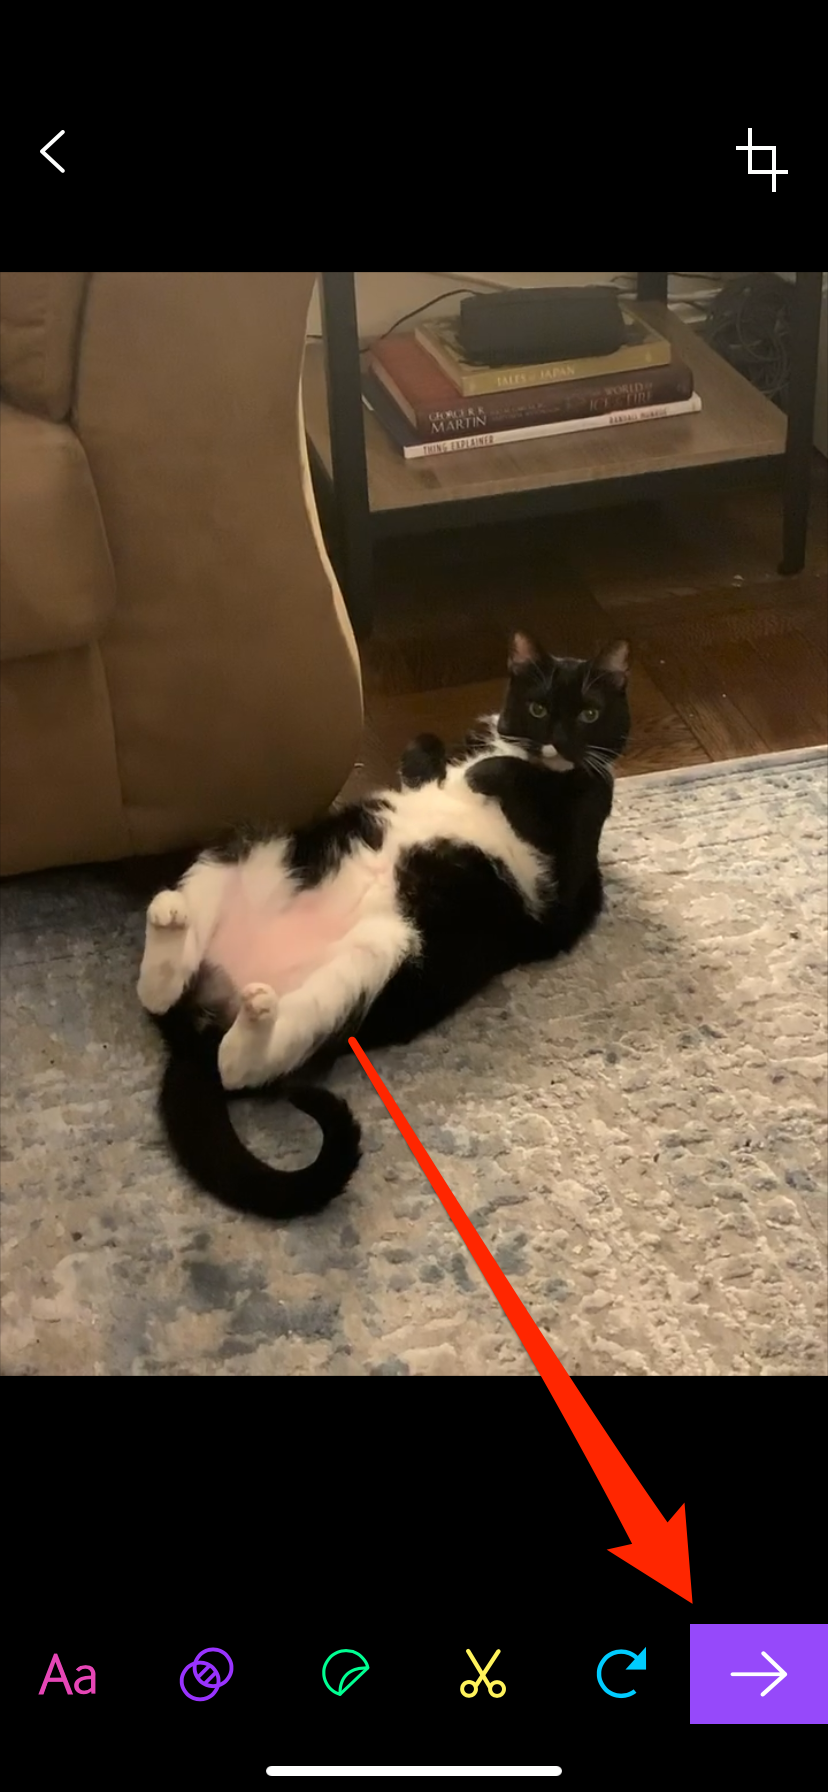
4. There are various options for customizing it on the bottom (from left to right): Write a caption, add a filter, add pre-made art and word art phrases, trim your GIF, and more.
Once it's exactly how you want it, tap on the purple arrow to upload it to GIPHY.
William Antonelli/Insider
5. On the next page, tap "Upload to GIPHY." You'll have to sign up for a GIPHY account before you can upload and save your GIF.
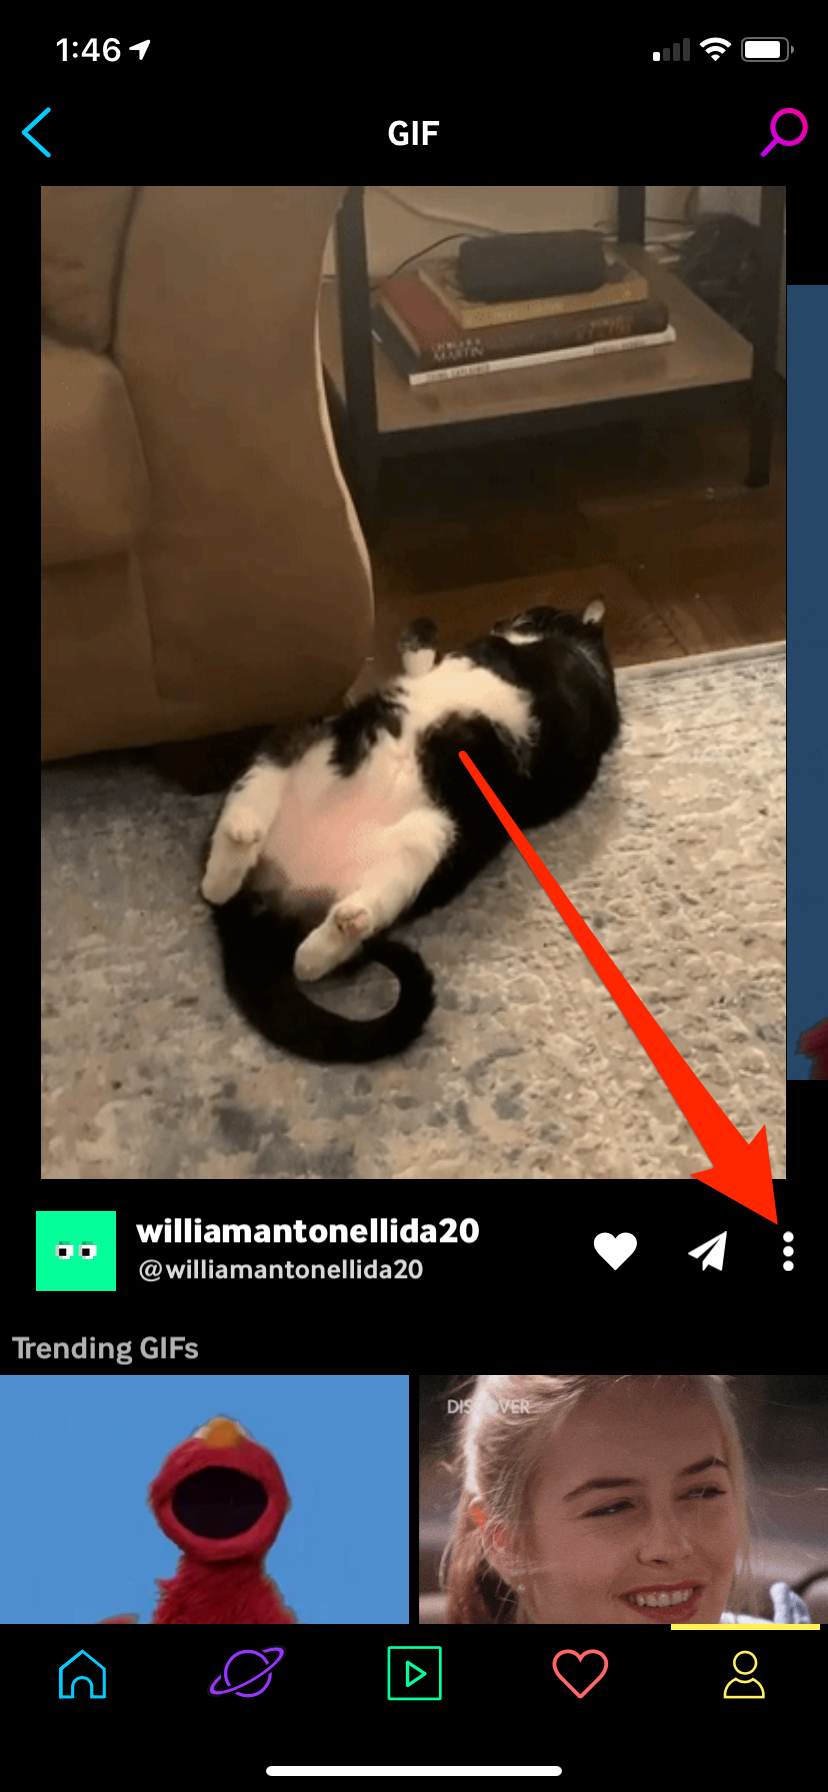
6. Once it's uploaded, tap on the three vertical dots to open a new menu.
William Antonelli/Insider
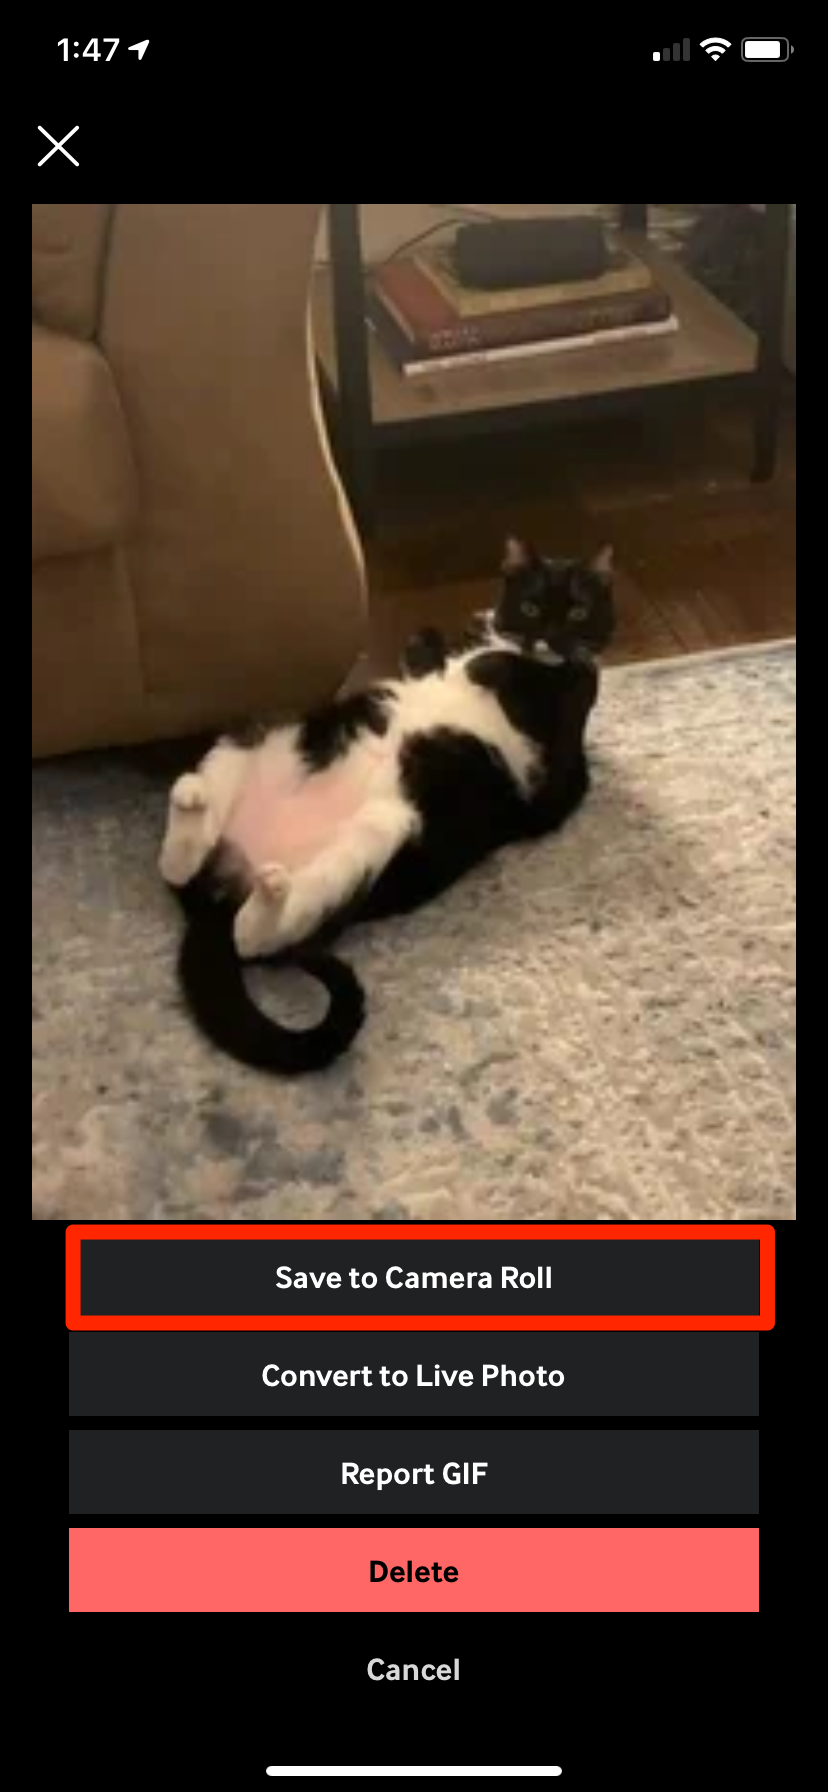
7. Tap "Save to Camera Roll" to download the newly created GIF onto your phone. You can now freely export or post it wherever you like.
William Antonelli/Insider
Unlike GIFs created with the native Photos app, GIFs created through GIPHY will be clean and complete. They'll also keep working even when posted online or transferred to another device.

William Antonelli/Insider
