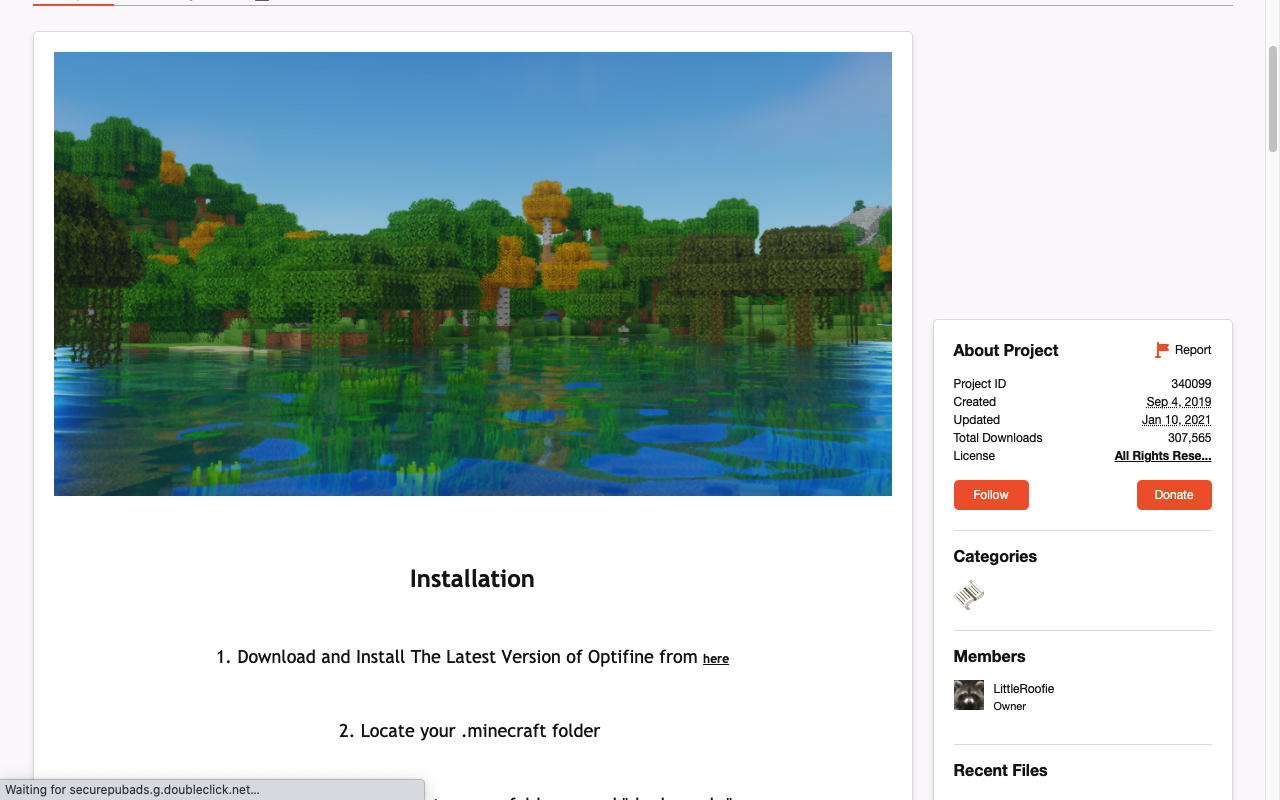
- To install shaders in "Minecraft: Java Edition," you'll first need to download a free program called OptiFine.
- Once OptiFine is installed, all you need to do is move the shader files into a specific folder on your computer.
- Installing shaders in "Minecraft" can make your game more beautiful, but also harder to run.
- Visit Insider's Tech Reference library for more stories.
At first glance, "Minecraft" is not a very pretty game. It looks more like a world of Legos than anything, with sharp blocks placed by large stick figures.
That's why thousands of fans have put in the effort to make shaders. Shaders change how lighting works in "Minecraft," which sounds simple, but can completely transform what the game looks like. Once you start playing with shaders, you might wonder how you ever went without them.
Luckily, installing shaders in "Minecraft" is easy. Here's how to find shaders, download them, and install them into your game.
How to install 'Minecraft' shaders
Installing shaders in "Minecraft" is a two-part process. Luckily, the first part - installing OptiFine - only needs to be done once, and you're good forever.
Set up OptiFine
OptiFine is a free third-party app that lets you finetune and customize "Minecraft's" graphics. The exact method to install and set it up will differ slightly depending on whether you use other "Minecraft" mods, but here are the general steps.
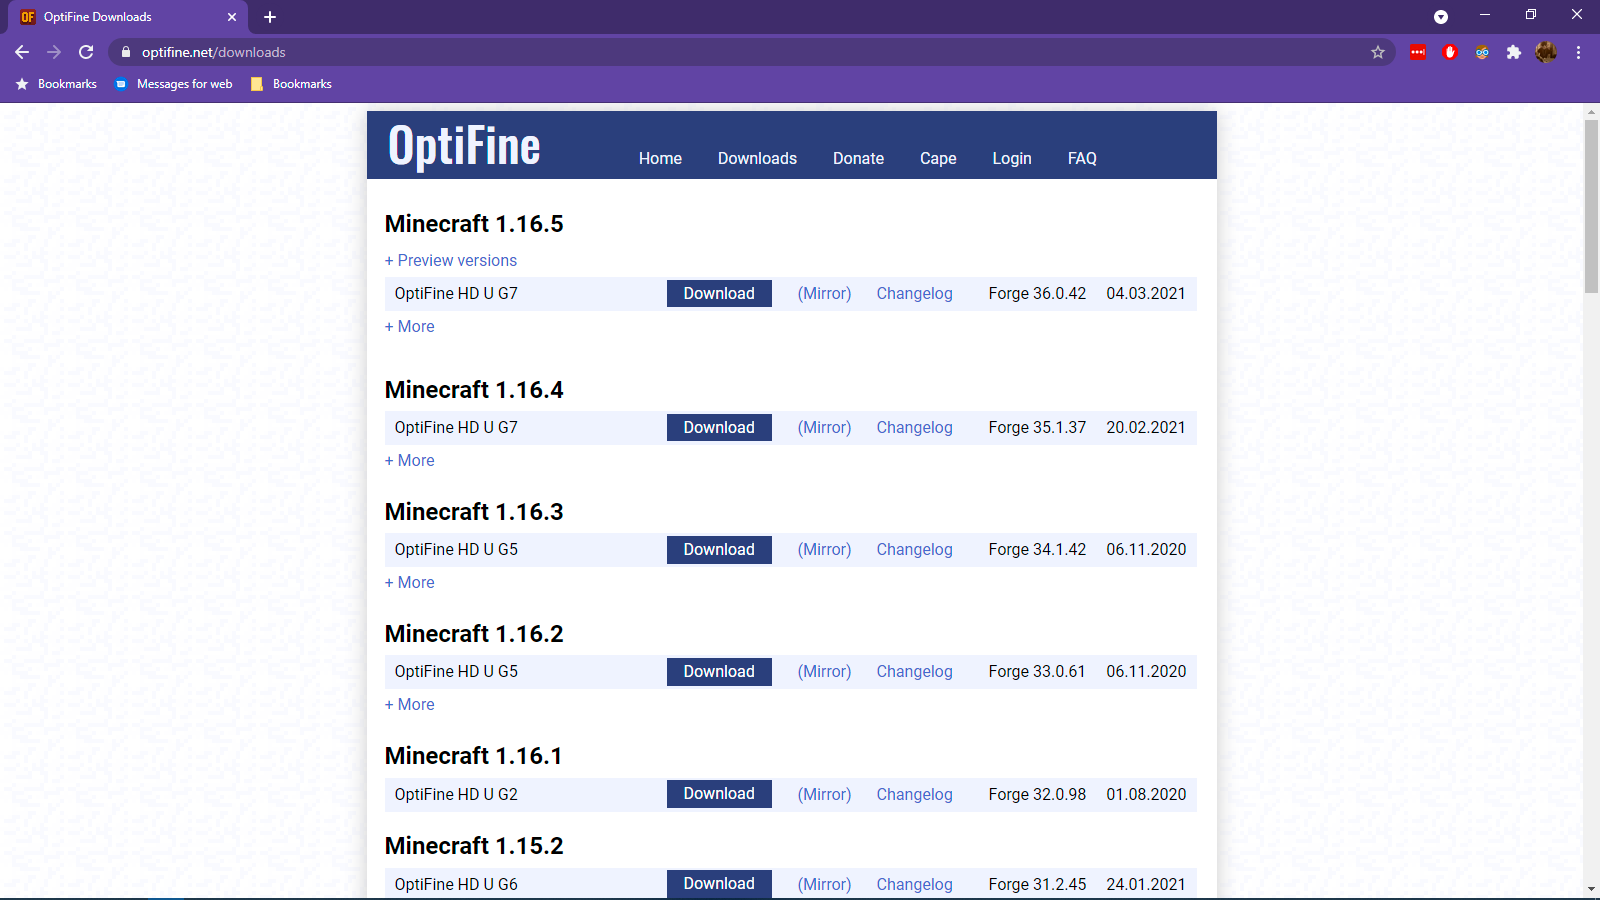
1. Download OptiFine from the website's downloads page, making sure you select the OptiFine version that corresponds with the version of "Minecraft" you run. Save the file somewhere you'll be able to find it easily.
Emma Witman/Insider
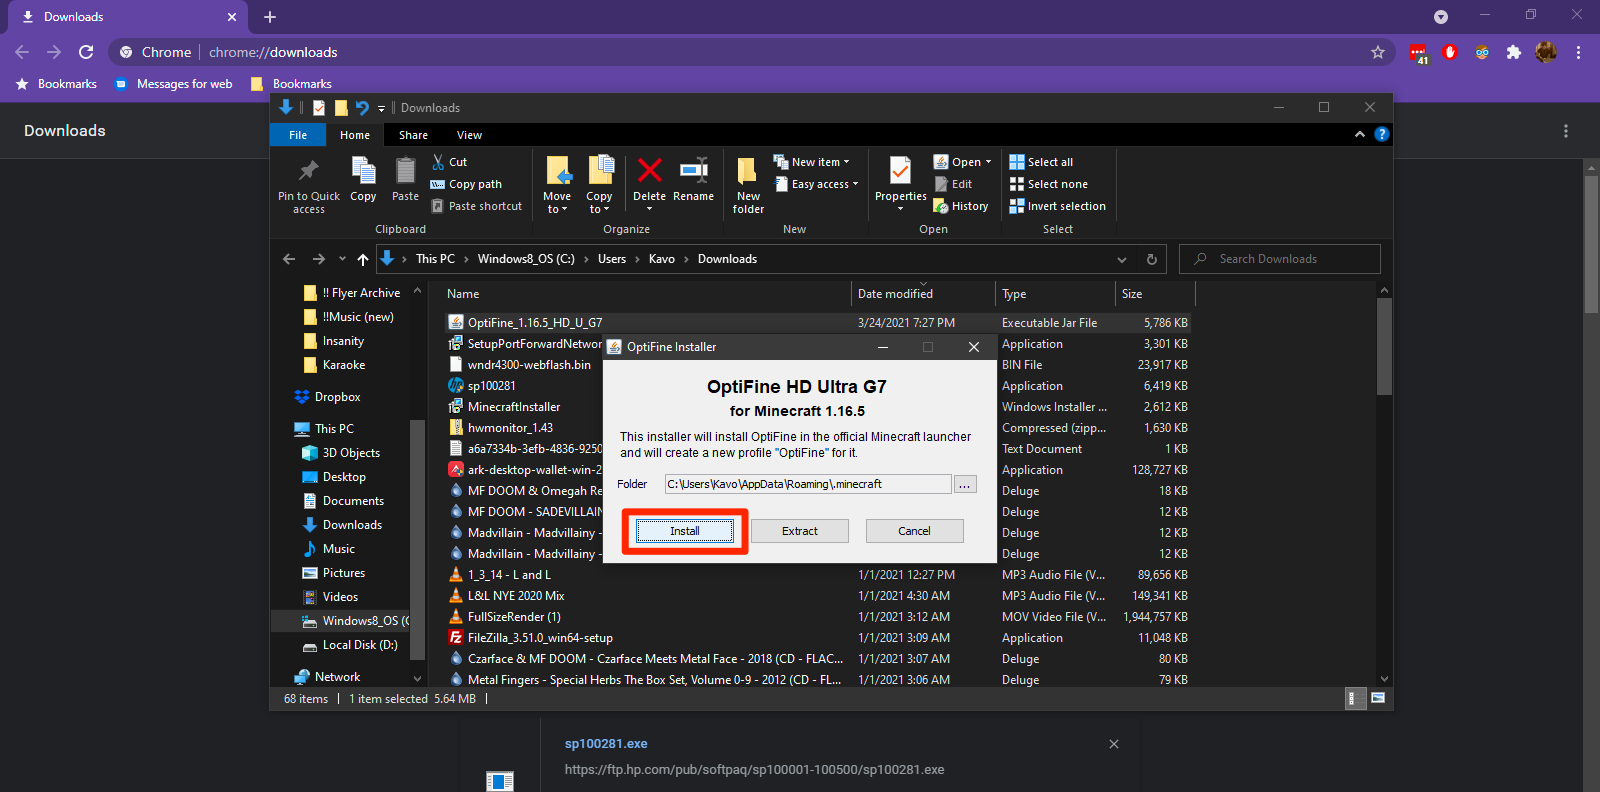
2. Find the .jar file you downloaded and double-click it to run the installer. Click "Install." Afterward, you should see a message announcing OptiFine's successful installation.
Emma Witman/Insider
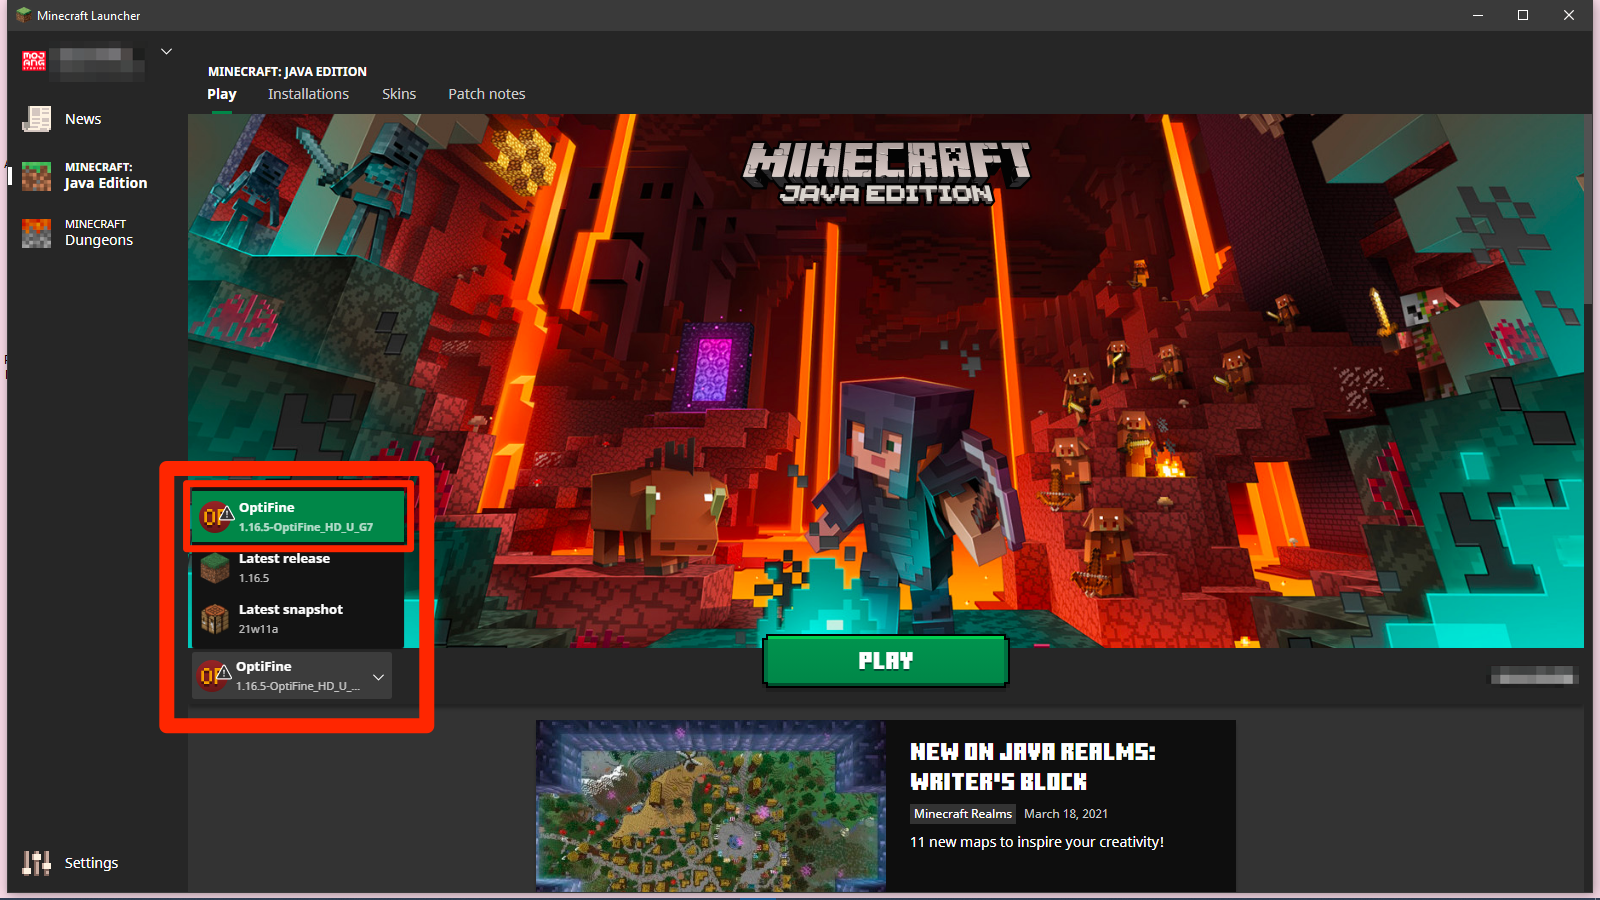
3. Open the Minecraft Launcher app. In the drop-down menu to the left of the "Play" button, select OptiFine (or "Forge" if you want to run other mods), and click "Play."
Emma Witman/Insider
Now, we'll get the shader files installed.
Move your shader files
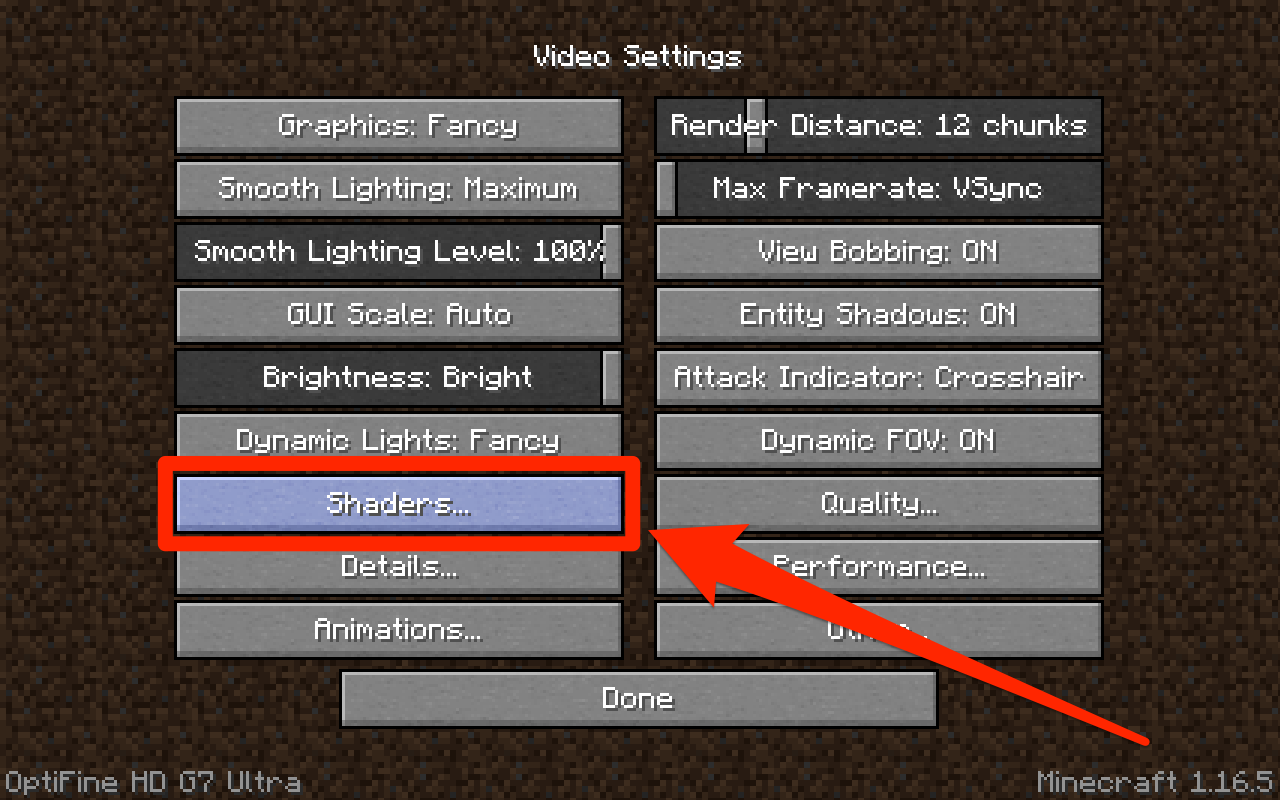
1. From the familiar "Minecraft" intro screen, select "Options," and then "Video Settings."
2. On this page, you should see some new settings. Click "Shaders…"
Emma Witman/Insider
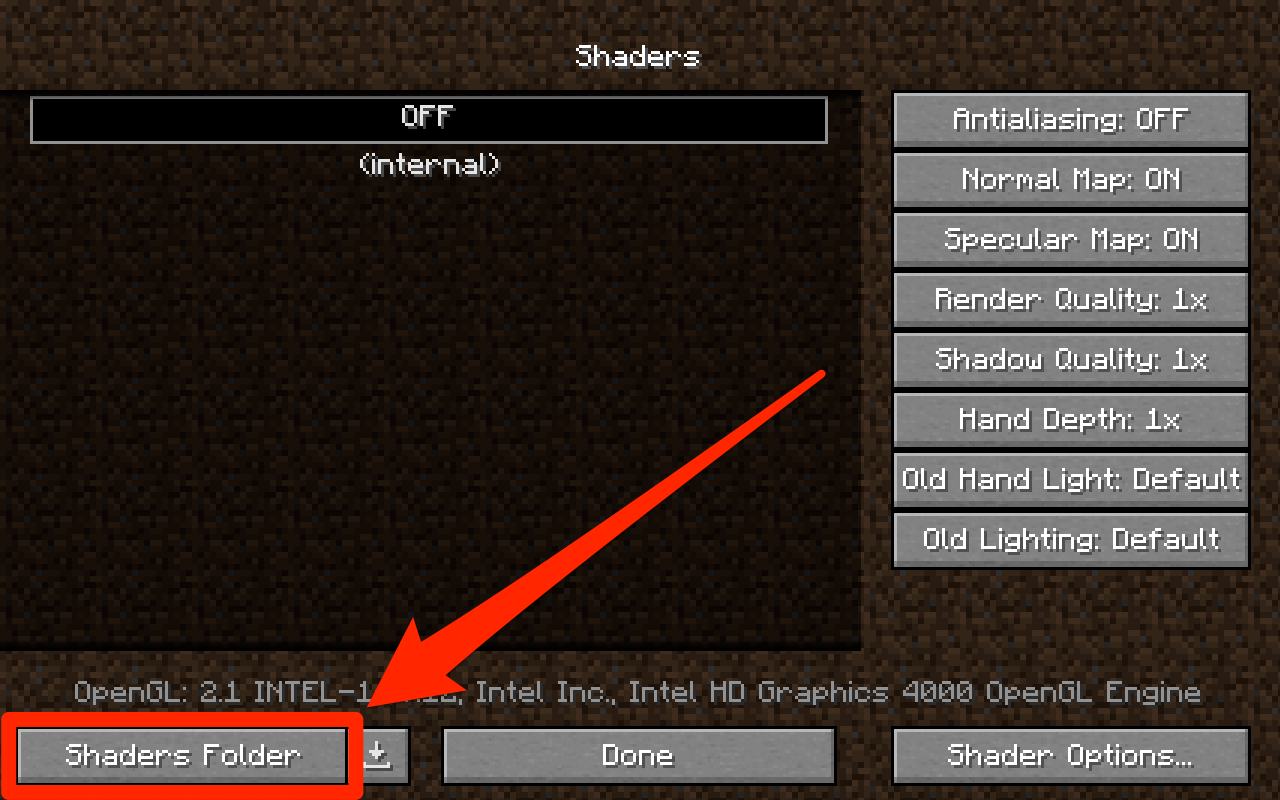
3. At the bottom-right, select "Shaders Folder." This will open the folder where all your shader files will go.
Emma Witman/Insider
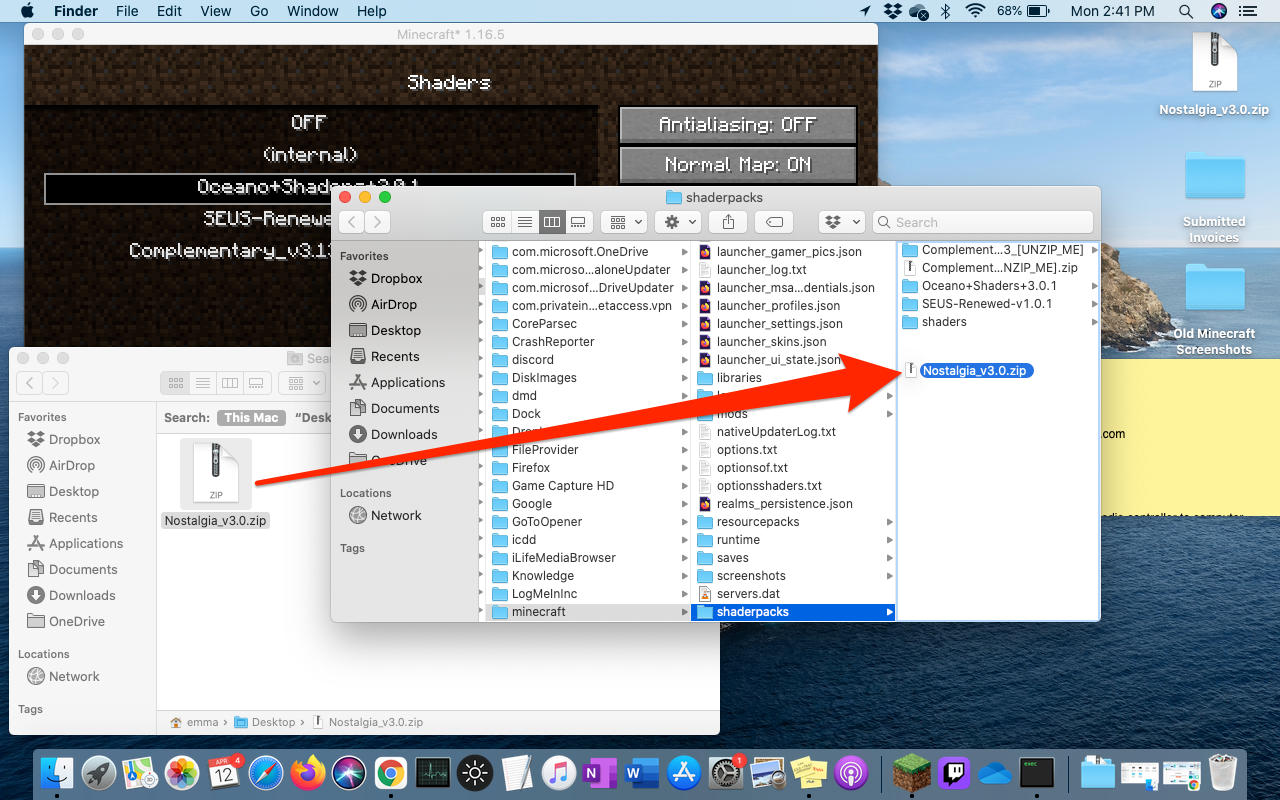
4. Grab the shader files you've downloaded and move them into this folder. Again, don't unzip them.
Emma Witman/Insider
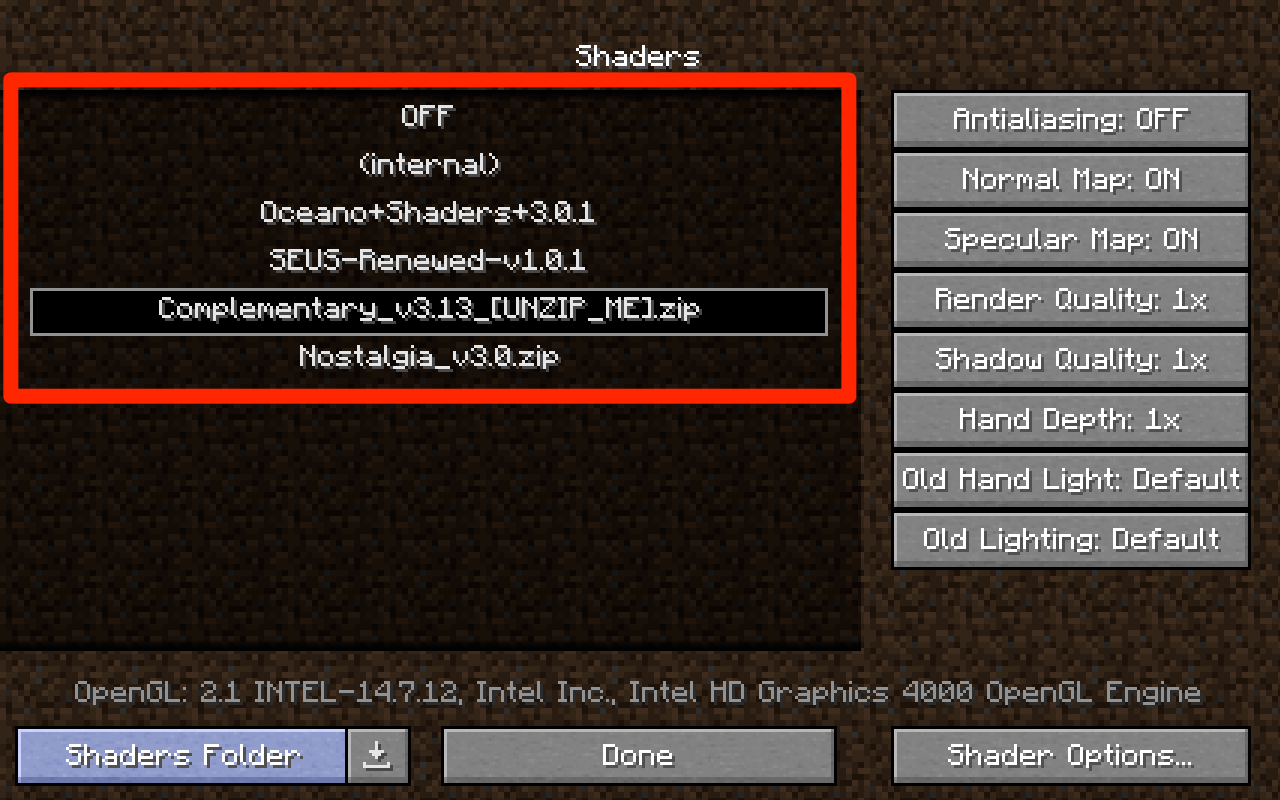
5. When you return to the Shaders page, you should see your newly-added shaders listed. If you don't, close"Minecraft"and open it again.
How to enable or disable 'Minecraft' shaders while playing
If you find that certain shaders don't play well with your computer, or you simply don't like how they look, here's how to enable or disable shaders while you're playing, without deleting the files outright.
1. While playing, press the "Esc" key to pull up the Menu screen.
2. Just like how you added the shaders, select "Options…" then "Video Settings…" and "Shaders…"
3. To change between shaders - you can only have one shader pack enabled at once - select the shader you'd like from the list of available options. Then, click "Done."
4. To disable shaders entirely, select "OFF" at the top of the Shaders page, and click "Done."
Emma Witman/Insider
