
Andia/Universal Images Group via Getty Images
- A Google Forms survey is a free tool that can be used for fun or professional research purposes.
- You can customize Google Forms questions and answers in many different ways.
- After you've created a survey using Google Forms, you can share it with others to collect their responses.
- Visit Insider's Tech Reference library for more stories.
Google Forms is a free and useful tool that enables you to create surveys for others to complete. Since you can customize questions and answer options, it's helpful for conducting research but can also be just for fun. Once you've created your survey, you can quickly share it through an email or link, or embed it into your website.
How to create a Google Forms survey
1. Go to forms.google.com and log in to your Google account if prompted to do so.
2. Click on the form labeled Blank – it's represented by a plus symbol.
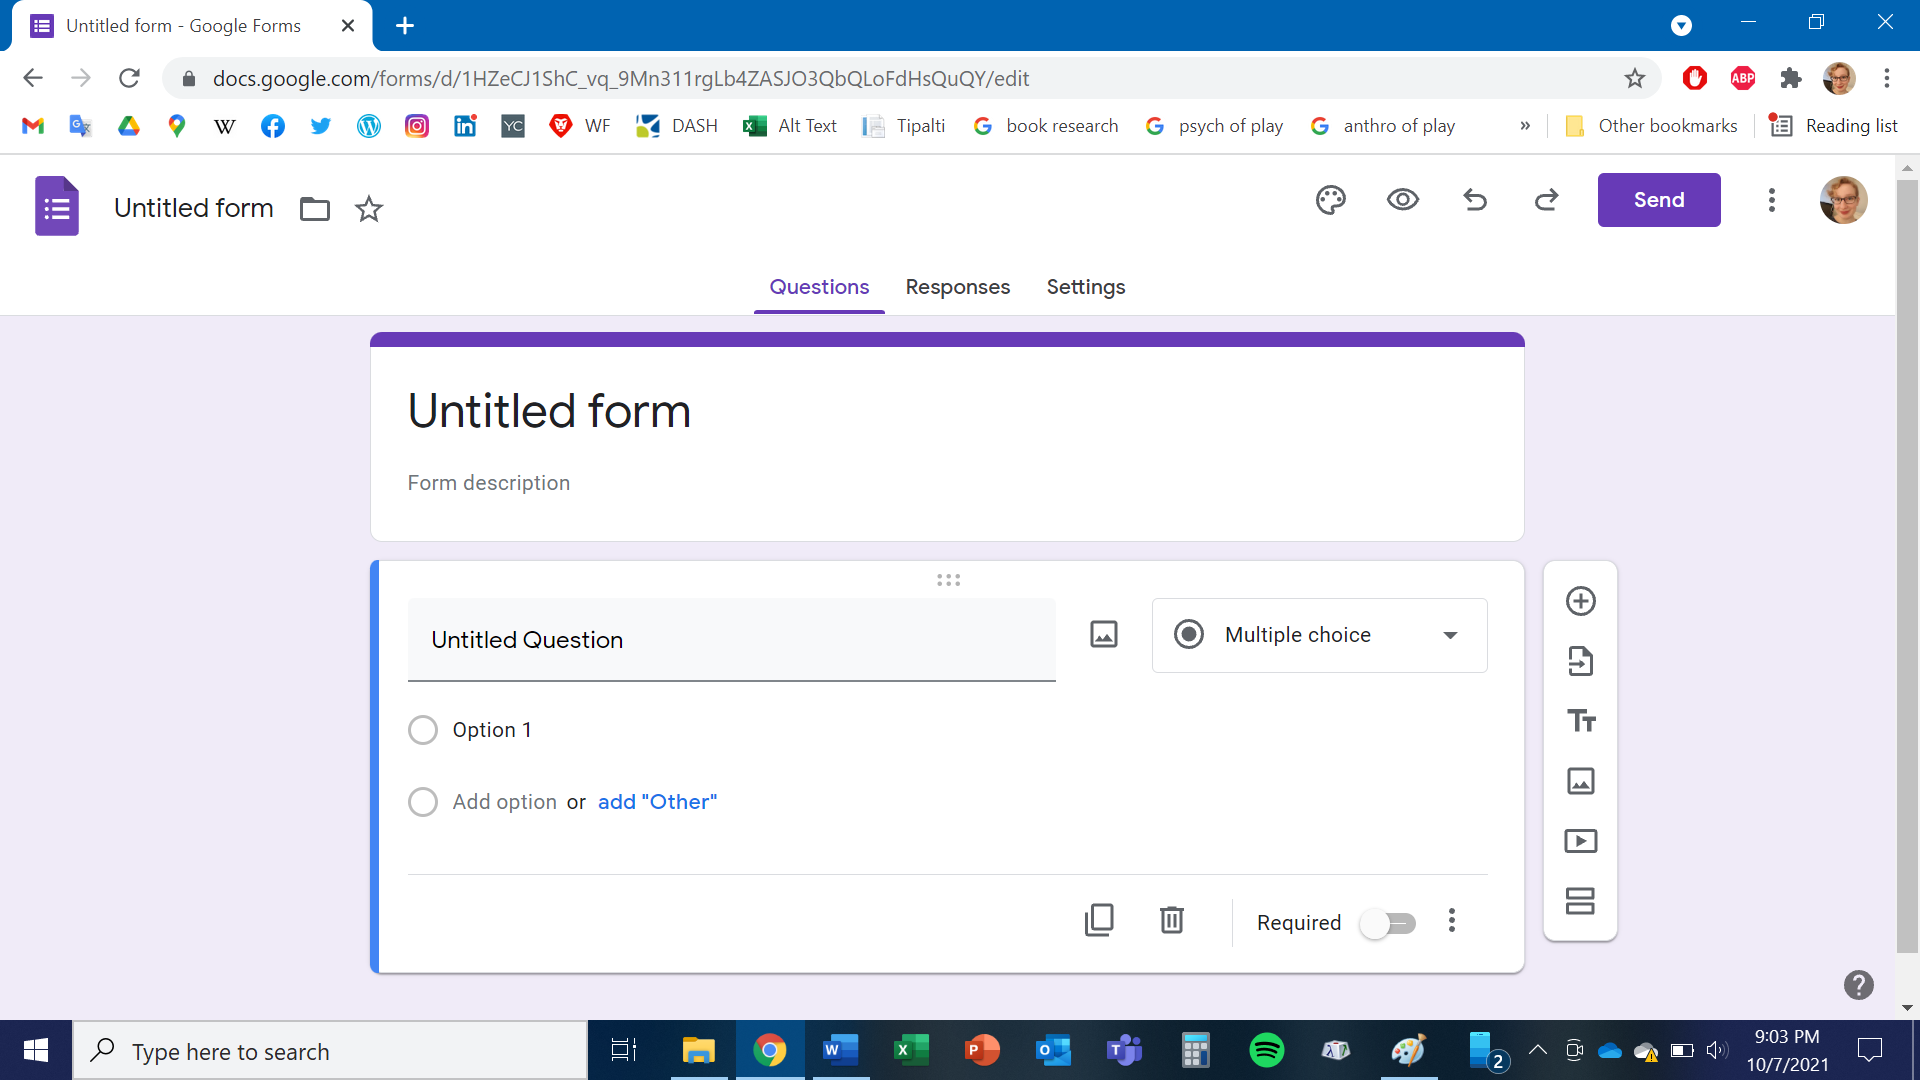
3. Click the field called Untitled form and type the title you want to use for the survey. You can also write a description of the survey by writing in the field directly beneath it, called Form description.
Chrissy Montelli
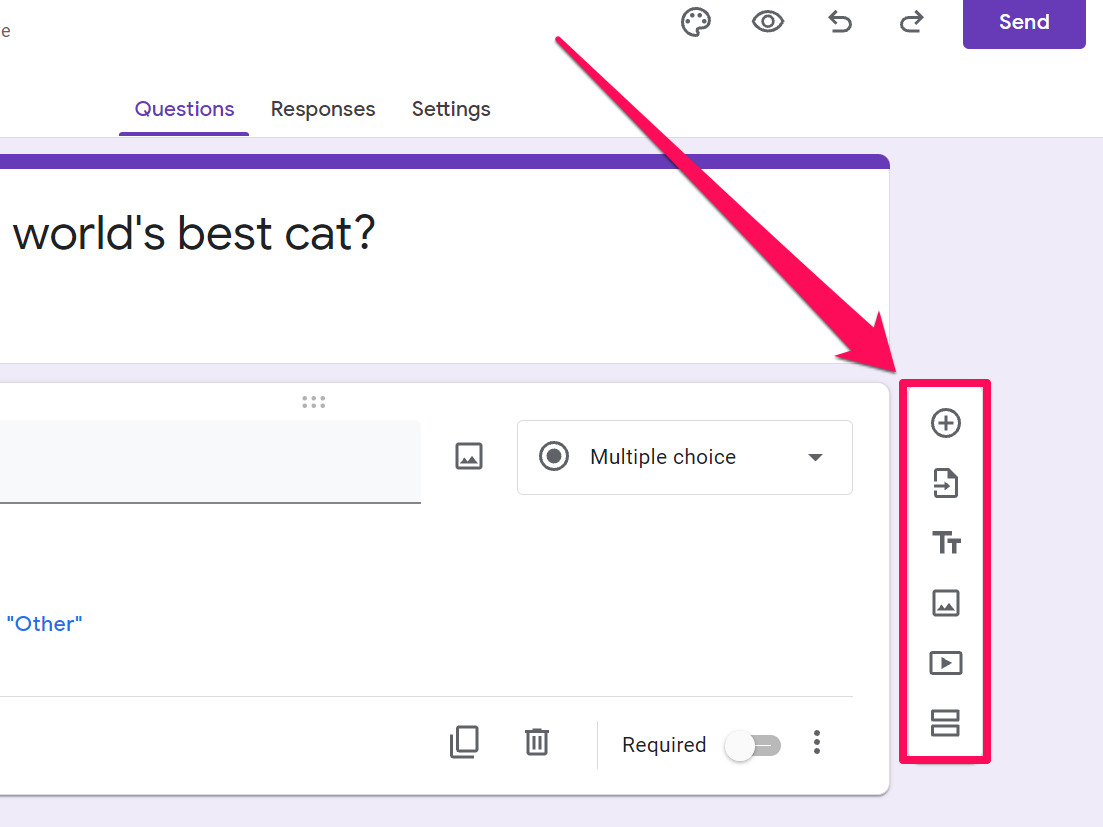
4. Once you title your survey, you can add questions by clicking on the icons on the right side of the screen. Here's a quick rundown of the icons and what they do.
Chrissy Montelli
- Circle with plus sign: Add a new question.
- Paper with arrow: Import questions from another source (such as another Google Form you created).
- A large and small T: Add a text box that includes a title and description without a question, such as providing additional context.
- A square with two small triangles: Add a new question that includes an image.
- A rectangle with one triangle inside: Add a new question that includes a video.
- Two parallel rectangles: Add a new section to the survey to differentiate it from other sections.
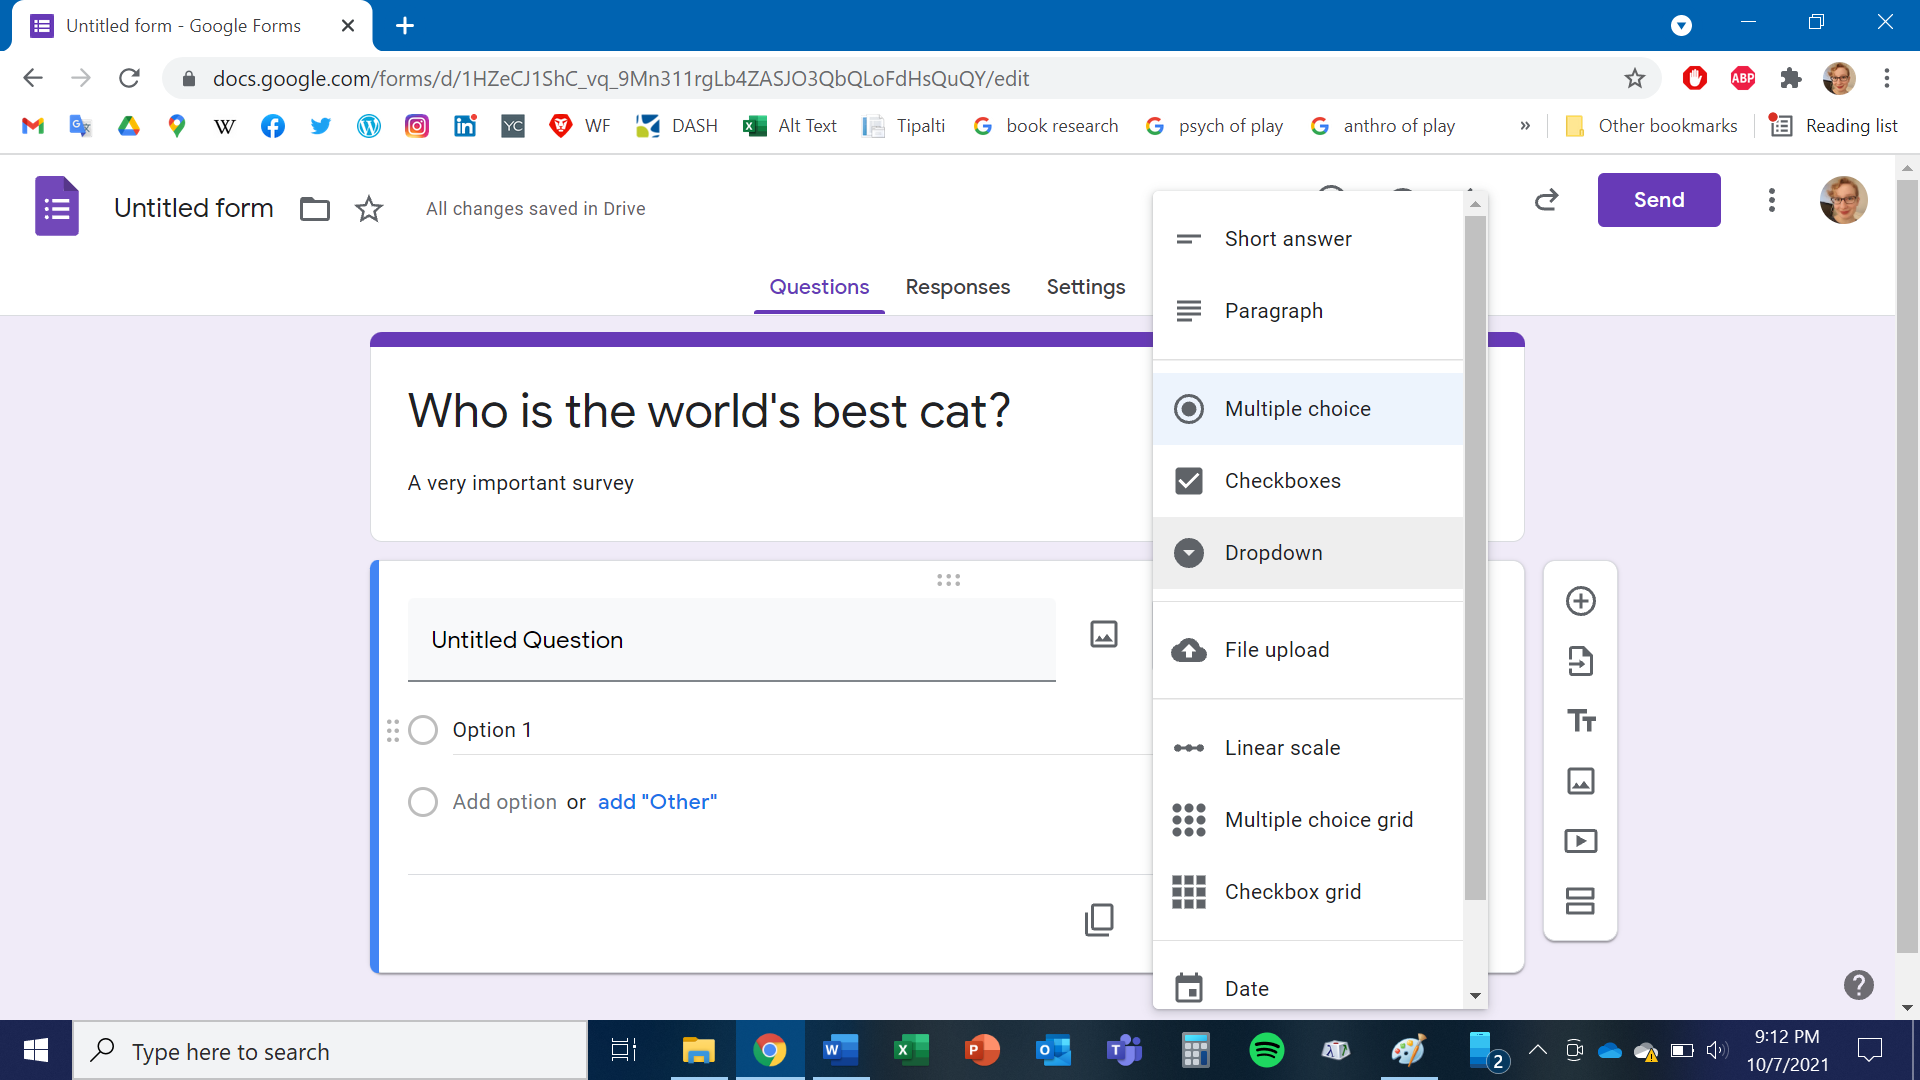
5. Depending on the type of question you're asking, respondents may answer in different ways, such as multiple choice or short answer. You can change the type of answer by clicking on a dropdown menu inside the question box and then clicking on the preferred answer type. Available answer types include:
Chrissy Montelli
- Short answer: A one-line answer that must be typed in.
- Paragraph: A paragraph-length answer that must be typed in.
- Multiple choice: Respondents are given multiple responses, but there is only one correct answer.
- Checkboxes: Respondents can select multiple answers from a list.
- Dropdown: The correct answer must be selected from a dropdown menu of options.
- File upload: The question must be answered by uploading an external file, such as a document or image.
- Linear scale: The respondent answers by selecting a point on a numeric or qualitative scale, such as a customer service survey.
- Multiple choice grid: The respondent must mix and match answers from a grid.
- Checkbox grid: The respondent can select multiple answers from a grid.
- Date: The answer must be a specific date.
- Time: The answer must be a specific time.
6. Once you add a type of question, you can write the question itself, as well as individual answer options. To do so, click on the respective field and type the text you want to use.
- If you want to delete an answer, click on the X icon to the right of that answer.
- If you want to delete a question, click on the trash can icon at the bottom of the question box.
- To duplicate a question, click on the Copy icon to the left of the trash icon.
- You can also click on the slider labeled Required to make responses required or optional.
- For additional settings, click on the three vertical dots.

Chrissy Montelli
7. Repeat the process until you've created all the questions you need for your survey.
How to share your Google Forms survey
Once you finish creating your survey, you can share it with others in a few different ways. Click the Send button in the upper-right corner of the form to get started.
Email the survey to specific recipients
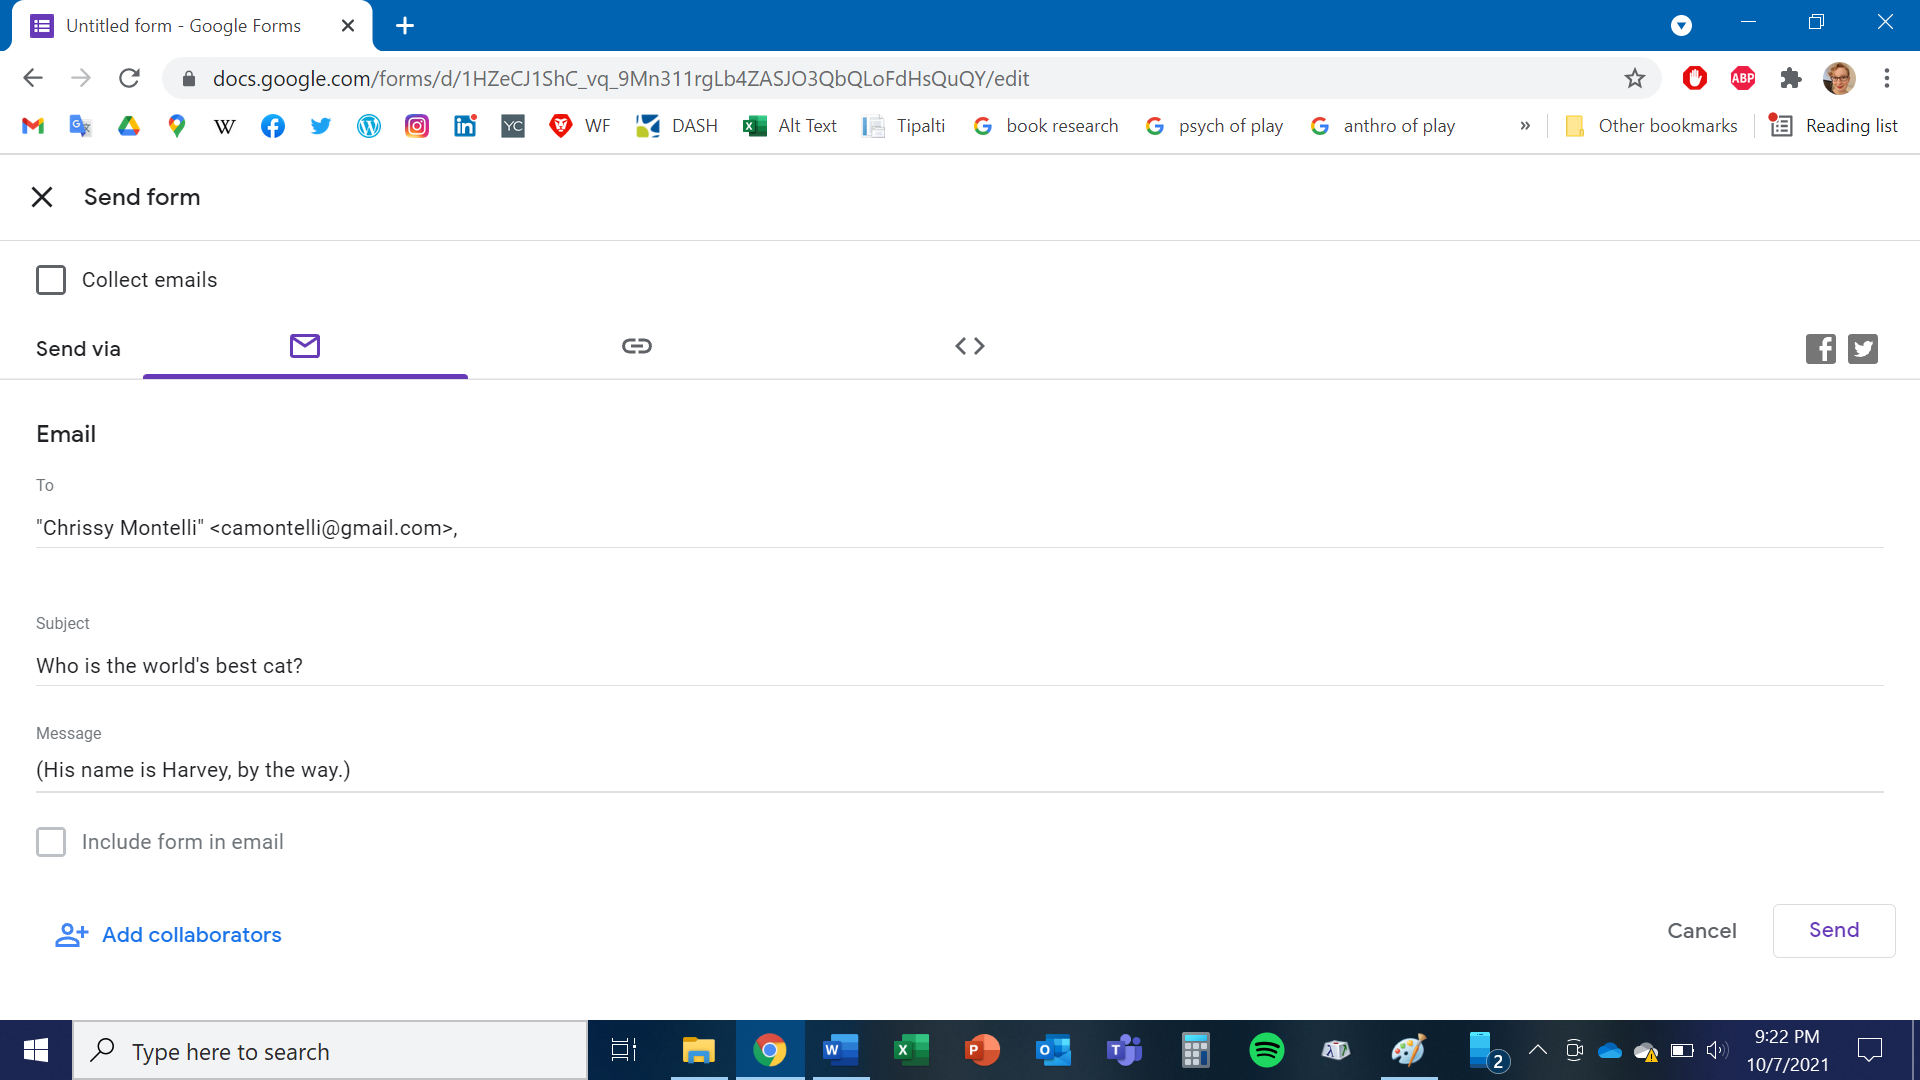
With the Email tab selected (first from the left), click in the field labeled To and type in the email address(es) of your intended survey recipient(s). If you prefer, you can include a message as well. Click Send in the bottom-right corner once you're finished, and the survey will be sent to all of the recipients.
Chrissy Montelli
Copy a link to the survey and post it elsewhere
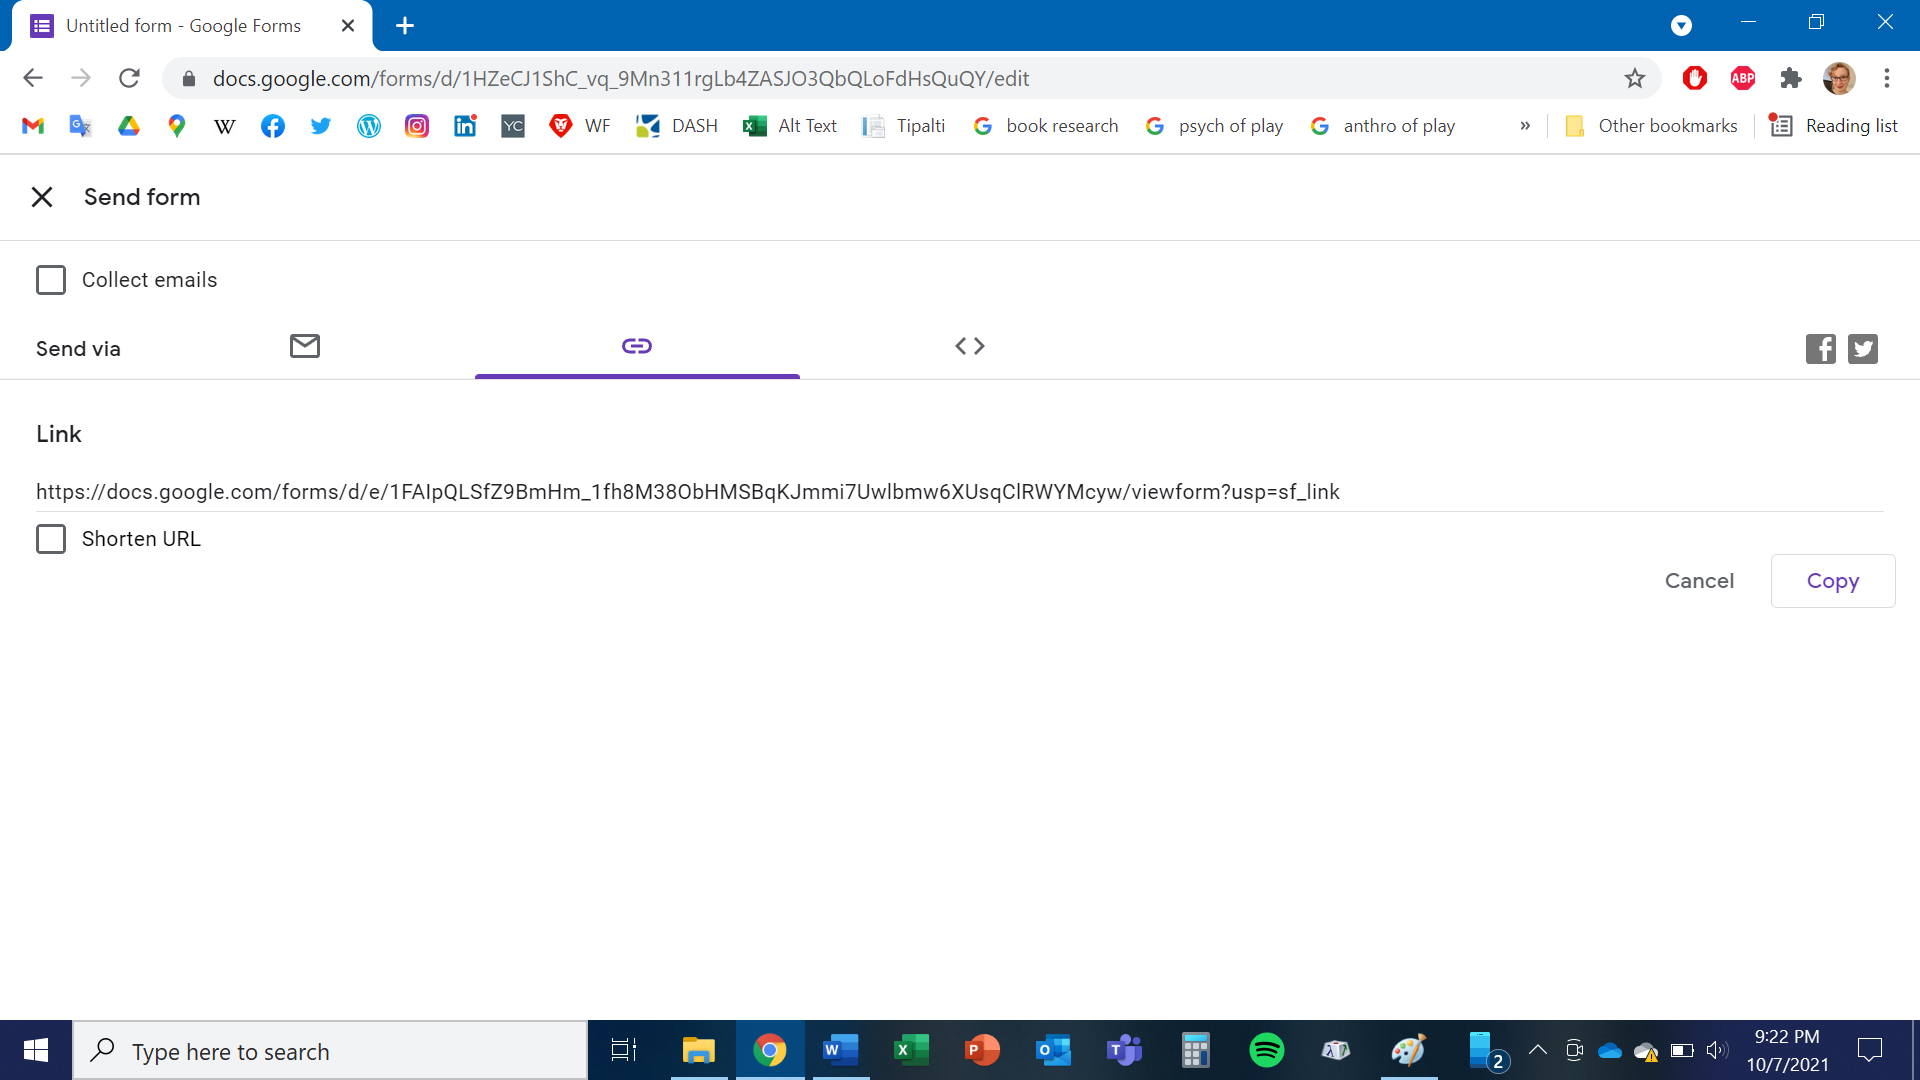
With the Link tab selected (second from the left), click on the Copy button in the bottom right corner of the screen. If you want a shorter version of the link, click on the field next to Shorten URL so that a check mark appears, and then click Copy. From there, you can paste the link elsewhere, such as on social media, and anyone who clicks on the link can answer your survey.
Chrissy Montelli
Embed the survey into your website
This one is a little more complicated, as it involves coding the survey into your personal website or blog. With the Embed HTML tab selected (third from the left), click Copy in the bottom-right corner of the screen. This will copy the survey's code so that it can be embedded in the code of your website or blog, which you'll have to do on the website's host site (such as WordPress).
