Henry Nicholls/Reuters
- To change the IP address on your Android device, you’ll first need to find an available IP address on your network.
- Once you’ve found an available IP address, you can change your Android’s IP address by changing your Wi-Fi settings.
- You’ll need to give your Android device a “Static” IP address, and then enter the new IP address.
- Visit Business Insider’s Tech Reference library for more stories.
If you want to host a server using your Android device, you’ll need to change your Android’s IP address to a static IP. Here’s how to do it.
How to find an available IP address for your Android
You need to use a Windows computer to find an available IP address before you can change your Android’s IP.
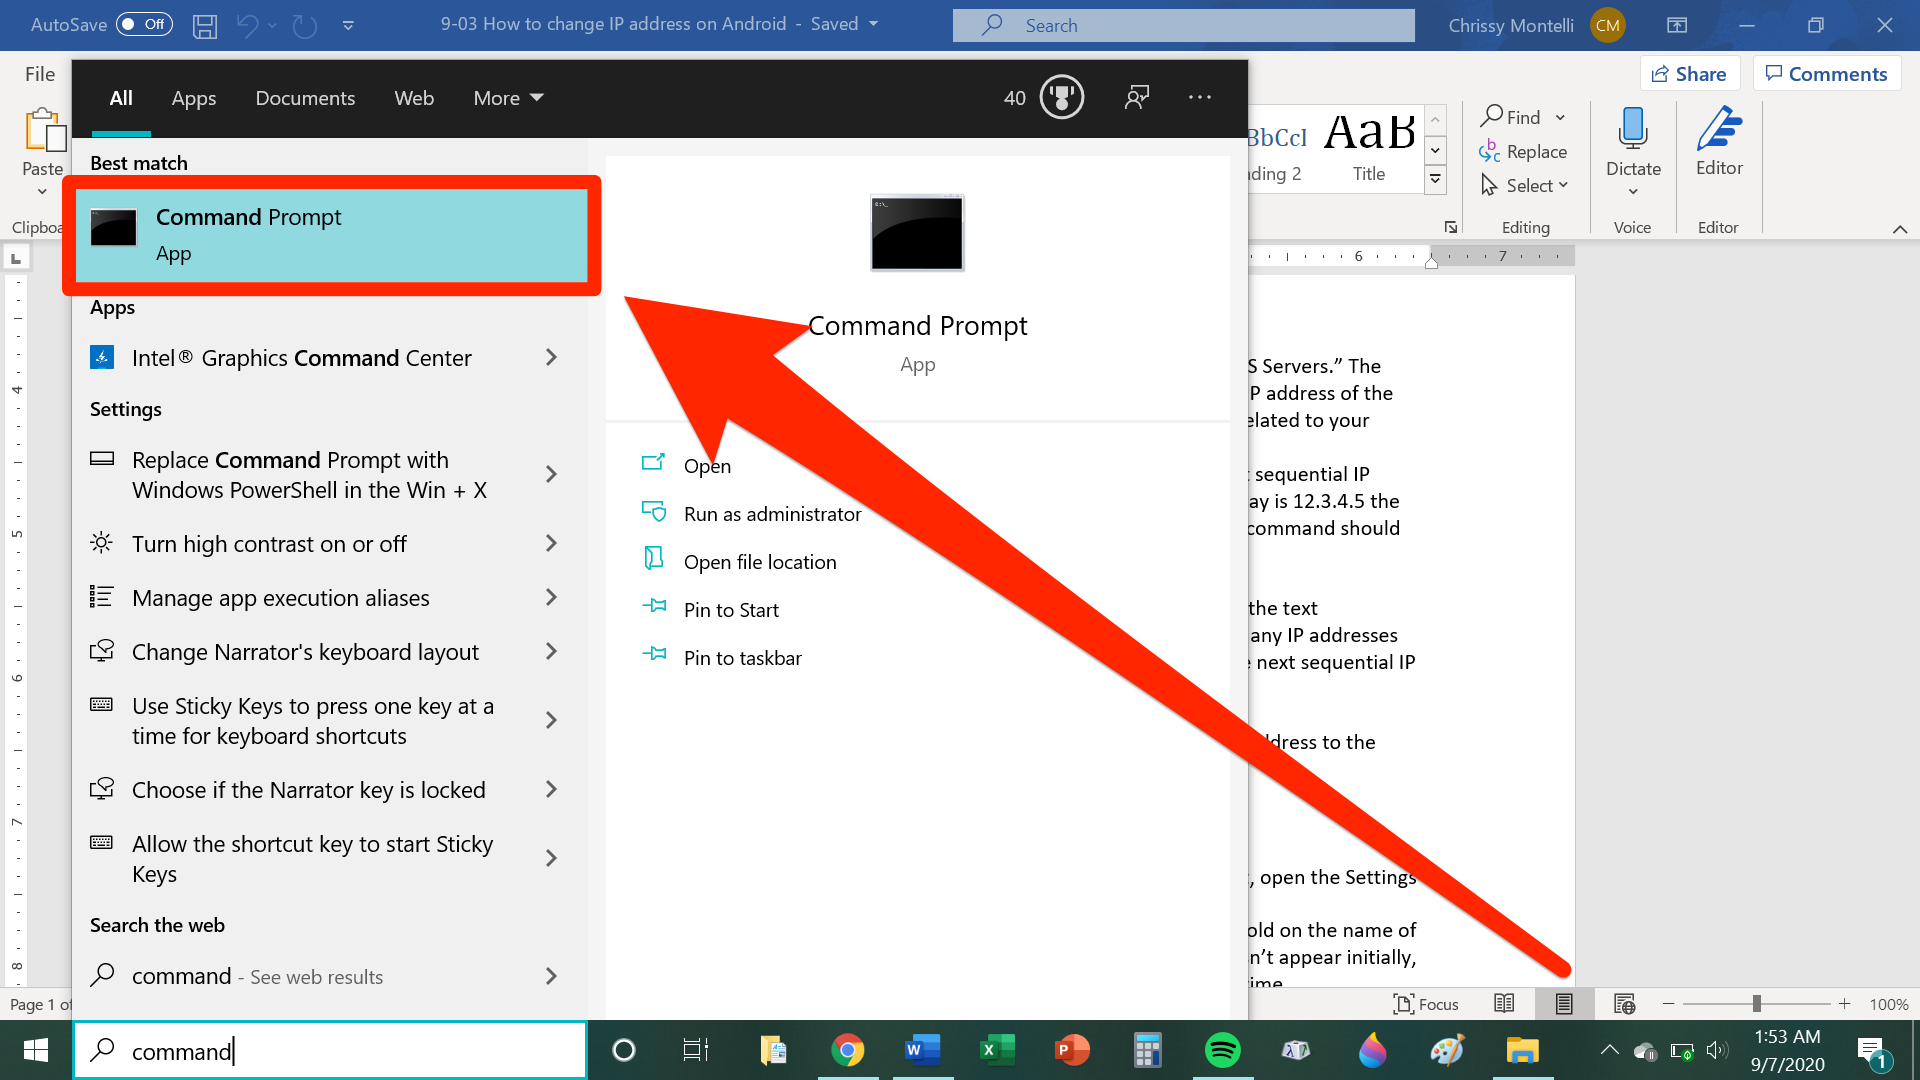
1. On a Windows computer, click on the Start menu and type cmd to make the Command Prompt appear. Click on the Command Prompt once it is visible.

Chrissy Montelli/Business Insider
2. In the Command Prompt, type the following command and then press Enter:
ipconfig/all
3. Look for the information called "Default Gateway," "IPv4 Address," and "DNS Servers." The Default Gateway is your network's IP address, while the IPv4 Address is the IP address of the computer you're typing commands from. The DNS Servers are two servers related to your internet service provider and internet usage.
4. To find an available IP address, type the "ping" command followed by the next sequential IP address following your Default Gateway. For example, if your Default Gateway is 12.3.4.5 the next sequential IP address would be 12.3.4.6. Using this example, your ping command should look like this:
ping 12.3.4.6
Press the Enter key when you are finished.
5. If any IP address appears with the text "Destination host unreachable," that IP address is available. If you don't see any IP addresses showing "Destination host unreachable," repeat the ping command with the next sequential IP address, i.e. 12.3.4.7 and so on, until you find an available IP.
Once you've found an available IP address, you can change your Android device's IP address.
How to change the IP address on your Android device
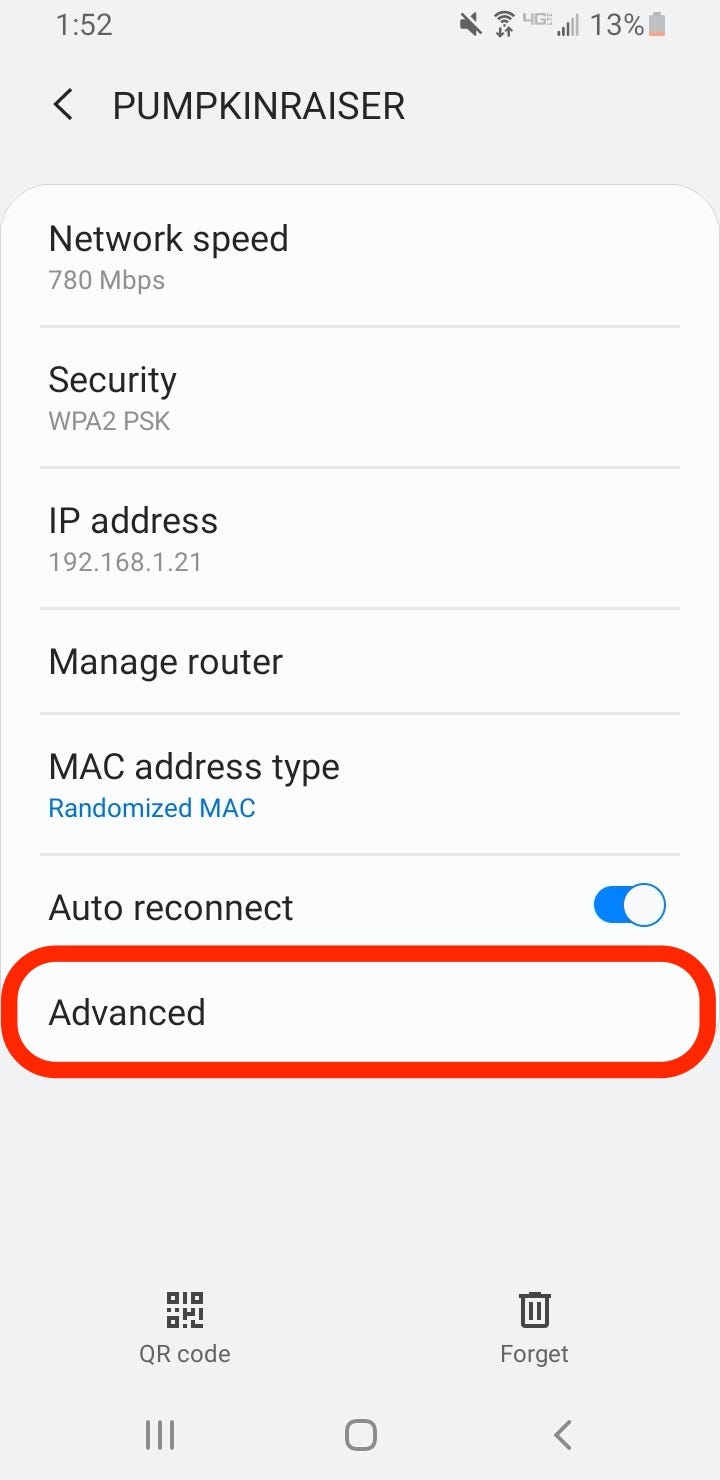
1. Open your Android device's Wi-Fi settings. If you're not sure where to find it, open the Settings app, then tap on "Network & Internet," then tap on "Wi-Fi."
2. If you're already connected to the Wi-Fi network you want to use, tap and hold on the name of that network. When "Modify network" appears, tap on it. If this option doesn't appear initially, tap on the Wi-Fi network, tap "Forget network," and try the step one more time.
3. Tap "Advanced settings."

Chrissy Montelli/Business Insider
4. Use your finger or stylus to scroll down to IP Settings. Tap on "DCHP" and then tap "Static" in the drop-down menu that appears.
5. In their respective fields, type the available IP address that you discovered, your Default Gateway, and the two DNS servers. You can change the other settings as well, or leave them in their default states. When you're done, tap "Save."
Related coverage from Tech Reference:
-
How to get dark mode on your Android phone or tablet in 2 ways, and help reduce eye strain
-
How to block a number on any Android phone to stop receiving unwanted calls
-
How to add Bitmoji to your Android keyboard and use the personalized emoji library in texts and other apps
-
How to activate voice controls on your Android device, and make Google searches or open apps with your voice
-
How to add widgets on an Android device and resize them on your home screen
