
JGI/Tom Grill/Getty Images
- You can add a header or footer in Google Docs from the 'Insert' menu.
- Google Docs automatically adds superscript numbers to your document when you insert a footnote in the document footer.
- While you can add and remove headers and footers using Google Docs on the web, there's no way to completely remove them on the mobile app.
- Visit Insider's Tech Reference library for more stories.
Many kinds of documents, including business reports, academic papers, and manuscripts, all make use of headers and footers – sections at the top and bottom of the page that are different from the main content.
You might use headers and footers for section titles, author information, page numbers, footnotes, the date, or other info that needs to stay consistent across multiple pages.
Here's how to create and edit headers and footers in Google Docs.
How to add a header or footer in Google Docs
There are a wide variety of things you can place in a header or footer. Google Docs treats headers and footers as separate sections within the page, and creating them is a very simple process.
On desktop:
1. Go to Google Docs in a web browser.
2. Create a new document or open an existing one to begin adding headers or footers.
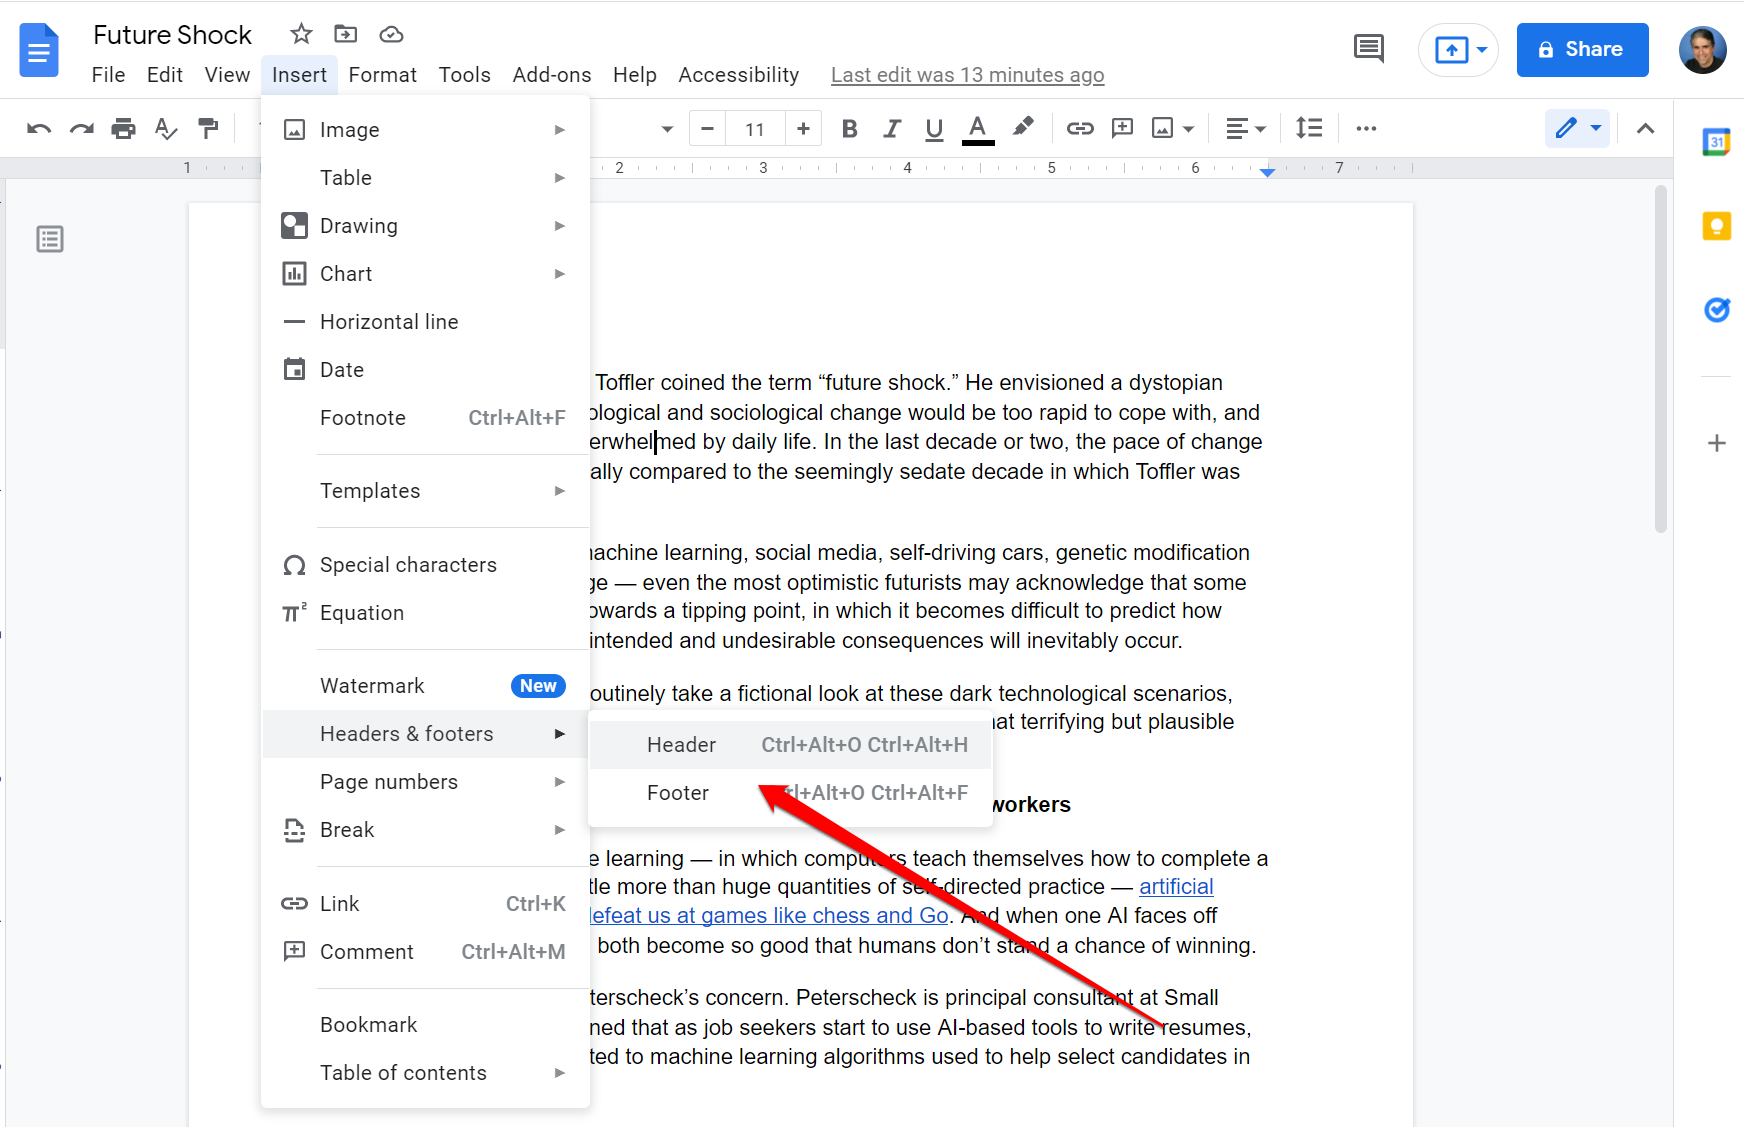
3. In the toolbar menu at the top, click Insert, then click Headers & footers.Choose either Header or Footer.
Dave Johnson
You can also use keyboard shortcuts to add a header or footer:
Header
- On a Windows or ChromeOS computer: Press Ctrl + Alt + O or Ctrl + Alt + H.
- On a Mac: Press Ctrl + Cmd + O or Ctrl + Cmd + H.
Footer
- On a Windows or ChromeOS computer: Press Ctrl + Alt + O or Ctrl + Alt + F.
- On a Mac: Press Ctrl + Cmd + O or Ctrl + Cmd + F.
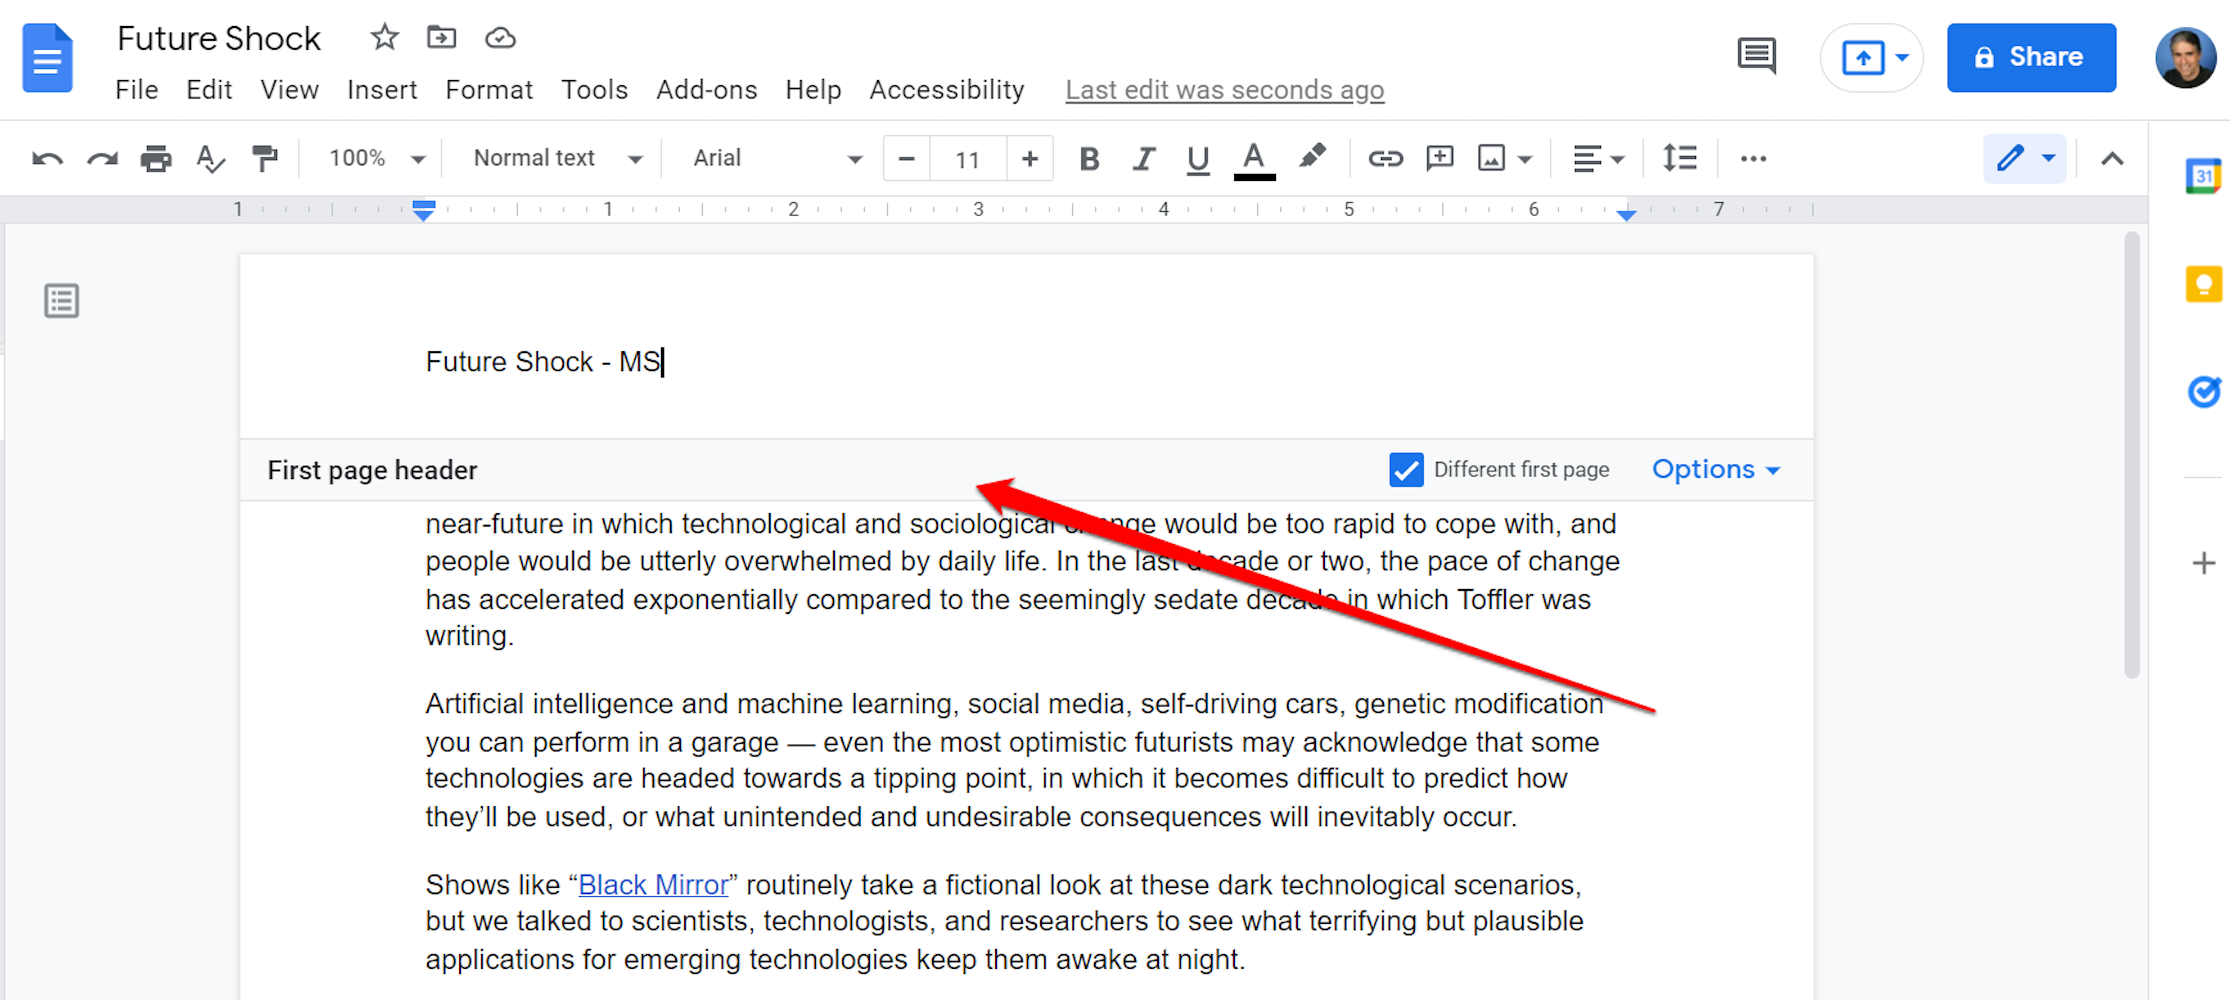
Once you've added a header or footer to your document (you can insert either one or both, depending on your needs), you should see the banner separating the sections and the controls to set header and footer options. If you don't see it, double-click text in the header or footer to edit it, and the banner will appear.
Dave Johnson
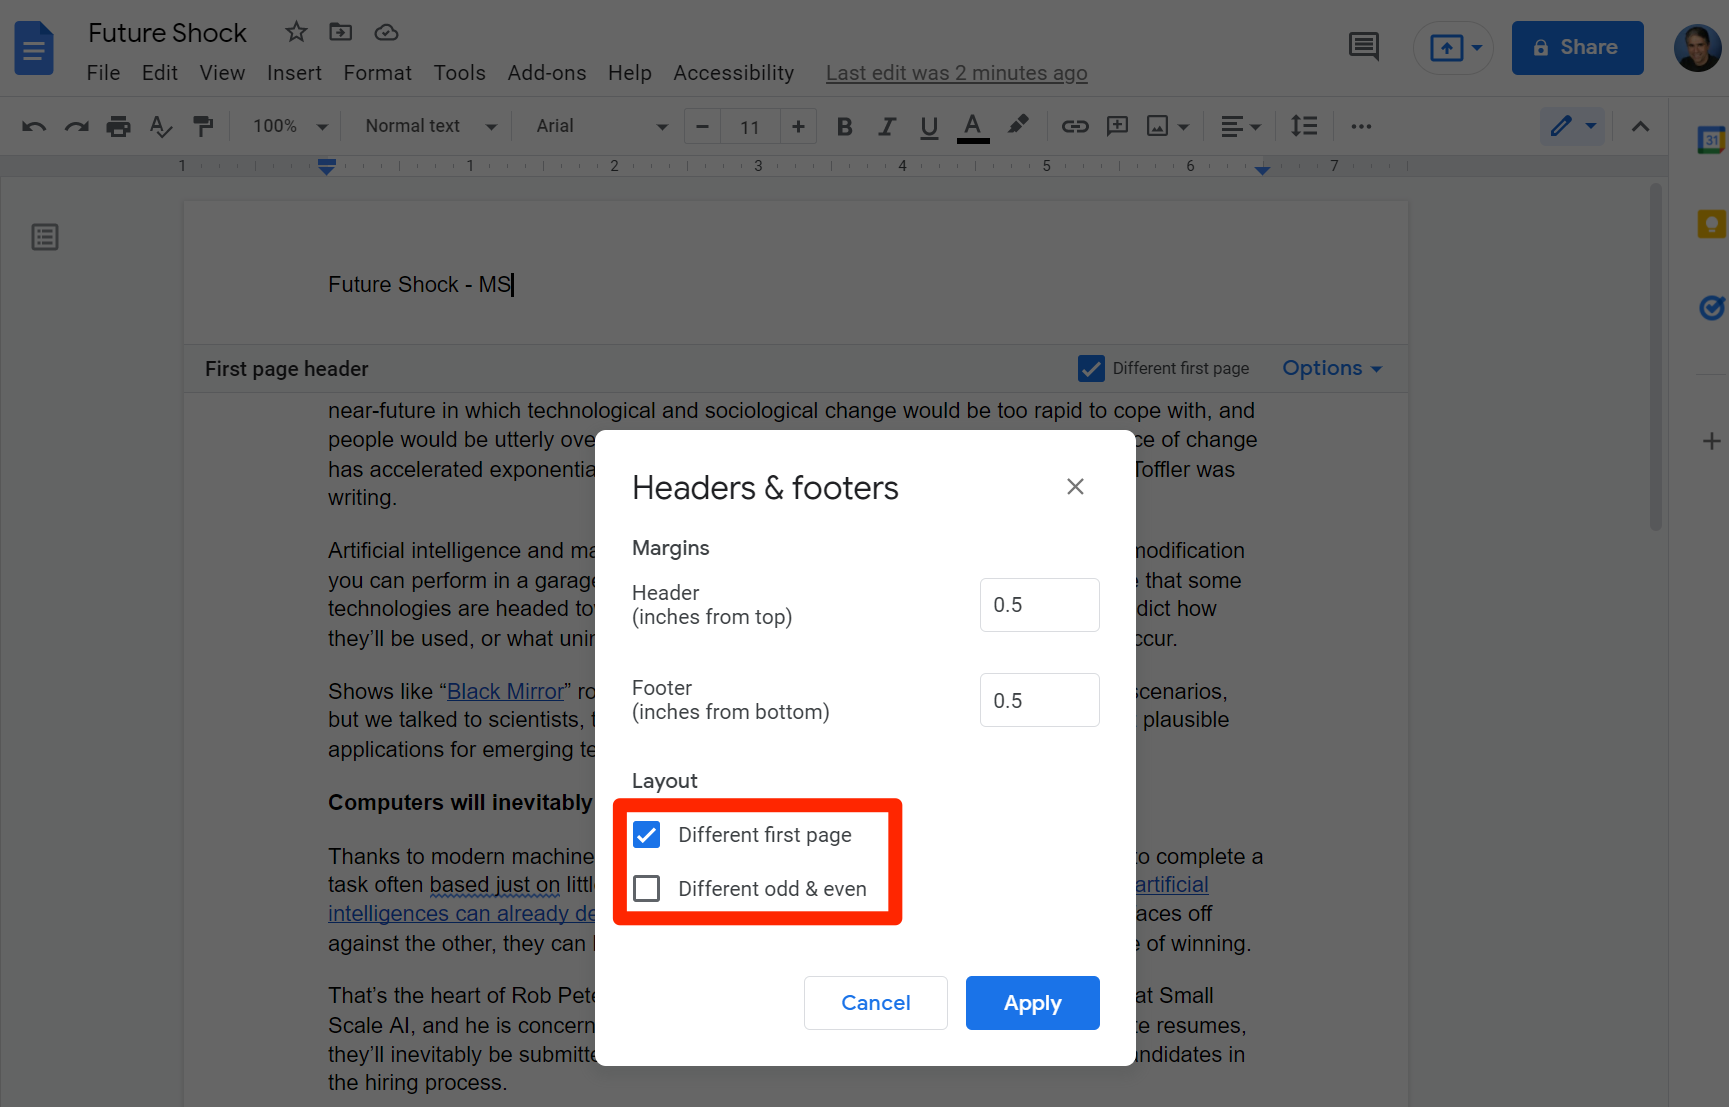
By default, headers and footers are the same on every page. But if you want them to be different, Google Docs gives you several choices. Click Options in the header banner or footer banner and then click Header format or Footer format. In the Headers & footers options window, you can customize the document:
- You can modify the margin above the header and below the footer.
- Click the checkbox for Different first page to make the headers and footer display different content on the first page than every other page in the document.
- Click the checkbox for Different odd & even to make the headers and footer display different content on even pages than odd pages (this is often the most useful for documents that will be printed and bound in a way so odd and even pages face each other).
Dave Johnson
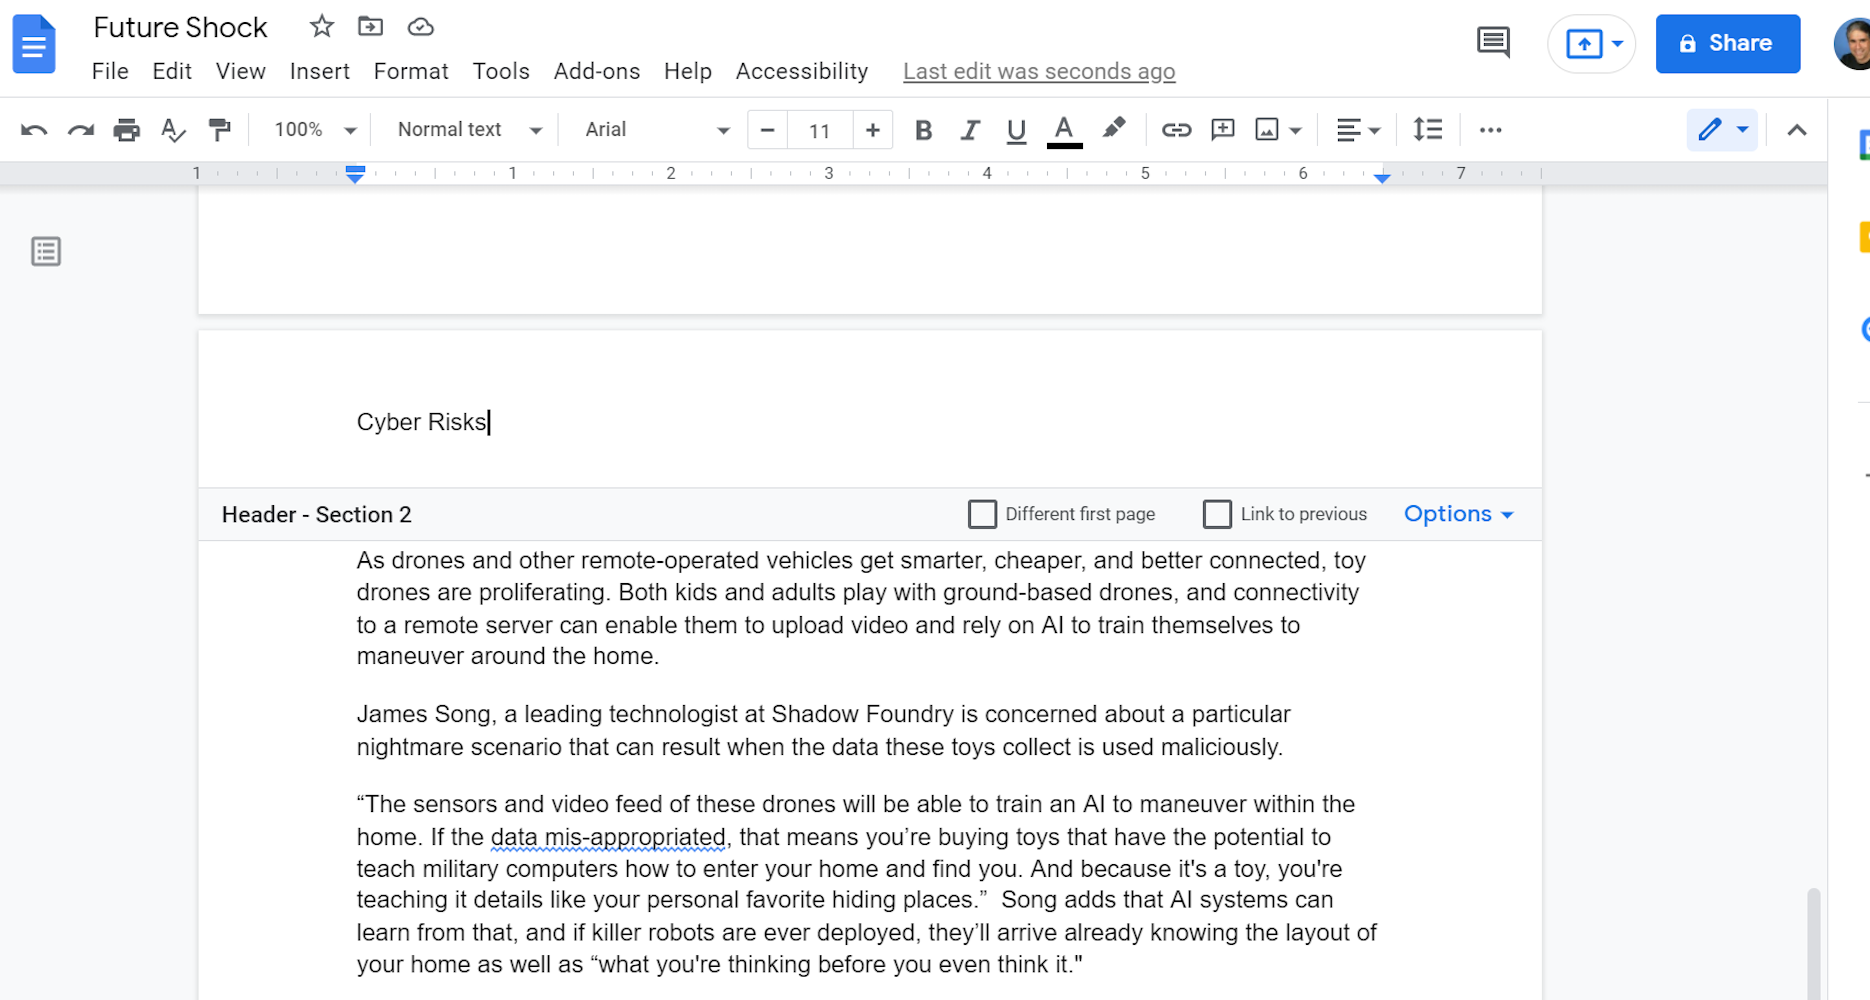
If you have a very complex document, you can make the headers and footers change as frequently as you like - they can be different on every page, if you want. You can do that by dividing the document into sections. Here's what to do:
1. On the page before you want the header and footer to change, place the cursor and click Insert, Break, Section Break (next page).
2. Go to the next page and double-click the text in the header.
3. Clear the checkmark from Link to previous.
4. Change the text in the header.
Dave Johnson
Now the header content is different in the new section. You can add as many sections as you like, and each one can have unique headers and footers.
On mobile:
Even though the Google Docs mobile app isn't as sophisticated as Google Docs on the web, you can still use it to add a header and footer to your document. The process is the same on both iOS and Android.
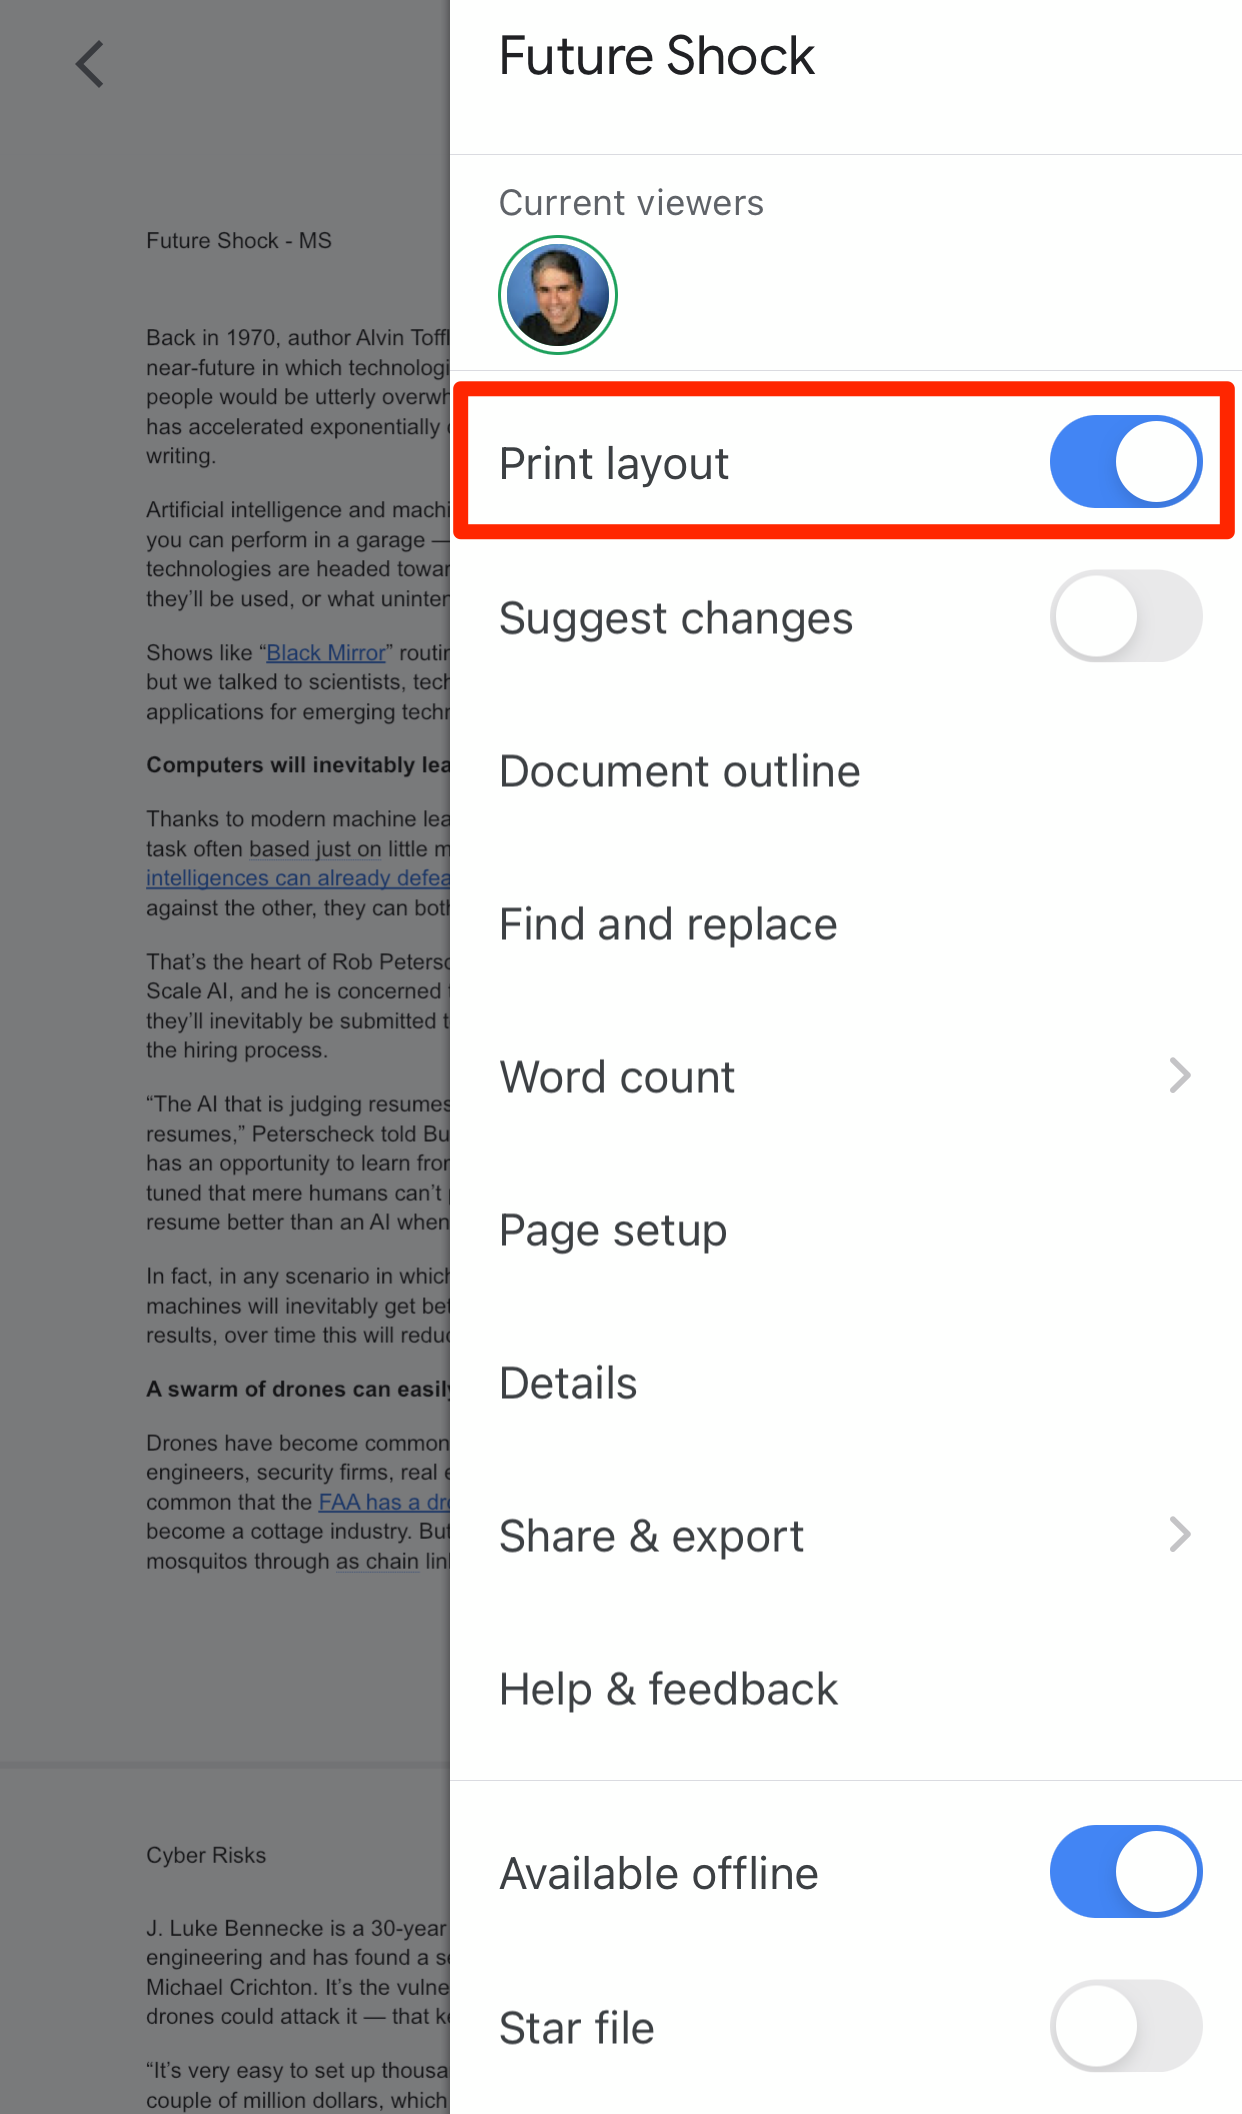
1. Open the Google Docs app and open a document. If you're not already in edit mode, tap the pencil icon to start editing.
2. In the top-right, tap the three-dot icon.
3. Turn on Print Layout by swiping the button to the right.
Dave Johnson
4. Tap the very top of the page and type to create a header. Likewise, tap the bottom of the page and type to create a footer.
How to insert header page numbers in Google Docs
Headers and footers are especially good for inserting common document features like page numbers without interrupting the flow of your main content.
Because page numbers are so common, inserting page numbers in Google Docs automatically sets up a header or footer even if you hadn't previously created one.
On desktop:
1. Open a document in Google Docs.
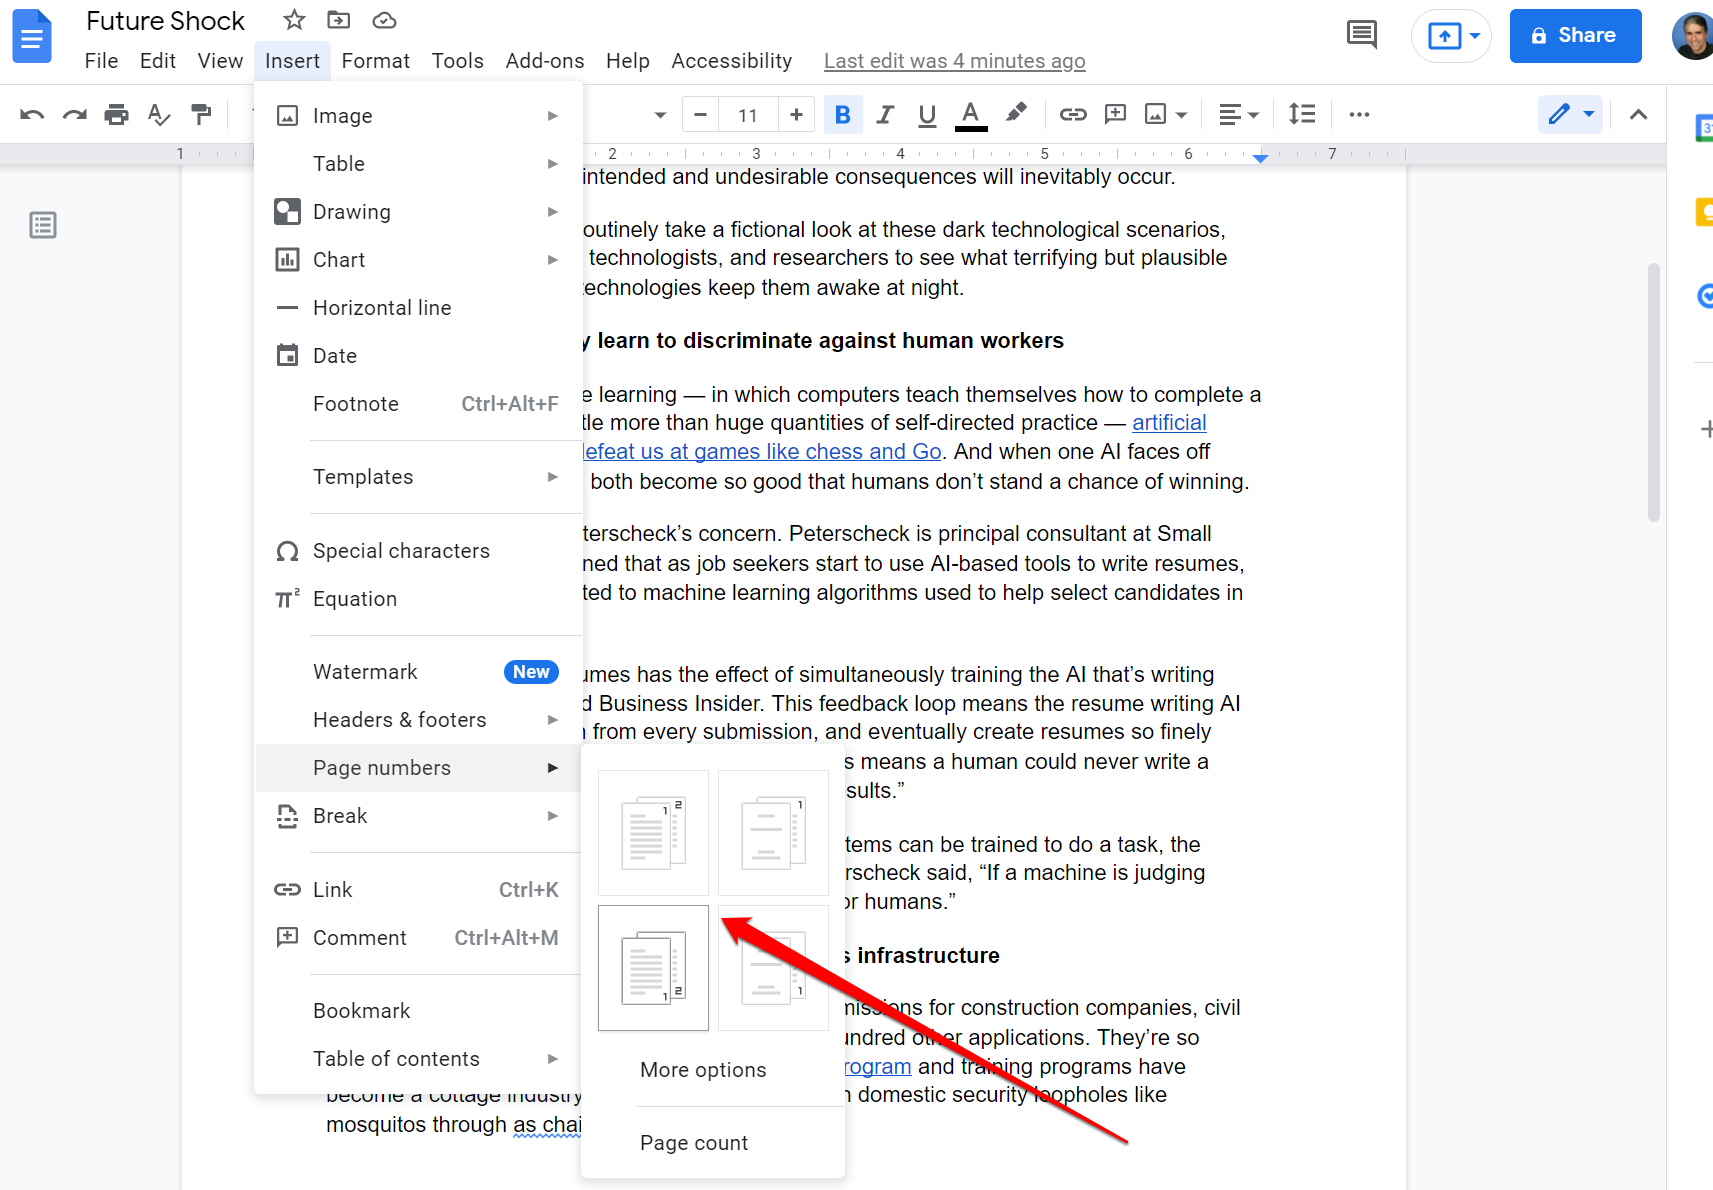
2. Click Insert, then hover your cursor over Page number.
3. In the fly-out menu, choose where you want the page numbers to appear. You can place them in the header or footer, and choose to skip numbering the first page. If you haven't already added a header or footer to your document, Google Docs will make one for you automatically.
Dave Johnson
You can customize page numbers in a few important ways:
- By default, page numbers start at 1 on the first page, but you can skip the first page and have the page numbering start at 2 on the second page. To do that, click Insert, Page numbers, then click More options. Clear the checkbox next to Show on first page.
- You can start the numbering at any number. In the More options dialog box, enter the number you want in the Start at field.
- You can move the numbering from header to footer in the Position section of the More options dialog box.
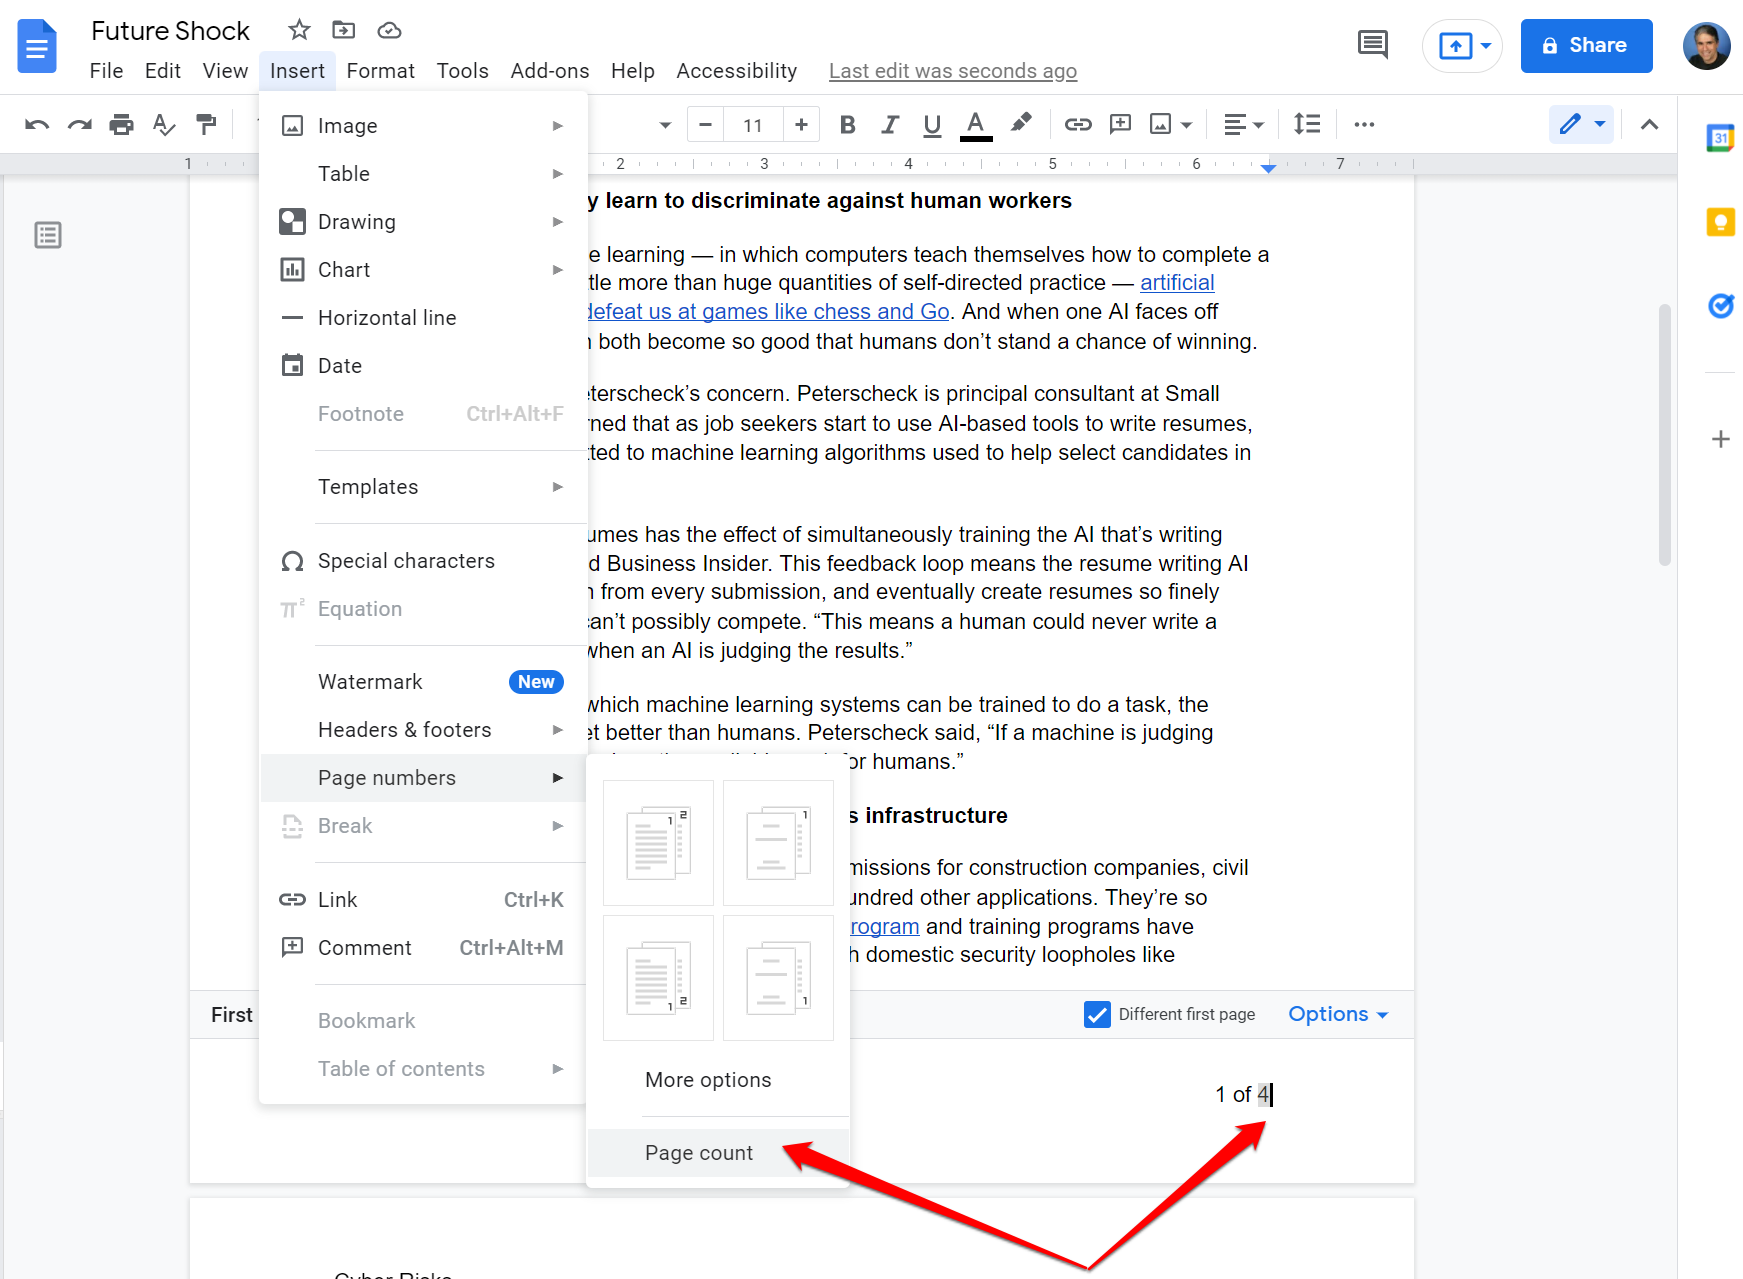
You can also show the page count of your document. This can appear anywhere - in the header, footer, or even in the body of the page. Most often, this is displayed with the page number, as in "Page 3 of 10." To do that in Google Docs:
1. Insert a page number in the header or footer of the document.
2. Double-click the page number so you can edit the header or footer.
3. After the page number, type "of."
4. Click Insert, Page numbers, then choose Page count.
Dave Johnson
On mobile:
You can also add page numbering to your Google Doc using the mobile app, and it works the same on iOS and Android.
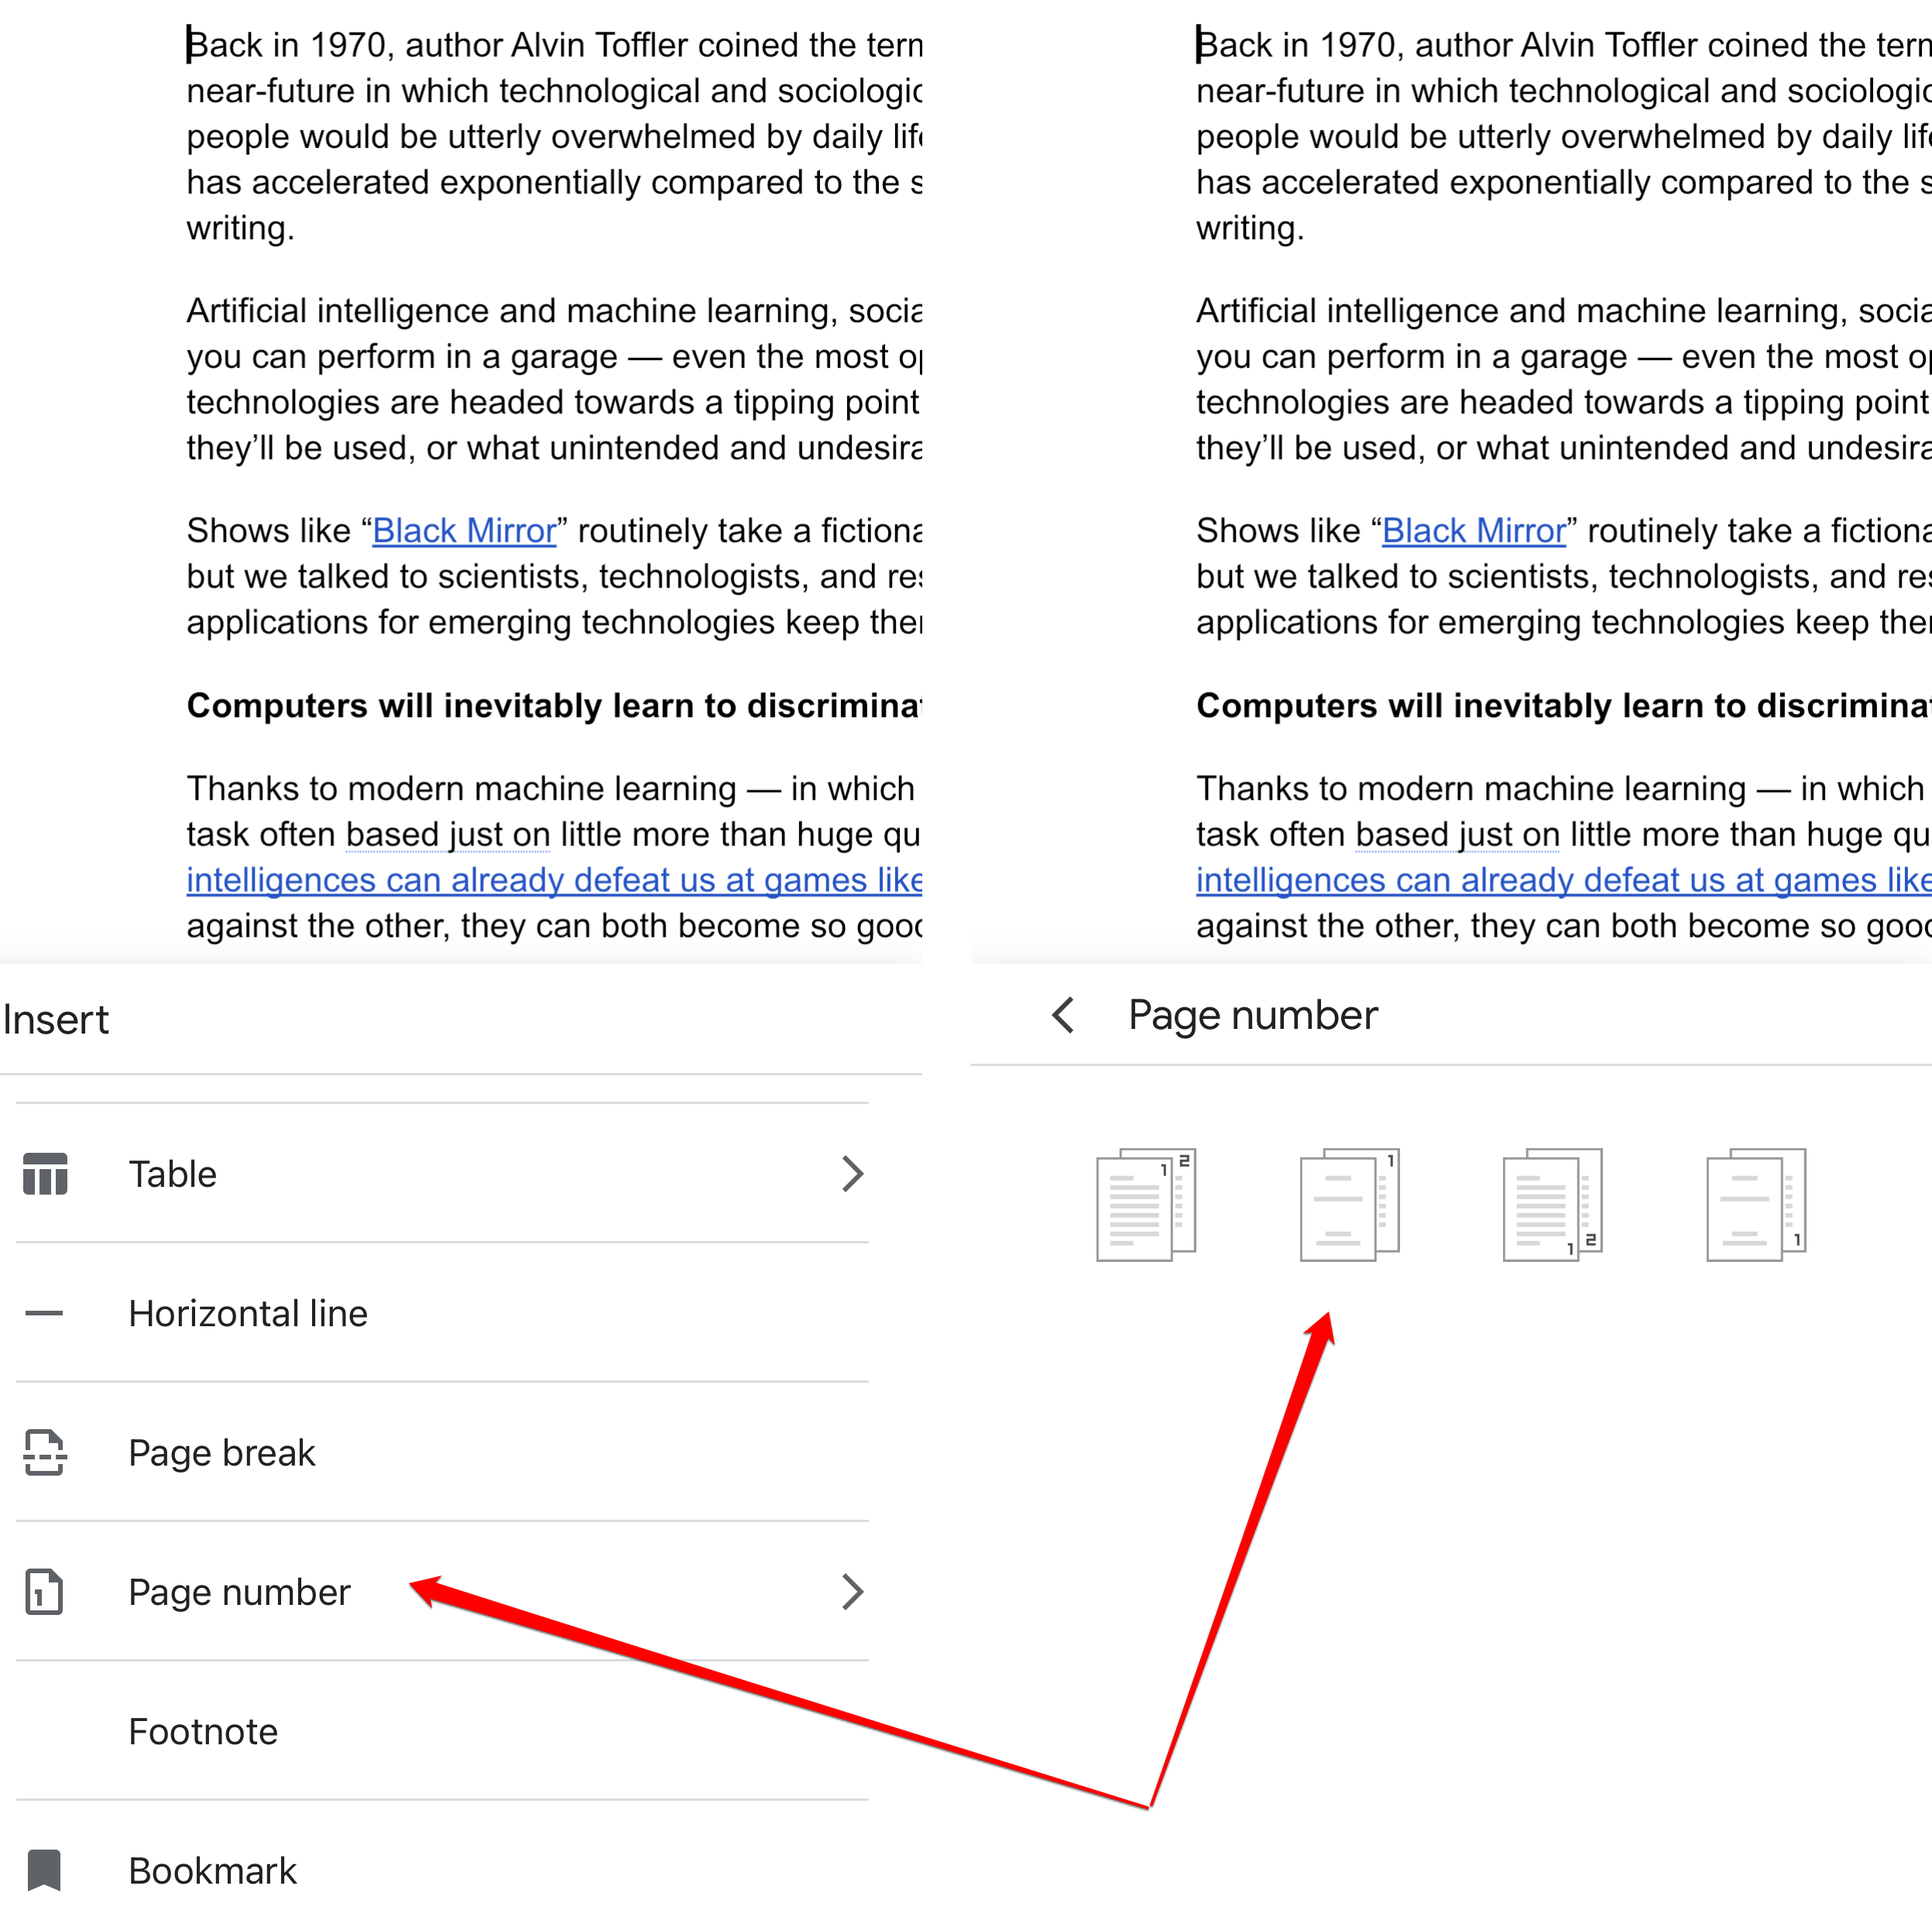
1. Open the Google Docs app and open a document. If needed, tap the pencil icon to start editing.
2. At the top-right, tap the plus + icon to open the Insert menu.
3. Tap Page number, then choose the style of page numbering you want (in the header or footer, and whether you want to skip numbering the first page).
Dave Johnson
How to add a footnote in Google Docs
One of the most common uses for a footer - perhaps aside from page numbering - is for footnotes. You can insert footnotes with just a click.
On desktop:
1. Open a document in Google Docs.
2. Place the cursor where you want a footnote to appear in your document, such as at the end of a word or at the end of a sentence.
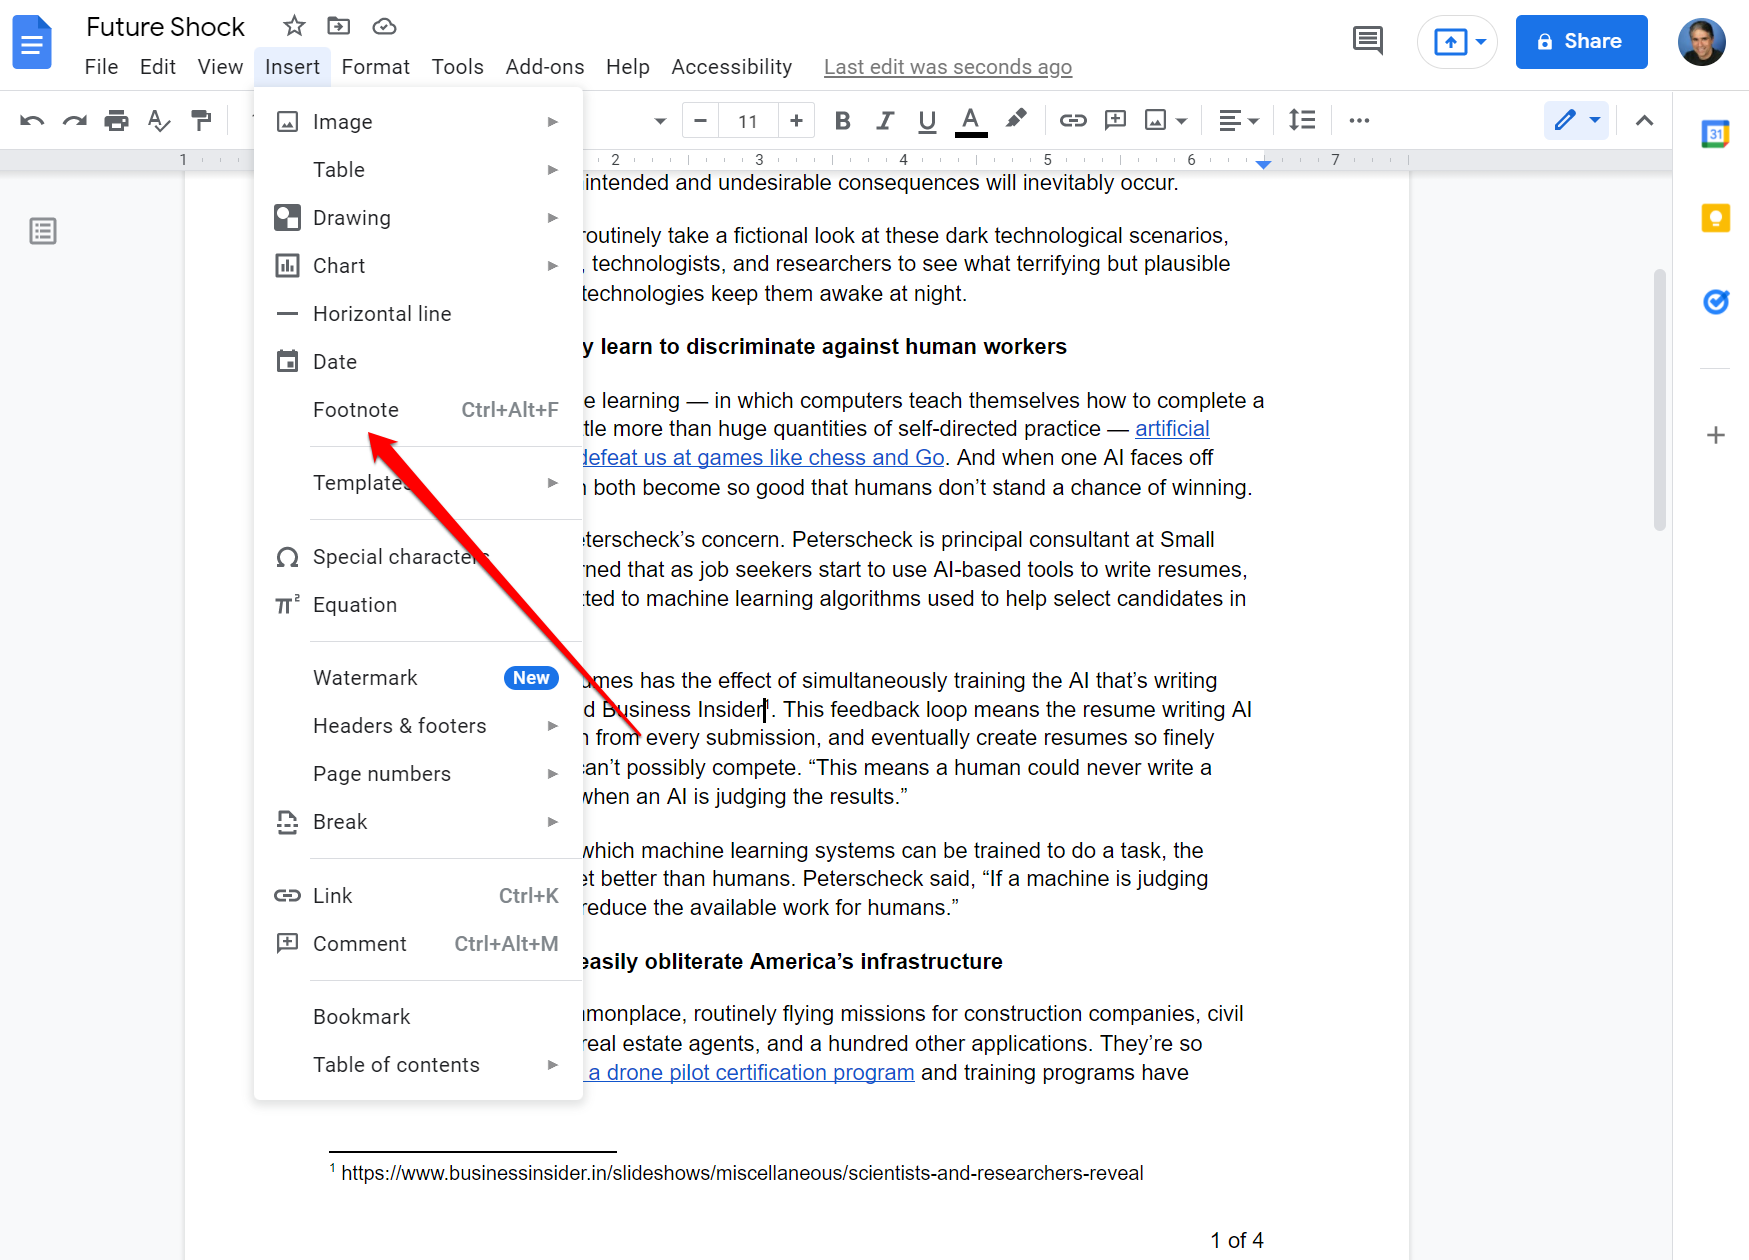
3. Click Insert, then Footnote.
Dave Johnson
4. You should see a superscript appear at the cursor and also in the footer on the same page. Type your footnote and then return to writing your document.
On mobile:
1. Open the Google Docs app and open a document. If needed, tap the pencil icon to start editing.
2. Place the cursor where you want a footnote to appear in your document.
3. At the top-right, tap the plus + icon to open the Insert menu.
4. Tap Footnote.
5. You should see a superscript appear where the cursor was located and also in the footer on the same page. Type your footnote and then return to writing your document.
How to remove a header or footer in Google Docs
If you add a header but later decide you don't want it in your document, it's easy to remove, but only if you're using Google Docs in a browser.
1. Open the document in Google Docs that you want to remove the header or footer from. Let's assume we are removing the header for this example. The process is almost exactly the same for the footer.
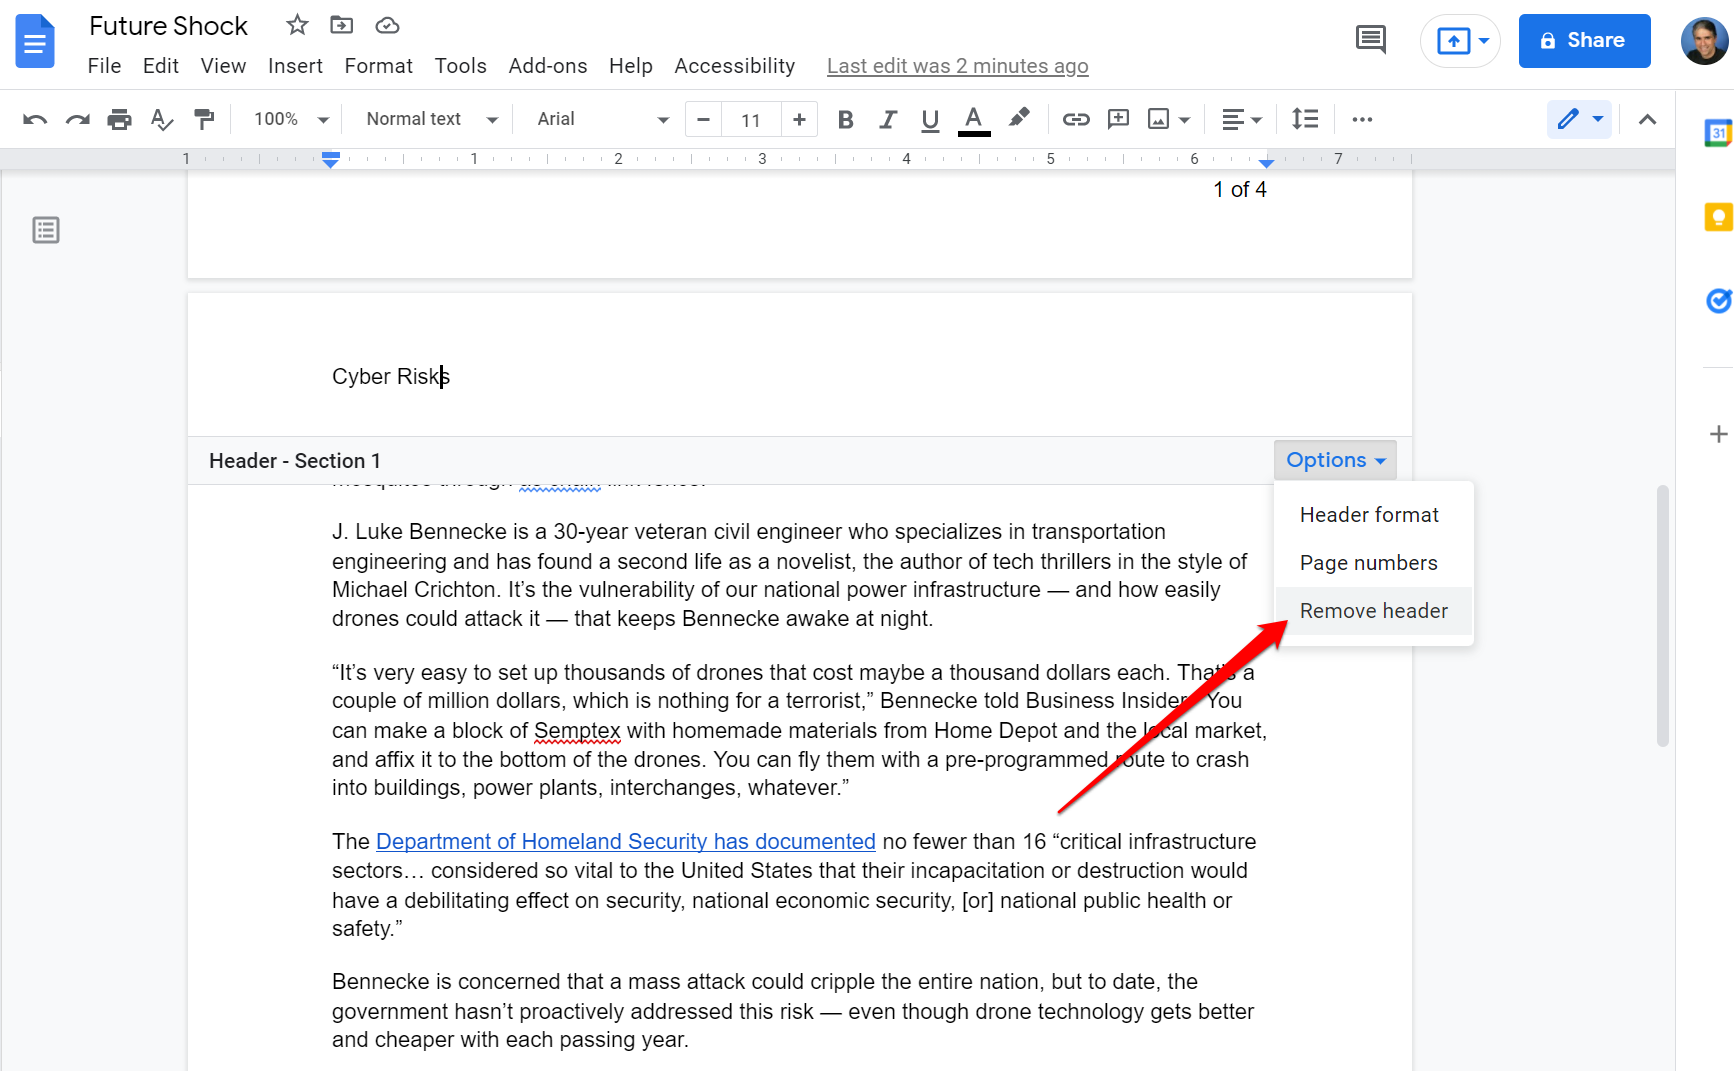
2. In your document, double-click on some text in the header. You should see the banner appear between the header and the main body of the document.
3. Click Options in the banner.
4. Click Remove header.
Dave Johnson
You can't remove the header or footer from a document in the mobile app for iPhone or Android, but you can fake it. Just delete all the text from the header or footer. You can reduce the top and bottom margin of the document to reduce the size of the header and footer sections (which are still there) as well.

