
Guido Mieth/Getty Images
- You can add a signature to a Microsoft Word document in several ways, depending on the computer you're using.
- You can upload a physical signature using a scanner or a cell phone, add additional text like your job title, and then save it to be reused later.
- Visit Insider's Tech Reference library for more stories
Inserting your signature into a Microsoft Word document is a way to put your own stamp on it and make it look official and professional. It's also much easier than signing documents individually if you need to send them out en masse.
You can also insert signature lines into your documents so they can be signed once they're printed out.
While you can add signatures to Word documents on both Microsoft and Mac computers, the process is slightly different depending on which one you're using. The methods listed below work for: Word for Microsoft 365, Word for Microsoft 365 for Mac, Word 2019, Word 2019 for Mac, Word 2016, Word 2013, and Word 2016 for Mac.
How to add a signature in Word on Windows computer
Insert a handwritten signature
1. Sign your name on a piece of paper the way you would any physical document. You may want to use a thicker writing instrument than usual.
2. Scan the page and save it as a JPG or PNG.
3. Open the image in your computer's File Explorer.
4. To crop the image, click the crop tool at the top of your Image Explorer toolbar.
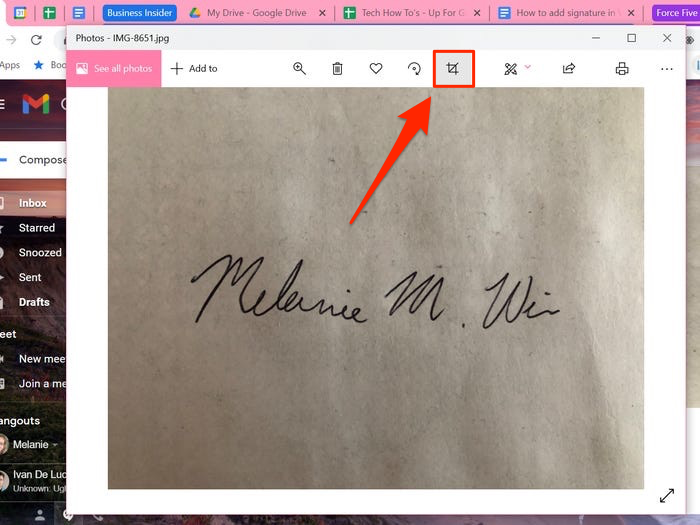
Melanie Weir/Insider
5. Once you've cropped the image to your liking, click Save a copy.
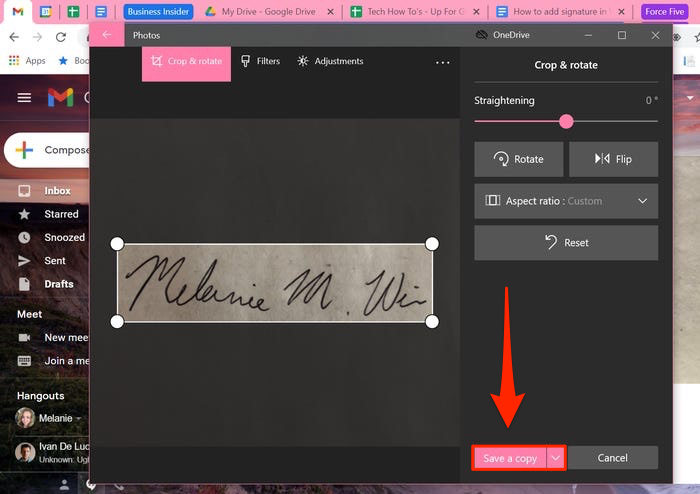
Melanie Weir/Insider
6. To add the signature to your document, go to the Insert tab in the Word toolbar, select Pictures, and choose a method to insert the file you just saved. Use the dots at any of the four corners of the image to resize it to your liking.
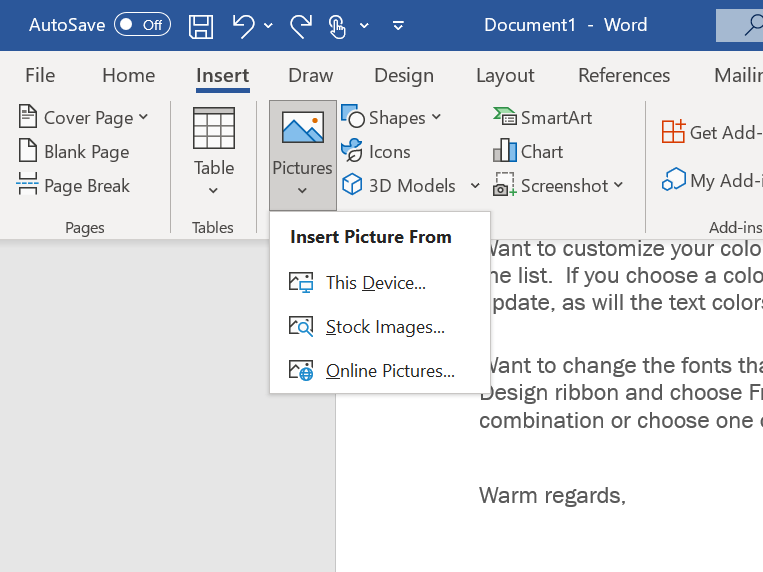
Melanie Weir/Insider
Insert text with a reusable signature
You can include information like your job title, email, phone number as part of your signature by saving that information as AutoText with the image.
1. Type the text that you want to appear every time you use this signature under the picture of your signature that you just inserted.
2. Use your cursor to highlight both the text and the image.
3. Go to the Insert tab in the toolbar and select Quick Parts. If you don't see that label, the icon will be located in the Text section of the tab, near the WordArt tool.
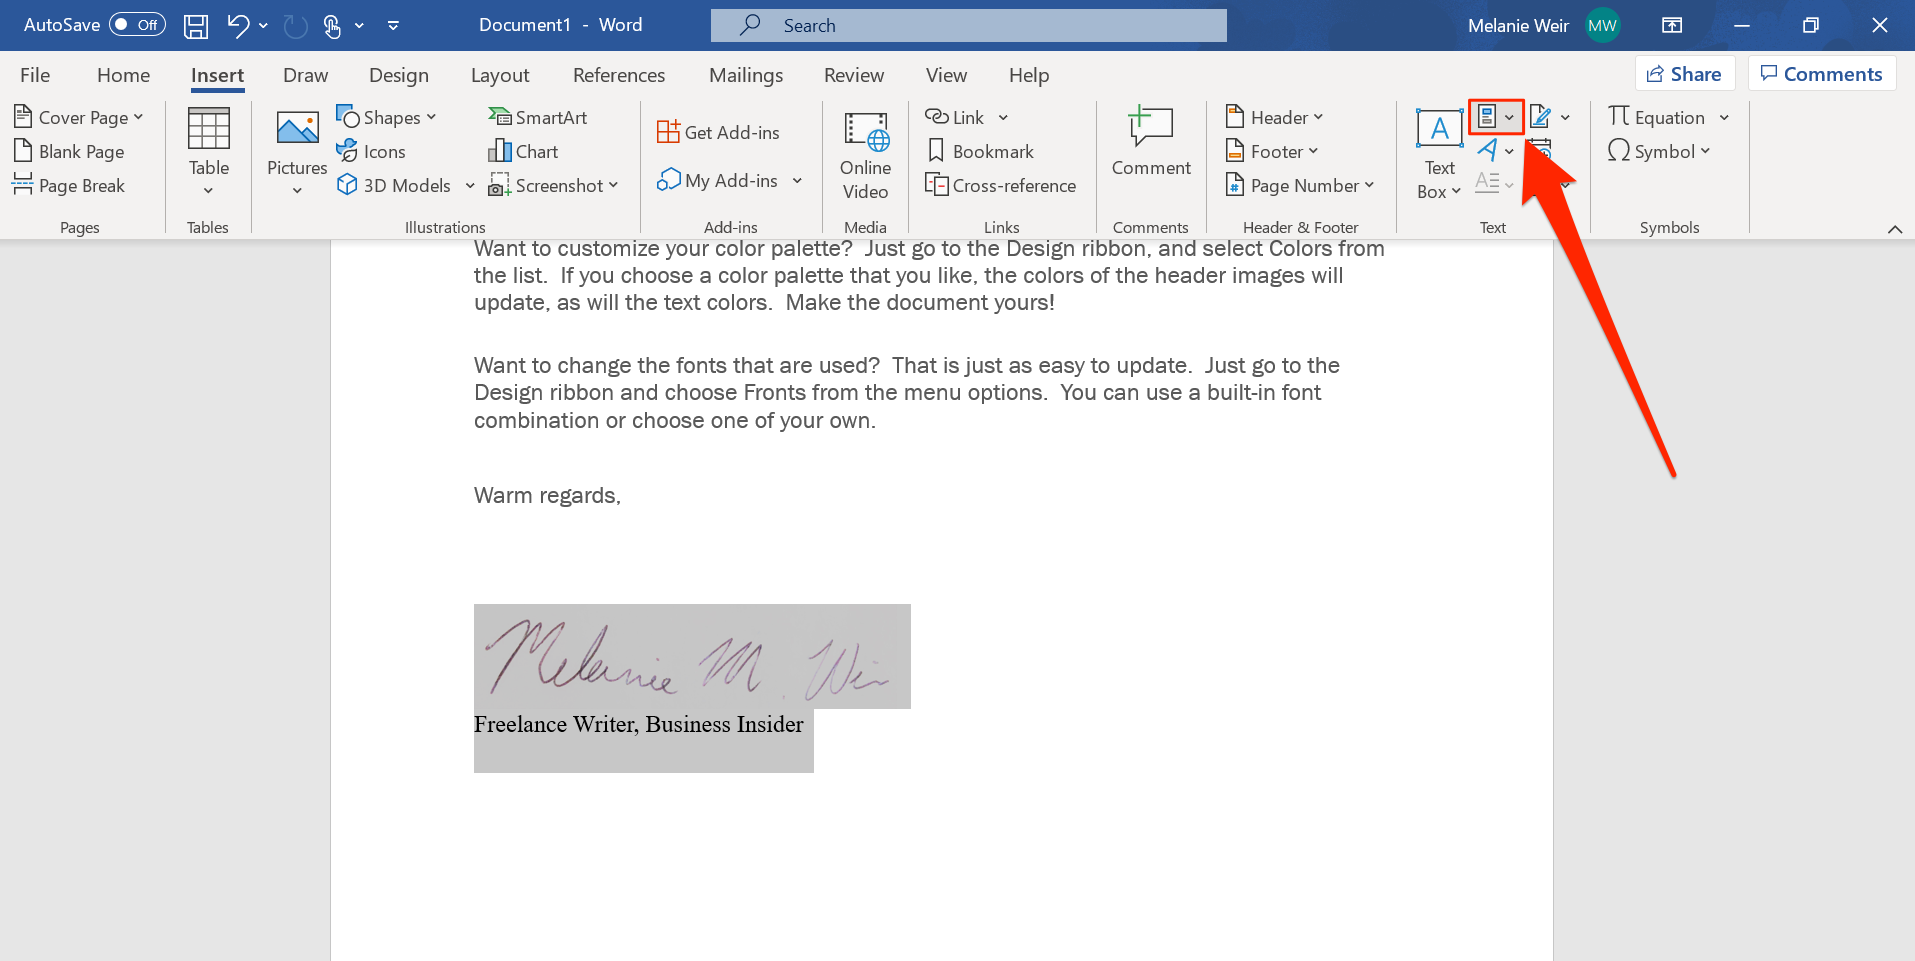
Melanie Weir/Insider
4. Click Save Selection to Quick Part Gallery. This will open a window labeled Create New Building Block.
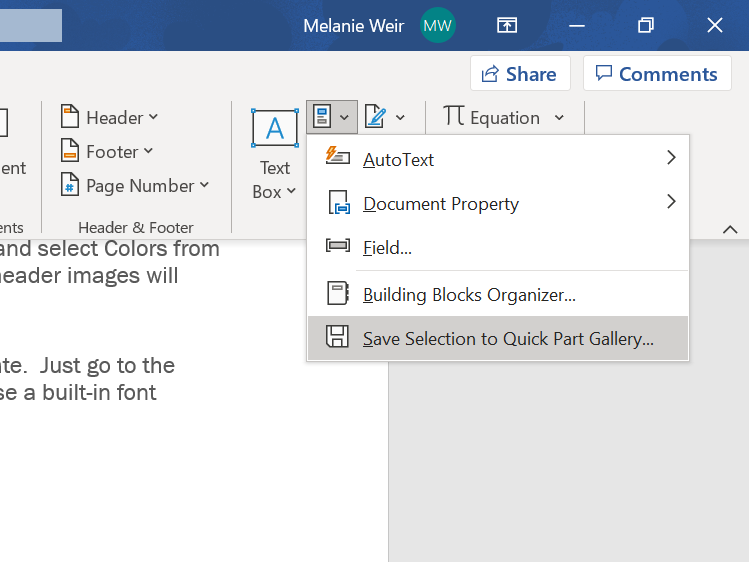
Melanie Weir/Insider
5. Where it says Name, type out a label for the signature block, so you can easily find it to use later.
6. In the Gallery box of the New Building Block window, choose AutoText, then click OK. This will save the signature and the text you selected along with it as a reusable signature.
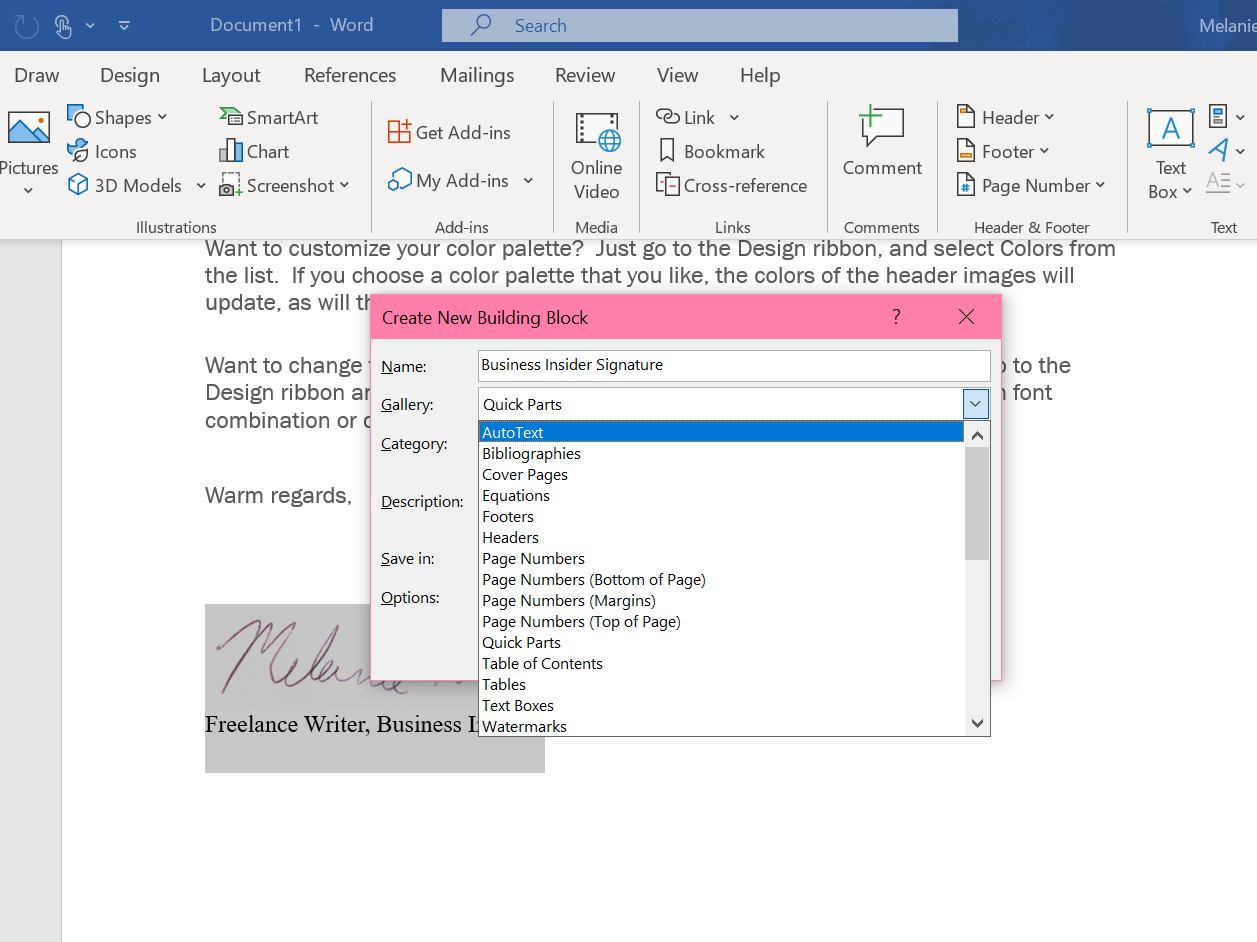
Melanie Weir/Insider
7. Whenever you want to use this signature, first place the cursor where you want it to go.
8. Go to Insert > Quick Parts > AutoText and select the name of the signature you just created, and it will appear.
How to insert a signature line
1. In the document, click the spot where you want the line to appear
2. Go to the Insert tab and click Signature Line. If you don't see this written out, it will be an icon in the Text section, near the WordArt tool.
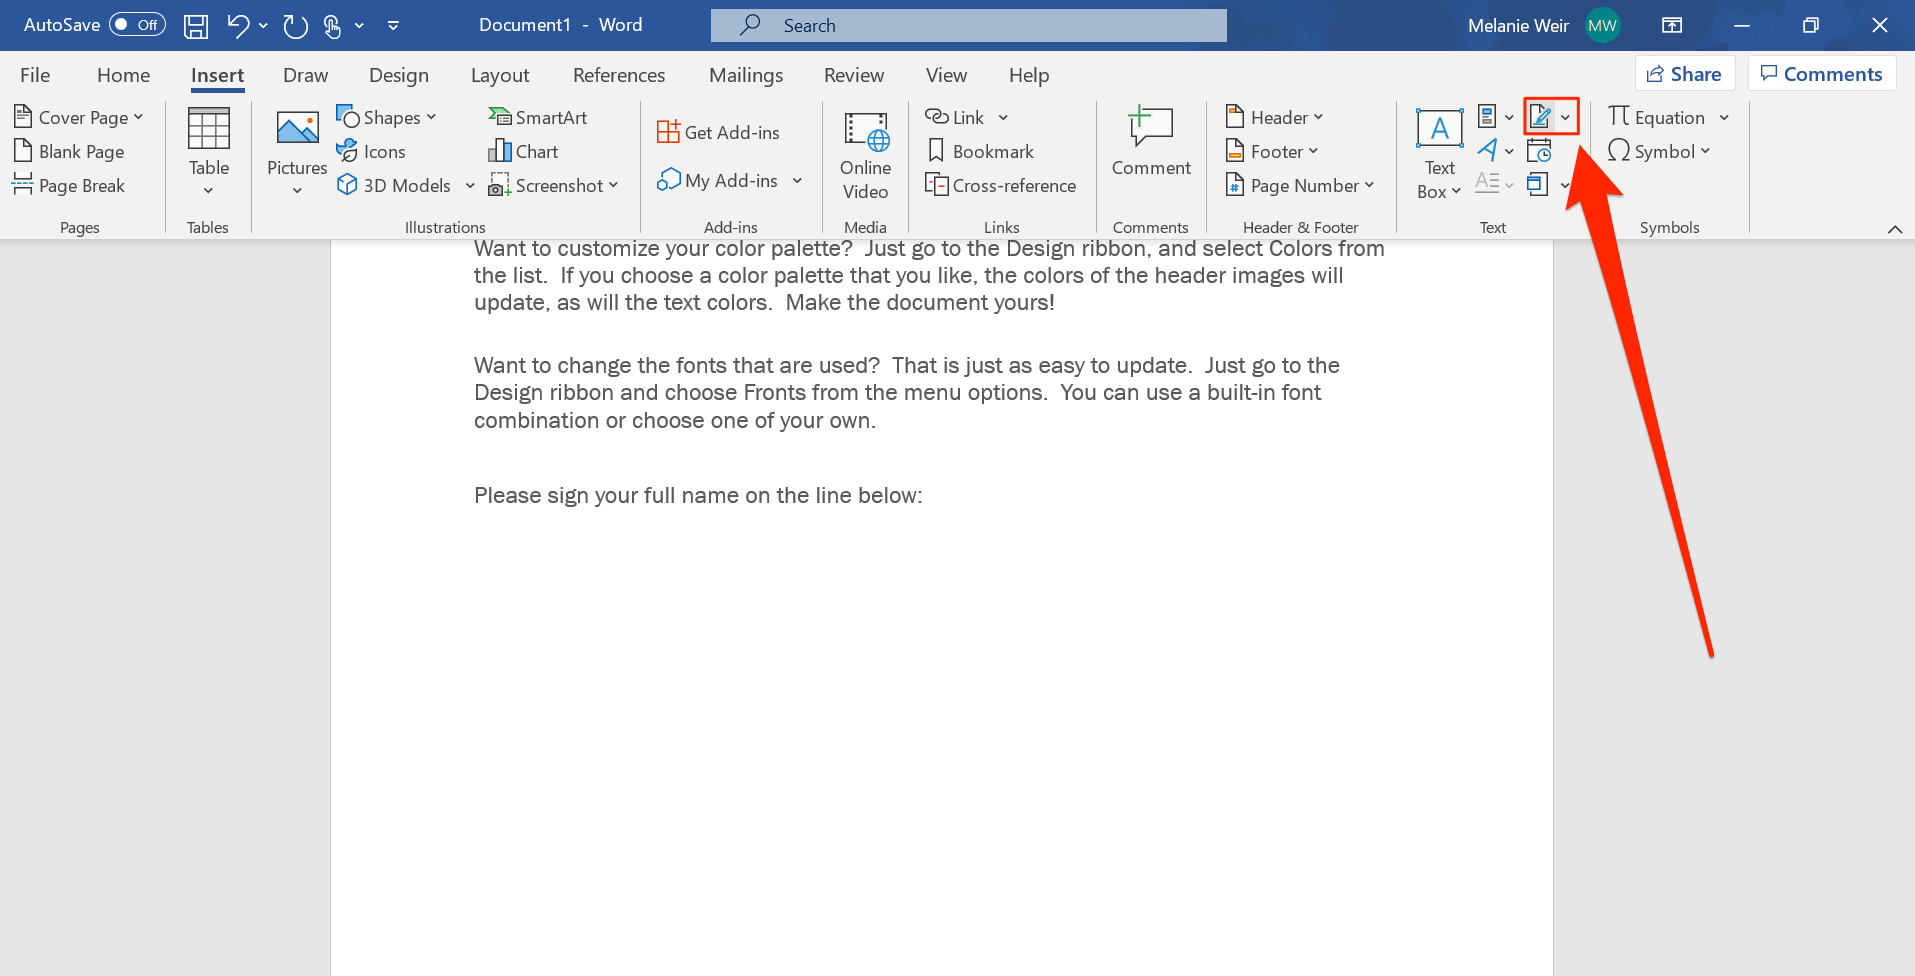
Melanie Weir/Insider
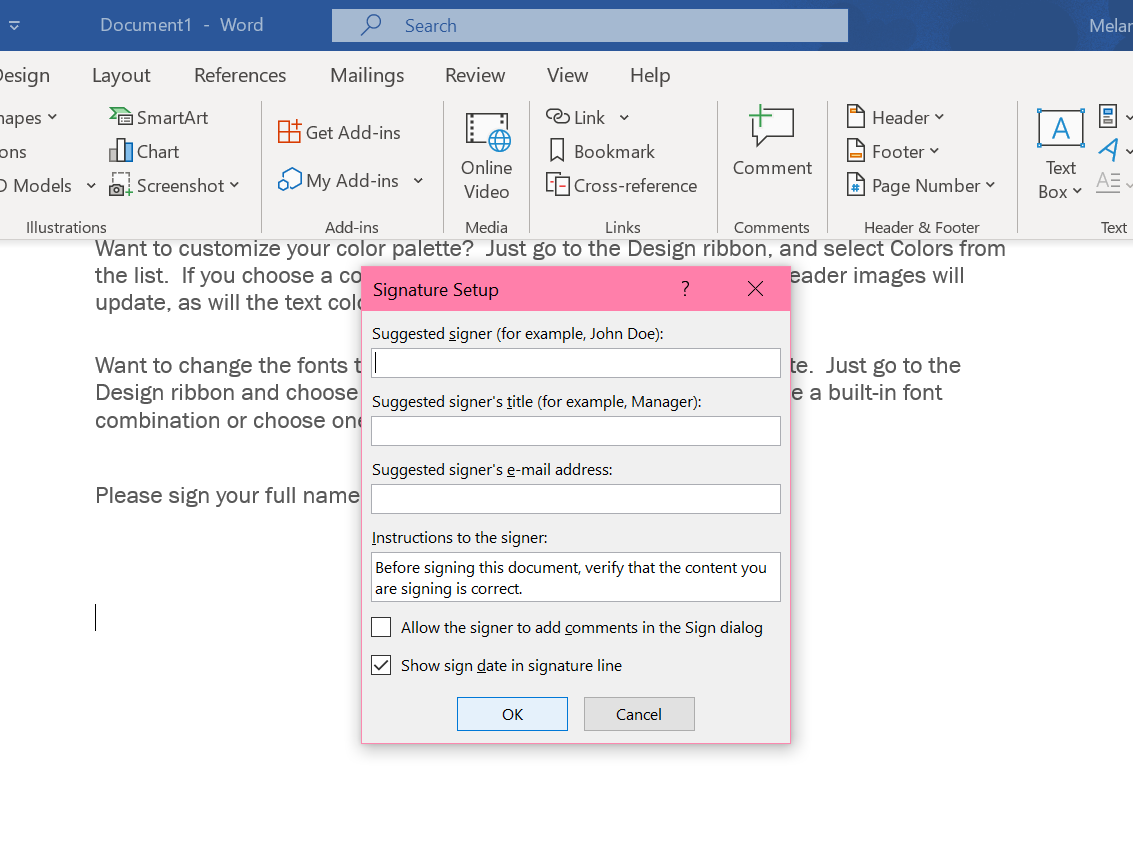
4. Select Microsoft Office Signature Line from the dropdown menu. This will bring up the Signature Setup box.
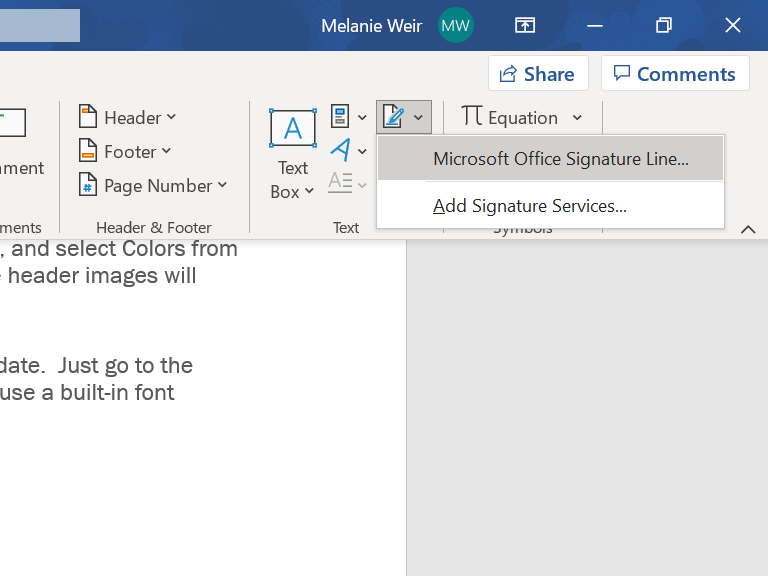
Melanie Weir/Insider
5. If it's appropriate, you can type a name in the Suggested signer box, or add a title in the Suggested signer's title box. This is useful if you would otherwise need the signer to both print and sign their name.
Melanie Weir/Insider
6. When you're finished, click OK, and the signature line will appear in the document.
How to add a signature in Word on a Mac computer
Insert a handwritten signature
1. Sign your name on a piece of paper the way you would any physical document.
2. Scan the page and save it as a JPG or PNG image.
3. In the Insert tab on the ribbon at the top of the screen, click Pictures.
4. Choose Picture from File from the dropdown menu that appears.
5. Find the picture you just uploaded, click it, then click Insert.
6. Once the picture appears in the document, click on it to bring up the Picture Format tab in the ribbon.
7. In that tab, click Crop, then crop the image to your liking.
8. Right-click the image and click Save as Picture to save it to Word as a file you can use again on other documents.
Insert text with a reusable signature
1. Type the text you want to see with your name in the line underneath the picture.
2. Using your cursor, highlight both the text and the image.
3. On the toolbar at the top of your screen, click Insert.
4. In the dropdown menu, click AutoText > New to open the Create New AutoText box.
5. Give a name to this signature block so you can find it again later, then click OK.
6. The next time you want to use this signature, first place your cursor in the spot where you want it.
7. Go to Insert > AutoText again, and choose AutoText when prompted.
8. Click the name you gave your signature block to insert it into your document.
